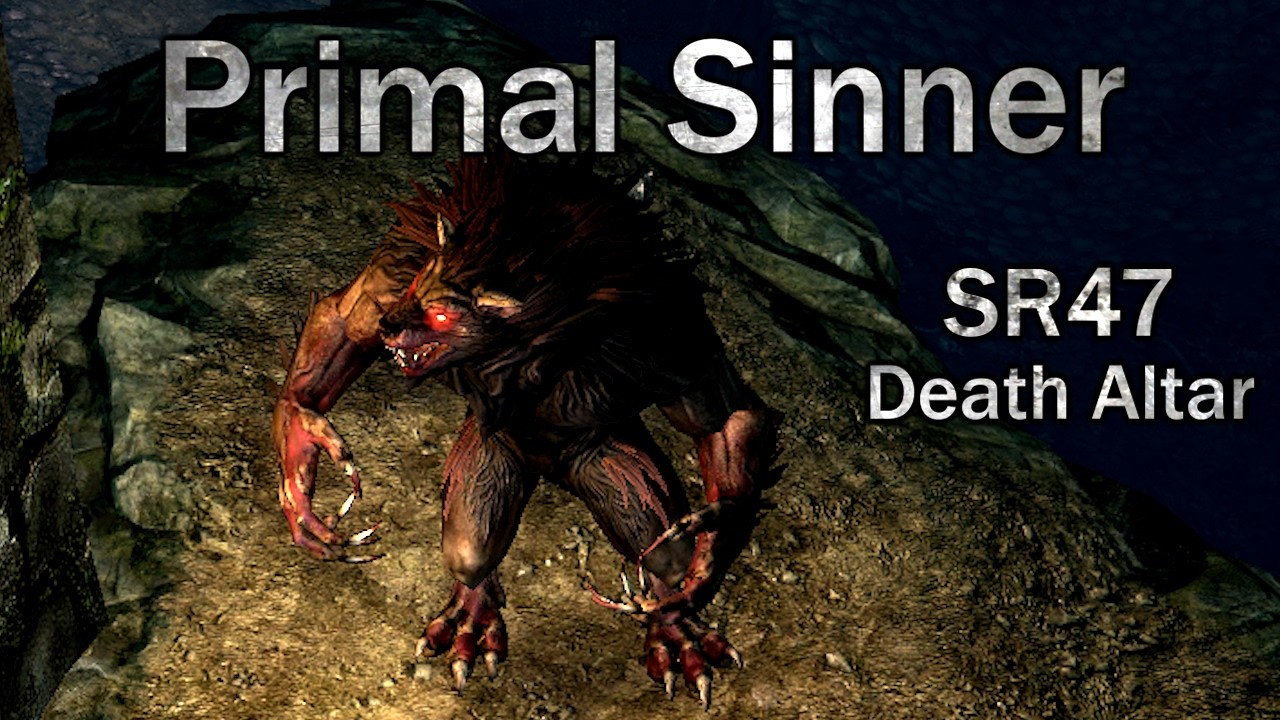
Primal Sinner
A Berserker + Shaman built around dual-wielding two Sincarvers.
This Alpha Werewolf hack ‘n’ slasher is among the most satisfying melee builds I’ve made.
Performance
All challenges beat on Ascendant + Death Altar. More about why “5EchoHeart” is the hardest altar here.
| Video | Challenge | Time | Difficulty |
|---|---|---|---|
| 00:40 | Tempest Totem | 6s | Asc + 5EchoHeart |
| 00:56 | Mad Queen | 7s | Asc + 5EchoHeart |
| 01:12 | Lokarr | 10s | Asc + 5EchoHeart |
| 01:32 | Beronath | 40s | Asc + 5EchoHeart |
| 02:31 | The Dread | 40s | Asc + 5EchoHeart |
| 03:26 | Ravager (Flesh) | 46s | Asc + 5EchoHeart |
| 04:15 | Mogdrogen (Peaks) | 1m57 | Asc + 5EchoHeart |
| 06:18 | Callagadra | 1m21 | Asc + 5EchoHeart |
| 07:52 | Crate | 19s | Asc + 5EchoHeart |
| 08:33 | Uber N’erfatal | 4m39 | Asc + 5EchoHeart |
| 13:44 | Crucible 180-200 | 6m45 | Glad + ExtraSpawn + Naked |
| 20:48 | SR Farm | 5m37 | SR36-37 (Asc) |
| 26:46 | SR Deep Fast | 12m34 | SR44-45 (Asc) |
| 39:35 | SR Deep Slow | 14m38 | SR46-47 (Asc) |
Every challenge on this list I could beat consistently multiple times in a row. Except for Crate and Uber Bobr who required a few attempts on 5EchoHeart. On 3EchoHeart or lower I could probably do them consistently too.

(Stats above are without pharma)
Build Premises: 2xSincarvers + Berserker + Shaman
Build Challenges: SSF, No Aether Clusters
Damage Types: Pierce (and Bleed). All Physical, Elemental and Vitality converted to Pierce.
Active Skills: 5: Feral Claws, Rip and Tear, Bonechilling Cry, Devouring Swarm, Wendigo Totem
Primalist, Level 100 (GD 1.3.0.8) - Grim Dawn Build Calculator - Built and tested for 1.3.0.8
Don’t forget to activate Rallying Cry in GT. Resting OA is 3300+. Combat OA is 4500+. Aether res is at 5% overcap in game by rerolling stats on Eternal Band and Raddoth’s Shoulderguards. Armor absorb is at 100% in game by rerolling stats on Nyarlathon’s Gaze.
Savegame: _Primal Sinner.zip (1.8 MB) (last saved 30 Sep 2026 in GD v1.3.0.8)
This savegame has full map explored on every difficulty, including all dungeons of the Crucible in every difficulty, and has all devotions leveled to max (not just the devotions used, all of them).
This is my first time posting a build. I’ve made highly min-maxed builds in the past, but I usually just keep them private. I’m a perfectionist, not an “altaholic”. So I spend months pushing a single build to the limit before I move on. This is the result.

This is an SSF build, which means I farmed everything myself without trading and I don’t transfer items between characters. Only exceptions are blueprints and components which are shared automatically. I had a small quantity of components left over from my previous character.
This build was made in isolation; I didn’t research other builds. This is how I have fun theory-crafting and limit-testing my own ideas. So, if someone has already made a build like this before, that’s pure coincidence, I guess.
Build Details
Built from scratch to strike a good balance between offense and defense, this bad boy deals a lot of critical damage in a short time to kill bosses in record times, while also being tanky enough to survive deep SR.
A Fast Killer
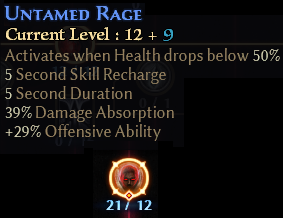
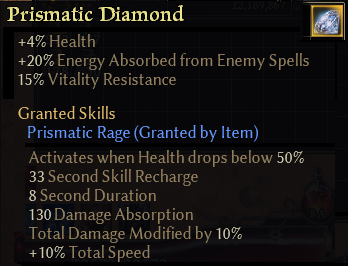
To kill bosses fast, this build relies on Sanginis to bring the health down to 50%. At that point, Untamed Rage and Prismatic Rage both trigger at the same time, giving you a massive boost in damage, attack speed, and crit chance.
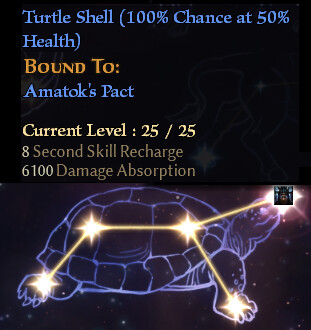
Tortoise also triggers at the same time for a defensive safety margin. And the crits happen so often that Amatok’s Grasp will trigger and bring you to a max attack speed of 279%. Then, Rip and Tear will trigger the Ulzaad constelation for and even bigger damage burst.
For about 10 seconds you are dealing a tremendous amount of damage while the high Damage Absorb from Untamed Rage keeps you safe. Make the most of it, and kill them fast!
A Tank?
Against harder bosses and deep SR, you need to remove Amplicorum and Sanginis from your potions and go for more defense, otherwise you will get 1-shot by many attacks, due to the lack of passive absorb. Untamed Rage will still trigger mid-fight due to the hard-hitting bosses. Thanks to Form of the Beast, it can last up to 18 seconds before it goes on cooldown for 5 seconds.
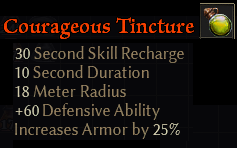
When Untamed Rage does go on cooldown, you will be very weak. So, I recommend you pop a Courageous Tincture to cover your defenses during that time. After the tincture runs out, Untamed Rage is ready for 18 more seconds. If BOTH Untamed Rage and the tincture are on cooldown… uhhh… run!
Pharma
| Health Pot | Mana Pot | Pharma | |
|---|---|---|---|
| Farm | Vial + Amplicorum + Ventorus | Vial + Revurrum + Phillom | |
| Kill | Vial + Terrobullum + Sanginis | Vial + Revurrum + Amplicorum | Elixir of the Dranghoul, Heartseeker Oil, Cursed Tincture |
| Survive | Tincture + Potentis + Expulsimum | Vial + Revurrum + Terrobullum | Elixir of the Dranghoul, Ugdensalve, Courageous Tincture |
Crits
This build relies on frequent critical strikes to trigger devotions and other effects. That’s why the base OA is so high; to crit even without Untamed Rage.
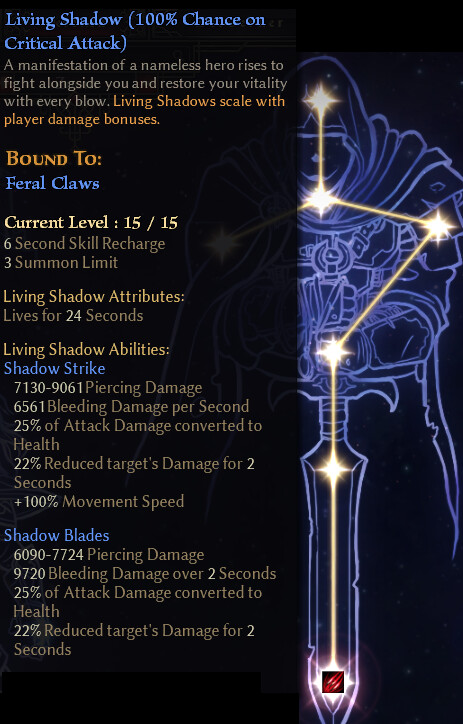
The 2 main reasons:
- Living Shadow devotion is your only reliable source of enemy damage reduction. If you don’t crit, you don’t reduce their damage, and you die.
- Assasin’s Mark devotion gives you a ton of enemy resistance reduction. Without it, your damage is pitiful.
That’s why the build focuses on a very high OA but not super high critical damage.
Blacksmith Bonuses
I crafted all of the craftable items in either Angrim or Duncan to go for the 2-4% Physique bonus. With a bunch of those stacked together, dumping all the extra Attribute points in Physique is really worth it to boost health and increase peak survivability. Boosting DA is OK too but diminishing returns hit hard since DA is already crazy high. You will basically never get crit, not even on the Death Altar (only exception are the Crate boxes but those are just ridiculous anyway).
Crafting the ring, the boots, and the gloves with the right BS bonus should be easy. The hard part is the amulet. Since there is currently no way to reroll Conduit affixes, you have to craft the amulet perfect, right out of the blacksmith. That means getting the 1 prefix out of 11, the 1 suffix out of 5, and the 1 BS bonus out of 3. That would be 1 good amulet out of 165 on average… but it’s much worse than! I’ve recently discovered that the +2-4% Physique BS bonus does not have 1 chance in 3 to roll, but rather 1 chance in 7. So you’ll craft, on average 1 good amulet out of 385. Be ready to go farm a LOT of Ugdenblooms…
Relics don’t have blacksmith bonuses so you can craft Amatok’s Grip anywhere. But be ready to craft a lot of them too, you will need either the Rallying Cry + Bonechilling Cry completion bonus, or the Werewolf + Rallying Cry one.
Finally, for the best possible ever rolls for the pants, the armor, and the weapons, you actually need to obtain them from the “Blacksmith Casino” of Rullia Fald (or Bella Fald for the pants). That way you have a chance of getting an extra +12 OA blacksmith bonus which you will keep even if you reroll the stats on the items. So those versions of these items are just better than random drops. It is, however, EXTREMELY expensive and time consuming to do. I personally could only get the +12 OA on the pants. I gave up on the armor and weapons and just went for random drops with no BS bonus. But hey, if you have the materials at least try it. Maybe you’ll get luckier than me. More OA is always good.
Totems
I tried incorporating Storm Totems into the build, since all Elemental is being converted to Pierce. It didn’t go well. In theory, even with only 1 skill point on them, with 3 Totems you should be doing more damage over a long fight. But in practice, in all the tests I’ve done, I actually dealt less damage. Not only did I lose crit damage from removing the 1 point from Voracity, but also I need to summon a Totem every 4 seconds, which has a cast animation, and constantly interrupts your attacks. Moreover, Storm Totems do not provide any sustain or survivability since they do not life steal, unlike the Living Shadows. Plus, you pay the “piano price” of having to spam a skill every 4 seconds, on top of everything else you need to do to pilot this character. It’s a piloting nightmare. Do not pick Storm Totems.
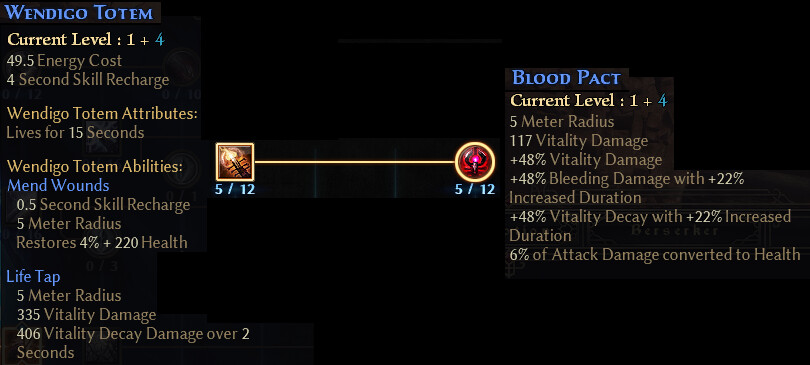
The Wendigo Totem, however, is a different story. With a passive heal and a buff that increases your damage and your lifesteal, the Wendigo Totem helps you kill things faster and survive difficult encounters even against enemies with lifesteal immunity.
If you want even less piano in the build, I recommend you just don’t use tinctures, but don’t remove the Wendigo Totem. Even at 1 skill point, it’s surprisingly good. You can cast it just once every 10 seconds, together with Bonechilling Cry.
Rings
The rings went through many variations. I started out with Bladetwister Signet and Widow’s Bite, which boost pierce damage, pierce RR, and attack speed. But my build had a problem: a very low 30% skill disrupt resist.
I knew I could add more with the Of the Gildam Arcanum, Of Dauntless Will, or Of Incantations suffixes. But I had no space for those. The jewelry suffixes were all taken by Of Untamed Fangs which is super important. Of Incantations could work for armor suffixes, but it was also much weaker than Of Kings; with it’s obvious boost to health and burst damage that fits this build’s playstyle perfectly.
That’s when I came across the Eternal Band and I realized I had no source of “% RR” and “flat RR”. So this ring gave me overall more RR and more attack speed than Bladetwister Signet, and many more useful resistances as well (I needed the elemental, aether, and disrupt resists). So Bladetwister Signet was the first to be replaced.
Much later in the build, I started feeling unsatisfied with Widow’s Bite. It gave me no offensive ability, no health, and the 4% lifesteal was overkill since I already had so much of that from other sources. But the worst problem is that it gave me no skills while I still needed to cap both Untamed Rage and Bonechilling Cry.
I had never tried making a “yellow ring” for the extra powerful Ascension bonuses, and when I found the “+3 to Bonechilling Cry and -100 DA Shred”, it felt like a godsend! So I tried in Grim Tools a Bloodletter’s Imperial Signet of Untamed Fangs and by comparing stats alone I immediately knew: the Widow’s Bite had to go. I also briefly considered a Covenant of Siff ring, but in the end, the Bonechilling Cry ascension bonus won.
So I tried farming and crafting an Imperial Signet in-game and… I had a little trouble. It turns out that an Imperial Signet with level 92 double-rare affixes is a GDStash-only item. It’s impossible to create in-game because of the ring’s low base level 67. It’s a shame, I really wanted that +39% to All Damage, but in the end I swapped for the next best ring: the Preserver Ring which only gives HP regen but hey, at least the affixes can get rerolled on max level.
Strengths and Weaknesses
Strengths
This build has the best sustain survivability in any melee char I’ve ever made.
Usually, high-lifesteal melee chars have 1 weakness: range. They need to move close to their targets to start attacking and actually start stealing life. But if ranged attackers strike them before they get close, it’s RIP with no sustain. But, thanks to the power of the amp’ed up Devouring Swarm, that is not a problem here. Before engaging distant targets you can throw a bunch of swarms from afar and start life-stealing before you’re even close. Also, you have a bunch of other passive forms of healing, which keep you alive even when fighting enemies with lifesteal-resist, such as Zantarin. Another weakness for most melee builds, but not this one!
Weaknesses
Sustain survivability might be great, but peak survivability is not. The most common cause of death will be getting 1-shot by a massive (usually physical) hit. 30k health is nice but phys res is mediocre, and you have no source of passive damage absorption. The only damage absorption available is with Untamed Rage, which requires reaching 49% health first. And some hits can bring you from 70% to 0%, bypassing all of your defenses.

Crowd control is also weak. Even though running with Rip and Tear through a crowd can be quite effective due to the reduced cooldown on crits, that one source of knockdown is actually the only CC you have. The Feral Claws auto attack does deal some AOE damage, but only in a small radius around the character. Outside of Devouring Swarm, your range abilities are rather limited. Initiating a fight on a group of enemies for the first time is very tricky. They are not yet debuffed, and that’s the most common source of deaths. Use your pots wisely, and take advantage of walls and obstacles if possible, especially in deep SR.
Build Variants
This build was balanced to be at a “middle of the road” between offense and defense. Enough defense to not get 1-hit by random bullshit, but not too much defense that Untamed Rage never triggers.
Want something more extreme instead? Take a look at theses build variants:
Variant 1: Ultra Violence!
If killing easy bosses in less than 5 seconds is your cup of tea, then you can swap some of the builds defensive stats for more offense:
- Dump all your extra attribute points in Cunning instead of Physique
- Craft all your items at Gaius instead of Angrim for more % Crit Damage
- Remove 9 skill points from Heart of the Wild and put them on either Voracity or Impulse for extra crit damage
- Swap the Sailor’s Guile, Tortoise, and Wraith constellations for others that give you more OA and crit damage, or base damage (Hawk, Raven, etc)
- Swap all the Enchanted Earth components for Bladed Plating. More OA!
- Swap the Physical resistance Ascended bonuses for… you guessed it. More OA!
Less defenses actually work in your favor, since now a lot of enemy hits will bring you below 50% HP and trigger Untamed Rage much more often. The demons will melt to your rage! But with the reduced health, armor, and phys res from these changes, you will find yourself getting 1-shot more often. Deep SR might become impossible. Good luck not getting 1-shot by Bobr…
Variant 2: I’m Too Young To Die!
If, like me, you don’t care about how fast you kill some easy bosses and diving deep into the shattered realm is what tickles your fancy, then you need more defense while sacrificing further offensive properties.
- Remove 6 points from Voracity, and soft-cap Recklessness to put more points in Oak Skin
- Swap Bloodborne entirely for Primal Bond to have passive damage absorb
- Swap the Ulzaad and the extra devotion points in Crossroads and Azrakaa for Lion and Jackal for 4% phys res
- Swap all the 50 OA Ascended bonuses for 9% more phys res (leave Bonechilling Cry on the green ring)
- Swap the relic for Aurora for 6% more phys res
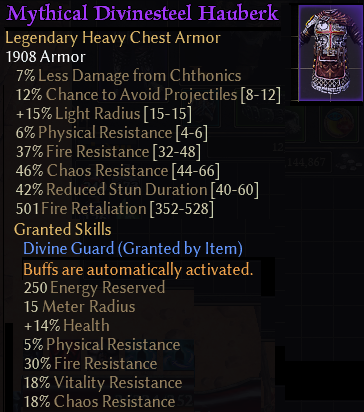
- Swap the body armor for Divinesteel Hauberk for 11% more phys res
Now with 51% phys res, this build will feel like a serious tank. With careful and slow piloting, I wonder if reaching SR50 is possible? However, is this even the same build anymore? Reducing the base OA means you might no longer be able to crit some targets without Untamed Rage… and Untamed Rage might no longer trigger now that you don’t take big damage hits. The loss of Bloodborne and Ulzaad means your sustain damage and burst damage will be lacking. I don’t feel this is the “way of the werewolf” anymore. But hey, you’ve got yourself a tank. Good luck beating Bobr on time…
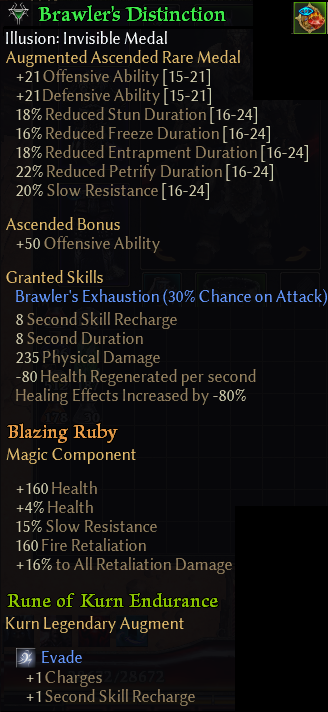
Another variant: Against Bobr I use the Kill Speed pharma, but I replace Revurrum with Primordis. I also spent the materials to reroll, augment, and ascend a Brawler’s Distinction just to try it. Yet, on all the tests I’ve done, it was never worth it. The Gryphon Eye is extremely powerful, and adds so much damage, OA, and extra skills, that swapping for a heal-canceling medal loses you more time than it gains because of the DPS loss. Not recommended. Unless if you go for the “I’m too Young To Die” build variant. If you’re killing Bobr very slowly and long into his enrage phase, then I wager the Brawler’s Distinction might be worthwhile. Feel free to give that a try.
Leveling Guide
I almost didn’t include this section because for me leveling is easy: just play the game. Complete quests. Explore the map. Enjoy the casual gameplay!
I’m not here to tell you what to do. But I can give you some loose recommendations:
Skill-progression: First Max the Werewolf skills and base skills that provide pierce/bleed damage and survivability. Don’t worry about crits and Devouring Swarm until later when you start getting your end-game conversions going.
Farm-worthy Leveling Items: (order of appearance in the campaign)
Relic: Bone Talisman from the Arkovian Foothills. Lie and keep the relic after finishing the elder quest from the Rovers. Possible upgrades: craft a Glacier relic. From there, follow the crafting-path towards Amatok’s Grip.
Gloves: Rhowari Grips from Old Arkovia. Buy them from the Rovers faction vendor. Possible upgrades: Bloodrite Gauntlets or Grasp of Unchained Might, if they drop
Medal: Brawler’s Distinction from the Four Hills. Possible upgrades: Insignia of Justice or Mark of Dark Dreams, if they drop.
Pants: Solael-Sect Legguards from The Hidden Path in the Broken Hills. Possible upgrades: Hulking Legguards if they drop, or craft a pair of Stormguard Leggings.
Boots: Legion Greaves from Homestead. Buy them from the Legion faction vendor. Possible upgrades: Stonewrought Groundbreakers, if they drop
Belt: Manticore Waistguard from the Jagged Waste. Gets you early pierce conversion during the leveling phase. Keep it until the end-game gear when you have all conversions from the weapons and amulet, then swap for a Calcified Sash for the petrify res.
Shoulders: Murderer’s Epaulets from the Arkovian Docks. Alternatives: Wraith Knight’s Pauldrons or Bloodlust Shoulderguards, if they drop. Otherwise just keep the Murderer’s Epaulets until you can farm Raddoth.
Weapons: Dermapteran Slicers from the Royal Hive. Possible upgrades: Fang of Morkh, or Fang of Fenris, if they drop.
Amulet: Sylvarria’s Root from The Undergrouth. Possible upgrades: Kaisan’s Eldritch Eye, or Weeping Ruby, if they drop.
Rings: Covenant of Siff from the Icehowl Cavern. Possible upgrades: Bladetwister Signet or Widow’s Bite, if they drop.
Armor: Bloodbound Armor from any bloodbound camp past Kurnhold. Possible upgrades: Bloodreaper’s Coat or Divinesteel Hauberk, if they drop.
Helm: Ironeye Helm from Ironeye’s Hideout. But this late in the campaign, you might be able to farm Nyarlathon’s Gaze directly.
Final Notes
About Benchmarking Builds
Posting just the fastest time to kill a boss, or just the one SR run that survives the farthest, is a garbage way to benchmark a build. I wanted to prove consistency by going for 3-in-a-row survivals as a form of benchmark, but it got either boring or frustrating fast.
Boring, because beating easy bosses 3 times in a row proves nothing. I’m just facetanking Lokarr anyway with 0 chance of dying, what’s the point? Sure I could beat him in 9 sec instead of 10 sec when I get luckier, but who cares? It’s always just a facetank simulator. It’s sad that there’s nothing on the altar that can make Lokarr interesting to fight. Lokarr and 99% of the bosses in the game. The end-game basically consists of 6 encounters that require piloting. Sad.
Frustrating, because half of the only 6 actually-challenging end-game bosses in the game are littered with RNG. Mutators, random item equips, and actual game glitches add a RIDICULOUS amount of unpredictability. It was NOT fun. I gave up on that form of challenge. Why incorporate consistency on my testing methods, if the game itself lacks consistency? It’s a fools errand. Grim Dawn has no consistent way to actually benchmark end-game builds.
Mods / Tools Used
This character was played using autohotkey to spam the HP+MP pots and Rallying Cry every second or so. Everything else was controlled by me without automation. I’m done doing repetitive crap by hand. Previously, my fingers were literally hurting to the fucking piano that this game has become now that potions are also buffs. It was already bad before, if you picked 2 classes with 2 short-repeat buffs, but the DLC made it much worse.
I don’t see myself playing Grim Dawn without autohotkey anymore. I know I could use the GD Auto Caster mod, but I’d rather run DPYes to analyze deaths, and I don’t think those 2 mods are compatible. I know it’s “cheating” but my IRL health comes first.
In some play sessions, I used DPYes to check damage taken and analyze deaths. It allowed me to understand if a death was due to getting crit, or being debuffed. Maybe I need more lightning max res, maybe I need more phys res, maybe just plain health, etc. I also had a few convenience teleports to test my build against certain annoying-to-get-to bosses (hi Crate).
GDStash was used to rename the character to “Primal Sinner”. When I started this build I had no idea what name to give it; so it was called “Coincident” for a while. GDStash was used for nothing else, and every item was obtained legitimately by farming and crafting in-game.
Hardcore
Is this build hardcore viable? Given its tankiness, maybe. But never forget: it is a “fake” tankiness. If you rely on Untamed Rage to survive, you’re gonna have a bad time… I personally don’t play much hardcore, because I like to flirt with death at every moment. Every death is an opportunity to learn and improve either my build, or my piloting skills. Hardcore means playing overly defensively, which makes it impossible to push my build and my skills to the limit.
But you guys feel free to try this on hardcore. When you reach the end-game, I recommend neither pushing very hard on the death altar, nor pushing very deep into the SR. Consider incorporating some extra phys res and the other defensive ideas from the Build Variants section. Good luck.

 And that wendigo totem might rescue you in clutch moments as well

 . However… there’s some good news:
