Build Intro:
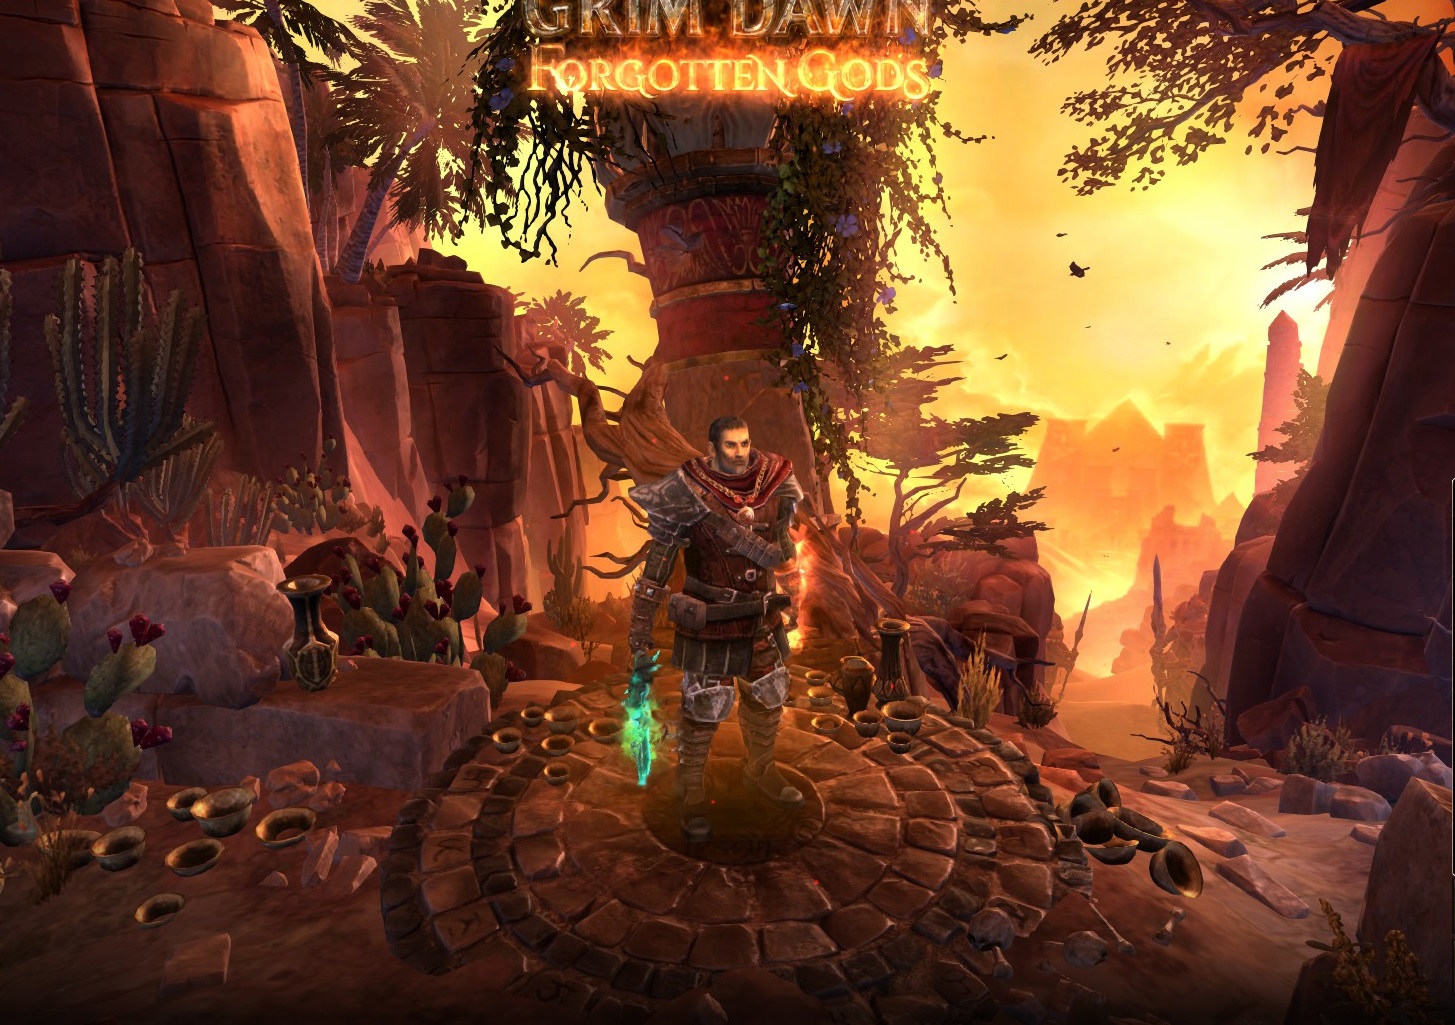
Here is my attempt at a build centered around Devastation, but with more of a caster feel to it.
Source: https://www.deviantart.com/yamaorce/art/Dragon-Age-Hawke-fv-213487067
Pros & Cons
PROS
+Incredible crowd clearing
+Good overall damage output
+Has good HP sustain vs common mobs due to high cast speed & ADTCH
+No energy issues
CONS
-Is very fragile due to low defensive stats
-Highly reliant on piloting & positioning for damage & survivability
Leveling
From level 1 to 94, I’ve opted to utilize a 2 handed ranged weapon, together with Righteous Fervor & Guardian of Empyrion for fast clearing. Not only is this surprisingly efficient for normal & elite, but it’ll assist in getting accustomed to the ranged playstyle of the final build.
ATTRIBUTES
Since Templars have lackluster Cunning gain, we will need 20 points in cunning to equip the gear I will list down later; Put the rest into Physique. Do respec the attribute points for distribution later once you hit level 94.
SKILLS
-
The big three skills you want to rush for are Righteous Fervor 16/16 (without its modifiers), Summon Guardian of Empyrion 16/16 (with its modifier, Celestial Presence 12/12) & Ascension 9/12 (without its modifier). Ascension is crucial, because the Templar lacks any sort of direct healing, so 100 damage absorption comes in very handy when things get hectic.
-
Once everything in step 1 has been sorted out, focus on maxing out the Arcanist Mastery Bar. We do this purely for the stat gains, otherwise our weapon choice will not be optimal. Preferably, raise Arcanist Mastery by two points per level up while spending one point per level up to acquire Mirror of Ereotes 1/12, Arcane Will 1/10 and Maiven’s Sphere of Protection 4/12.
-
Here is where things get a bit open ended. You my now allocate the rest of your skill points as you please. Here are my suggestions, grouped from most important to least important:
Consecration and Overload (Both of these offer Elemental & Aether resistances respectively, so you can place points to increase those stats)
Presence of Virtue, Inner Focus & Overload (If you don’t need the extra resistances above, then you can skip to this selection instead. Max all three, because you want to milk every single digit of Offensive Ability to improve your overall damage)
Haven (Purely for the health gains, but you can do this quite late since you get quite a bit of total HP by increasing attributes and maxing out both masteries early on)
Divine Mandate & Conversion (Divine Mandate offers more damage, and conversion is good for improving your stun resistance. These can be invested in once you hit level 70+)
Here’s an example of my build at level 90-ish: Templar, Level 100 (GD 1.1.9.7) - Grim Dawn Build Calculator
GEAR
Faction Gear
Devil’s Musket
Bysmiel Flameshroud Pauldrons
Outcast’s Burning Mantle
Harvest Grips
Rhowari Grips
Monster Infrequent weapon
Ugdenbog Flamethrower
For the other gear, feel free to equip any items you find along the way (Rare quality or better). Emphasize on Resistances, with +Fire damage modifiers as a secondary focus. +Skill items, epics or legendaries are nice, but only if they don’t compromise your resistances while leveling. I’ve stuck with mostly rares and faction gear while leveling in Normal & Elite.
Build
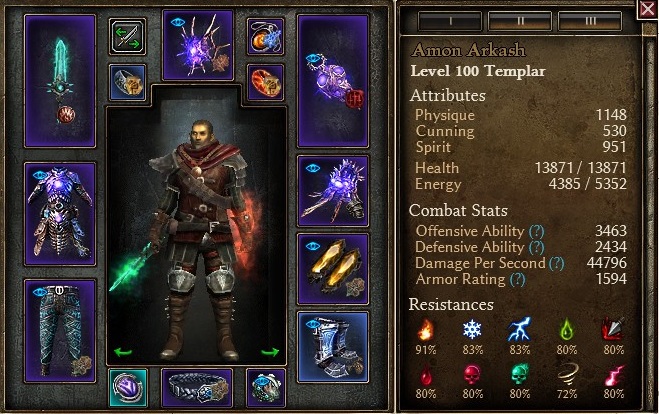
Note that I forgot to respec my attribute points, so please click the link right below for the finalized version
Templar, Level 100 (GD 1.1.9.7) - Grim Dawn Build Calculator : Final Build
Attribute points- PHYSIQUE 103 / CUNNING 4 / SPIRIT 0
This build has an easy to understand playstyle. Basically, LMB and RMB are for mobs, while Devastation and Apocalypse are for bosses. You should be able to clear most mobs with just your mouse, but don’t hesitate to drop a devastation if there are a few dozen enemies engaging on you at once. Positioning and maneuvering around is still the most important skill to learn. Since you have no shortage of damage, it is a 100% viable strategy to just loop dangerous foes (especially Father Kymon) back and forth as you keep activating Devastation and Apocalypse off cooldown. Basically, just worry about your own piloting, and everything will die eventually.
Now, this build is possibly the most fragile I’ve made- Possibly even more paper thin than a lot of glass canons. Most of the time, you’ll be working with only slightly more than 2500 DA & 4% physical resist which is honestly, not great at all. I’ve tried to swap out items to fix that but I haven’t been able to do so without breaking the build. However, you can Probably achieve up to 3000 DA and up to 34% physical resist with the help of Devotions, Arcane Will & Resilience. Granted, all of these are only temporary buffs that last for several seconds, but your health does dip frequently below the activation threshold for them to see frequent activation. And since I don’t have a better choice when it comes down to improving defenses, even a few seconds of enhanced survivability feels valuable in comparison. Such is the price we pay for great power I suppose. In addition to that, I’ve used the following potions quite liberally when needed- Ugdenjuice, Ugdensalve & Royal Jelly Balm / Essence / Ointment / Salve. Using all 6 potions together should give you enough Health Regeneration to survive messy situations while you kite things to death.
Devotion
1.Red Crossroads
2.Fiend (Bind to Pyran’s Pyre)
3.Ghoul (Bind to Resilience)
4.Scholar’s Light
5.Solael’s Witchblade (Bind to Devastation)
6.Spider
7.Magi (Bind to Apocalypse)
8.Viper
9.Ulzuin’s Torch (5 nodes all the way to Meteor Shower, Bind to Stormfire)
10.Purple Crossroads
11.Toad
12.Refund Red Crossroads
13.Refund Scholar’s Light
14.Rhowan’s Crown (3 nodes only, Bind to Summon Guardian of Empyrion)
15.Blue Crossroads
16.Behemoth (4 nodes only,Bind to Iskandra’s Elemental Exchange)
17.Put one more node into Ulzuin’s Torch
16.Oklaine’s Lantern
Final Words :

Overall, I found this to be a “Hard mode” build. My intention was to build a more damaging version of this build since I wanted faster kill speeds, however I had grossly underestimated just how much defense a character needs in order to use AoE skills like devastation optimally. My version is by all means not a bad build - it’s just high risk, high rewards since you need to be as evasive as possible all the while trying to keep things within the damage radius. It is just far easier to be tanky/durable and stay under Devastation while active, so I’d still say that the Battlemage version using a Spellscourge set is the more optimal choice for most people, especially newer players.
Also, my inspiration was partly because I had the cracked idea to pair Eye of Reckoning with Devastation but that character died (Unsurprising, since there wasn’t going to be any miracles with puny defenses). However, I’d like it if someone could make the idea work because I clearly haven’t. Here’s the build if anyone wants to make a softcore variant, because I would certainly not recommend it for Hardcore unless you think you can handle it.