Preface
It’s interesting to see how the meta of GD has evolved over the years. Many top builders have moved away from the classic crucible tanks to the DPS-focused crucible flash-farmers.
This decrease in cleartime, however, comes at a price - i.e. player skill.
Admittedly, I am not the best crucible player around but I shall attempt to share what:
- Patterns I’ve noticed in the crucible.
- Tips and tricks better players have given me (thanks be to the veterans)
FOR ALL PET PLAYERS, PLEASE SCROLL TO THE BOTTOM TO READ THE SECTION ON PET BUILDS KINDLY WRITTEN BY SIGATREV. It might be of value to quickly skim the rest of the guide as well, as it does cover some very generic topics applicable to any build.
Terminology used in this guide
Wave: Anything which results in a new batch of enemies being spawned
Round: 10 waves
Naked: Unbuffed/Unbannered
Choosing a playstyle
There are many crucible viable playstyles, and if the questions asked by members of the community are anything to go by, most players want to find ‘the best playstyle for crucible.’
Newsflash - there is NO best playstyle.
Pick something YOU are comfortable with. Pick something YOU can pilot well.
For example, I’m a HUGE fan of CDR builds. In addition, the time I’ve spent playing DOTA has made me rather good at timing skills. Therefore, I LOVE builds which rely on chaining skills like Mirror/MoT/BB.
Quick tangent - Upon casting one of these skills, it’s useful to count the number seconds which pass so that you know exactly when to GTFO.
I have also taken the liberty to include the personal strategies adopted by crucible players on how they go about dealing with specific waves.
This again shows that there is no universal best approach for handling the crucible. Pick what works for you, and stick with it.
Getting comfortable with your toon
Entering the arena for the first time with a new toon is an experience I, to this day, still describe as one fraught with uncertainty.
The natural reaction to this is to play it cautiously.
I, however, would discourage this (unless you’re doing glad 170 Hardcore style of course).
On the contrary, go crazy aggressive. Take unnecessary risks. Learn the limits of your toon in a controlled setting when you’ve invested little to no tributes on buffs/banners.
Failure, after all, is the best teacher.
How to move
Sometimes, paying attention to the tiny little details is what’s needed to improve. This is such an example.
Movement isn’t as simple as holding down the LMB and moving the cursor to where you want to go. The problem with using this ‘lazy’ movement method, is that you will essentially slow yourself down because the cursor will inevitably pass over one of the hundreds of things trying to bum rush you. When this happens, your toon will change direction for a split second, or halt to begin its attack animation (depending on what you have bound to your LMB).
This is especially fatal when you are surrounded and desperately need to GTFO. A slight pause may result in all escape routes being blocked by the throngs swarming at you, or eating one of aleksander’s meteors.
What I do is click on an empty spot if I want to move to, and have my toon do its magic. During this travel time, my mouse is constantly moving to the next spot I plan to move to, or to the next enemy I want to attack.
This way, you are garaunteed to run past the enemy horde as smoothly as possible.
Another (admittedly better) way of going about this is to use the ‘Forced movement’ function - the default hotkey for which is ‘F.’ Brought to my attention by x1x1x1x2, ‘When you press forced movement, the mouse cursor doesn’t highlight anything. Enemies, objects, vendors. You don’t click anything but the ground.’
This means that even if a monster were to zip past the spot you want to go just as you clicked on it, you would still move towards said spot.
How to attack
[spoiler]This section is only relevant for: (i) Inquisitors because of seal; (ii) Ranged toons.
As mentioned above, enemies are constantly pinballing all over the map to get at you. Pressing the LMB down to attack an enemy ensures that you attack as quickly as possible, but may also result in unwanted movement should the target slip pass your cursor. This not only gimps your attack speed as you can’t attack and move simultaneously, but may also result in you literally running to your death.
The workaround this is to use the ‘stationary attack’ function (this can be found under ‘key bindings’). Pressing this down while attacking will prevent the above from happening.
In addition, this also allows your to bypass the need to actually move your cursor onto the enemy. As long as your cursor is sandwiched directly between your target and yourself, you will still land your attacks. This is especially useful in run-&-gun situations. For example:
- I have Kuba behind me and I’m kiting him because I’m low.
- He stops to attack and misses because I’m moving.
- I have increased the distance between me and him by 10m.
- I need only move my cursor immediately behind my toon to pop off 1 or 2 shots before moving again.
In other words, I don’t need to move my cursor the full 10m to actually attack him.
Another nice benefit is that you can also land attacks at where your target is going to be. For example, slow projectile based attacks like BWC, or grenado often miss because enemies have the annoying tendency to haul ass at you. With the stationary attack function, you can now cast these skills at where you predict they will be.
[/spoiler]
Save that vital essence
Players often pick up the vital essence on the floor before the start of each round.
DON’T. DO. THAT.
It can be saved as an emergency heal.
I tend to pull my fights closer to the location of the vital essence during more difficult waves just in case I need to heal my bitch-ass.
Mutators
[spoiler]Try to leave one thing alive at the end of the 1st wave of each round and take the time to look at the mutators you’re dealing with.
For example, the mutator which looks like the jolly roger (skull + crossbones) means you have -25% HP.
Needless to say, it’s handy to know what the RNG has thrown your way.
NOTE: Mutators in yellow affect players. Mutators in red affect monsters.
[/spoiler]
Difficult waves
Wave difficulties tend to spike in multiples of 5’s, with the first nem spawning at wave 90.
Break down of wave spawns. Things in red = potential trouble
- 147: Possible MQ spawn
- 154: Kuba + Gabal’thunn + Thalonis
- 157: Larria the hexxer + Stone basilisk + Janaxia the betrayer
- 159: Ekketzul + Sentinel + Mogara + Avris Marrow-something
- 161: Aleksander + Healers
- 162, 163: Possible MQ spawn
- 167: Sharzul + Alkamos + Lucius + 1 other of no real significance
- 169: Theodin + Those 2 oversized imps you have to kill in the main campaign to get to him + Anasteria + Fleshweaver Krieg
Preparing for difficult waves
[spoiler]Some enemies can respawn after their first death (e.g. Theodin Marcell, IIgorr the eternal, allosteria).
This is troublesome mainly because if you kill everything else before TRULY killing these turd nuggets, the next wave will start, leaving you with another pissed off monster to deal with.
For example, Theodin always spawns at 169. If you fail to kill him twice, you’ll have his final form to contend with on top of 4 nems.
In addition, take the time to position yourself before the wave ends. For example, if I want to start the wave at the bottom left corner in wave 164, I’ll make sure to end the fight at the bottom left corner in wave 163.
[/spoiler]
Dealing with difficult waves
[spoiler]As a rule of thumb, these are the things to kill first:
- HEALERS. Seriously. Fuck them. This is especially true in wave 161. They tend to spawn in the top right corner (this isn’t a garauntee though). So the moment you start the wave, head to that corner, and try and kill them before aleksander gets to you.
Note that they DO have mirror, so nullify it if you have either the arcanist class, or Ulo’s cleansing water.
-
Fast moving nems. If you can bring fast moving nems away from slow moving ones, you are effectively reducing the number of enemies you have to juggle.
-
Nems susceptible to your damage type. Pretty much self-explanatory. If you deal fire damage, and you have both Iron Maiden and kuba on your butt, you naturally go for kuba. The quicker you bring the beast down, the quicker you turn a 2v1 into a 1v1.
[/spoiler]
Placement of banners
[spoiler]1. Bottom left corner --> Creds to x1x1x1x2 for sharing with me fluff’s trick
Why? Because you’re always going to get a fast moving nem spawning in that corner during. With enough firepower, you can take out that nem in 6 seconds or so, thus leaving you 1 less thing to worry about.
To quote the man himself,
Kuba never spawns on the bottom left (ever since the nerf that doesn’t allow double Kuba spawns) on 160/170 so it’s not gonna be annoying killing whoever spawns in there cause no healing. Also, the one disadvantage of bottom right is that Zant can spawn there on 160 which isn’t so great. (The other AoM nemesis on 160 is on upper right.
In addition, the radius of this banner will be large enough for you to still be under the effects of its buff when you engage theodin. (He most commonly spawns in the top left corner on wave 169). It is important to kill his 2 forms before the wave ends for the reason mentioned above.
^Note: Veretragna has pointed out to me that it is possible for Theodin to spawn in the top right corner as well. However, this only occurs in the crucible of the grove.
-
Bottom right corner --> This is the one I tend to use
> The radius of the banner is large enough for you to engage fast moving nems spawning in the bottom left corner
> It is also large enough for you to deal with the healers which generally spawn in the top right corner during wave 161
[/spoiler]
Tips and tricks for dealing with nems[spoiler] -
Aleksander: If possible, fight him under a pillar or an overhang. It’ll prevent his meteors from hitting you.
-
Fabius: Fluff pointed out to me that fabius does NOT get a movement speed bonus when he uses his shadowstrike. Keep a ear out for the sound effect of his veil of shadow kicking in as this will tell you that he’s close. Run in a circle and he will miss his SS.
-
Iron maiden: Again, this tip is from fluff. She’ll only blitz you if you move too far from her (Fluff claims the blitzing distance is 10m). So keep cool, and don’t try to run from her excessively if you’re low.
-
Gravathul: Is a huge sack of shit. Thankfully, he’s been nerfed hard in the crucible. I suggest killing him first as his HP pool is low, and he moves fast/hits hard.
-
Zantarin: Tends not to use his uber shotgun blast when you get close to him. Wait for him to blow his load (heh), then gap close on his punk undead ass. Put the poor fool to rest.
-
Mous: Is one of the most annoying nems IMO. His stupid frost crystals will make you an easy target for other nems. Take him out last by bringing the other nems away from his slow moving butt.
-
Kuba: And his fucking blood pools. A quick note on ground effects - they are the only damage sources which aren’t affected by DA. In addition, on ground effects are immune to skills like war cry which have a damage reduction component in them. To quote fluff:
Kuba pool of RR/debuff cannot be mitigated in terms of damage reductions. In fact i’m pretty sure the pools mess up your dmg even after he is dead, as i’ve seen in wave 154 fighting Gabal’thun
The only way to reduce their damage is with resistance &/or damage absorption.
As such, Kuba is the first or last of the fast moving nems I go for depending on my damage type. If you deal cold/vitality damage, leave him last as he’ll take ages to bring down. Just be sure to constantly step away from his blood pools as they will heal everyone. I’m also pretty certain that these pools can heal off pets (including blade spirits). So unless you’re certain you can outdps his heal rate with these summons, don’t use them.
-
Reaper: Is dangerous only if his ghosts debuff your resists. What I do is I occasionally open up my character sheet once I see an uncomfortable amount of debuffs start to stack on the bottom right corner of the screen. If my resists are fine, I keep fighting, if they start getting low, I kite.
-
Valdaran: Pretty harmless by himself, but GOD DAMN ANNOYING in a nem horde. His position swapping bullshit pretty much makes it difficult for you to focus down one nem. The easiest workaround this issue to get enough damage to do away with the first nem spawning at the bottom left corner before he lumbers over to you. Aside from that, I’d try to kill him first the moment he appears next to you.
-
Benn’jahr: One of the easier nems to handle, his most dangerous skill is his obsidian cage/trap thing. Kill him last, and try not to damage him too much with AoE as he gets a massive movement and attack speed boost when he’s ~45% HP or lower.
[/spoiler]
Dangerous Non-nems
[spoiler]1. Mad Queen. Plenty of threads have been written on how to deal with her so I’ll keep it short - don’t fuck with her when she turns red/goes super saiyan if you’re ranged.
-
Ekketzul: Watch out for his fissure. The cast animation looks like a 2-handed shove in the air (kinda like a hadukken). Move away from the spot you’re standing on immediately
-
Anasteria: Has insane aether RR. Burst her down, or keep an eye on your aether res.
-
Loxmere: More annoying than dangerous, he can prove deadly if you get hit by him and something else simultaneously
-
Larria the hexxer: Can shotgun you with her PRM once they start converging back to her. Move away, or fight her near walls so the projectiles get eaten up.
-
Commander lucius. His ‘devastation’ hits quite hard. Deadly when paired with debuffs.
-
Anything which traps/freezes/stuns you - A note for shadowstriking builds: You can be trapped in mid shadowstrike. This not only resets the cooldown of your skill, but can prove fatal if you’re using SS to escape.
-
Mobs with reflection - By veretragna:
Some mobs have white Mirror animation (Myrmidons etc), some mobs have yellow Mirror.
If the character have at least 8% ADCtH and some decent weapon damage, Yellow ones can be easily crushed even under Mirror because they reflect only 30% of damage income and they are vulnerable even under Mirror. 30% reflected + 70% passed and affected by ADCtH are balanced, you receive no damage.
White ones are other story: they reflect 30% damage too, but they are immune under mirror: you can’t heal and damage is not balanced, you hit yourself when hitting the White reflector.
[/spoiler]
Using Racial bonuses to your advantage: by veretragna, jabrixone
[spoiler]To be honest, I had no idea wtf a racial bonus was till veretragna unwittingly explained it to me here.
I usually just put it off to the normal neo-nazi BS we see in our day to day lives and just trundle on by with my day.
Just kidding, veretragna. 
Jokes aside, veretragna and jabrixone both raise excellent points.
Many things in the game grant players a non-trivial amount of bonus damage to certain monster races.
For example - https://www.grimtools.com/calc/8NKWGeON
^N.B Nems can spawn with such bullshit weapons, and seeing that we are humans in the game…:rolleyes:
Because some monsters are the bastard, mongrel children of 2 different races (e.g. Aleksander is both human and an aetherial corruption), you can stack these damage bonuses.
Continuing on with Aleksander as our example, and assuming we have a nightblade equipped with the screams of the aether ring we have:
- %human damage bonus from anatomy of murder
- %aetherial damage from the ring
As such, we’d be able to lynch the skank silly with good, ol’ racism.
This is the reason why sanctified bone finds its way into many crucible builds. And this is also something to take note of during the prioritization process of target acquisition.
One last point, seeing that humans:
- comprise the largest percentage of nems we see in the crucible (aleks, fabius, maiden)
- Are also the most annoying nems to deal with,
I personally think it’s worth getting some points into anatomy of murder on any class combination with the NB class.
[/spoiler]
How the top pilots deal with difficult waves
Specifics on dealing with wave 159 by Fluff
At wave 159 it’s a good thing to trick sentinel into using his acid breath and not get hit by it. It reduces your dmg substantially and affects the rest of the wave sometimes. The idea is to not let Ekket conjure fissures.
For example: Sentinel starts breath animation --> you SS to him avoiding his breath --> Kill him and move straight to ekket’zul.
Then kill Ilgor the eternal’s 2nd form if he’s there so it won’t transfer into 160.
Specifics on 160 by x1x1x1x2
[spoiler]i. Bottom left spawn: AoM Nemesis
ii. Bottom Right spawn: Pre-Aom Nem
iii. Top left spawn: The mountain
iv. Top right spawn: AoM Nemesis
Specifics on dealing with wave 161 by x1x1x1x2 and ptir
Aleks can oneshot you with PRM shotgun if the plants on bot right apply RR on you. Ptiro recommends rushing bottom right on 161 if you don’t have nullification to dispel healers mirror. Kill healers afterwards
What Fluff and I do instead is as such:
i. Kill healers in the top right corner
ii. Kill defender golems because they grant aleks a massive defense boost
iii. Kill Aleks
Specifics on dealing with wave 169 by Fluff
i. Attack Theodin first
ii. Kill his 1st form then attack the Abominations that rush you.
iii. When Theodin’s 2nd form is up damage it. Anasteria will have arrived by now so keep damaging abominations and Theodin while retreating.
iv. If Anasteria is the last to be killed (usually the case) make sure she didn’t stack too much RR before she dies (it can be up to 60 or 70 for 5 seconds so beware of this) so you can safely rush lower left Nemesis at 170. NOTE: She applies RR with her projectile lob attack.
How ptiro deals with 169
I prefer to kill Anasteria first if I can control my AoE dmg to not acidentaly kill everyone else. She is the most dangerous of the bunch and can do unpredictable dmg
How mad_lee deals with 169
Anasteria can really ruin your day. If you can isolate 1v1 with her, do it at the beginning of the wave (bottom right corner), then kill fatsos then Theodin then Krieg. Fatsos also debuff your resistances
[/spoiler][/spoiler]
The different arenas by mad_lee (w. some minor additions by spanks.)
[spoiler]Crucible of the Legion is excellent for melee builds that have a mobility skill, I like playing it with my Belgo Infiltrator and with my Soulrend Breaker. Yes, you loose bit on the timer, but it’s much easier to get those one on ones where your char excels without being debuffed by million debuffs.
Crucible of the Dead: (i) Standing under arcs against waves with Alex is the optimal strategy. (ii) Pulling fights to the platforms where the vendors/blacksmith are is also prudent. The ‘railing’ on the side will effectively act as a funnel allowing you to deal with less monsters at any given time. This strategy should only be used cautiously by builds WITHOUT a mobility skill as it is possible for the monsters to sandwich you should they come in from behind.
Crucible of the sands: decent for melee builds but require more focus. Standing under arcs against waves with Alex is the optimal strategy. In addition, don’t be afraid to use those archways as temporary funnels. This is especially useful against nem hordes as they will jostle around the narrow entryway trying to get to you before giving up, and coming round the side. This effectively turns a 3-4 v 1 into a temporary 1v1 for a few seconds.
Things to note:
- Healers will spawn @ bottom left corner in 161
- AoM Nems will spawn at the bottom most portal (so place banners accordingly)
Crucible of the void: Worst arena to fight in. Confined area means you get swarmed easily. Red background makes enemies even harder to spot. No overhangs, with no chokepoints. I normally just quit and start a new crucible round unless I’m piloting a tank.
Crucible of the grove: My second least favorite arena. The green background makes it difficult to keep track of enemies especially with aetherfire. No overhangs. Weird banner sites. This is the map where things spawn in places they shouldn’t spawn. For example…
Theodin spawns in upper right corner only on Grove arena, iirc. - Veretragna
Crucible of the deep: The trick here is to use that middle portion as a choke point. Playing king of the hill on the little ridge can be dangerous as there is no escape route. I, however, believe this will be one of the easiest arenas to pilot when dem mobility runes are introduced. Just leap frog from one ridge to the other. That being said, the banner spawn sites here are phenomenal as the map is relatively small, and therefore the radius of any banner used will encompass a greater percentage of the arena.
Consumables and the crucible by: mad_lee, and smitherson
[spoiler]- Always carry Courageous tinctures with you (I usually have like 50 on each Crucible viable character). Really helps if you got a build that can’t dispatch of stuff like Reaper or Iron Maiden fast (usually fire builds), and just makes dangerous waves easier
-
Always carry Aether Clusters with you and don’t be shy to use them. Easy to farm, those little things can save your ass. And remember that dying during 150-170 run because you thought you could save that Aether Cluster that time will mean, well, yes, saved aether cluster but also loss of 82 coins you’ve spent on 4 buffs and a checkpoint
-
If your char is low on hp, there is no shame in using Royal Jelly Essence.
-
If your char is low on Freeze res or you are farming coins on 100-150 naked, there is no shame in using Frostshroud Ointment (don’t craft them using frozen hearts, they can be farmed at Homestead’s vendor) - there is nothing more tilting then dying to Moosie because you got unlucky and he chain froze you for like 4 seconds
-
I’ve found Aetherward oil to be a very solid consumable in Crucible. If you’re running a shield build, that’s another big chunk of damage that you’re no longer taking, and if you aren’t that extra aether resist makes Anasteria, Alex, Theodin, and all those other aether RR sources a way smaller threat, with them taking more damage as a cherry on top. It’s also considerably easier to get in mass quantities, since you can simply buy it like courageous tinctures and hungerer oil.
[/spoiler]
Mobility skills[spoiler]
-
Upon initiating on a priority target, save mobility skills for escape. This is especially useful with nems who spawn immobile ‘traps’ (e.g. Aleksanders aether crystals). Do NOT however blitz into mous’ ice crystals unless you’re absolutely out of options. You run the risk of getting frozen.
-
Learn how to abuse them. Namely, try to recognize the angles from which you can blitz/SS from. This allows you to gap close/escape from around corners.[/spoiler]
Some GIFs:
[spoiler]1. When NOT to kite (Blast shield is up. I’m not surrounded, and there’s an open escape. Heal is about to come off CD. So I fight)
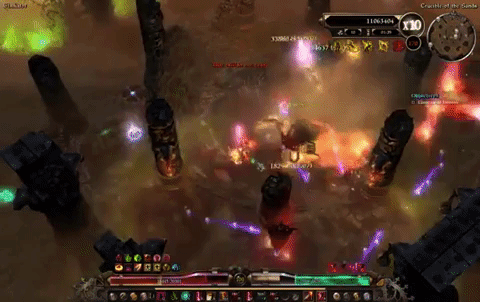
- Using mobility skills to stay on the edges of mobs (This allows you to reposition without losing DPS.)
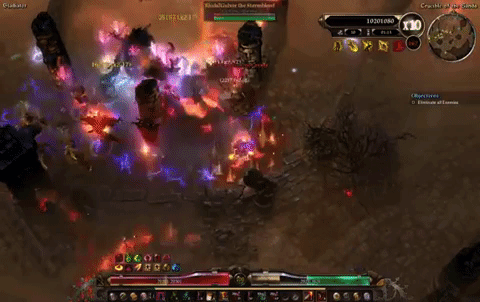
- Using the forced attack function to set up attacks while kiting.
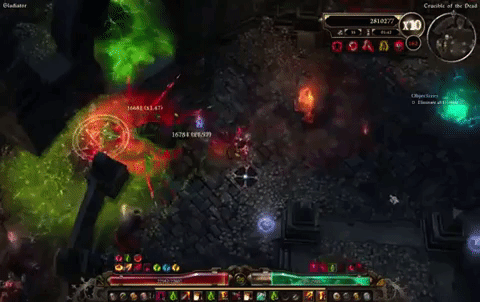
- Stutter-stepping with the forced attack/movement function to maintain DPS while dodging Aleks’ meteor.
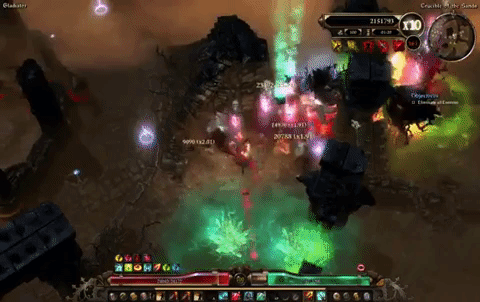
[/spoiler]
How pilots actually manage those 6minute clear times
[spoiler]
Up till now, I’ve been discussing methods on how to safely, and consistently clear 170. The reason for this is that not many players have top tier end game builds like the many which parade around the forum. Thus they will inherently be incapable of pulling off such feats. For those that do, however, here’s how they do it:
-
Starting the next wave WITHOUT fully killing monsters with ‘2 forms’ (e.g. theodin). This alone will save you a buttload of time.
-
Stutter-stepping around the periphery of the arena (i.e. running while stopping to maintain a level of DPS) at the beginning of each wave to shepherd all the stragglers to the middle. By consolidating everyone into one concentrated mess, all AoE spells will essentially deal more damage as they’ll be attacking more targets.
-
Focusing on tankier enemies first. Pretty much uses the same principle as point number 2. By attacking tankier enemies (e.g. the 3 buttheads from malmouth), not only will you kill them faster, trash mobs will die to the AoE. Continuing with the malmouth stooges, it’s also helpful here to alternate between attacking each one of them. This allows you to maximise your AoE damage for as long as possible.
In essence, if you were to kill one of the 3 first, then your aoe spells will now affect 2 them rather than all 3. Ideally, you want to kill them all at the same time.
- Know your limit. Knowing exactly how long you are able to stand your ground for before running is key to maximising DPS. Running too early gimps it, and running too late results in death.[/spoiler]
Piloting pet builds in the crucible - by Sigatrev
[spoiler]When it comes to piloting pet builds in the Crucible, my first piece of advice is about the builds themselves more than the piloting aspect: If you’re playing a build that requires you kite, you’re losing a LOT of your DPS, and also I have no advice for piloting it. I don’t play kiting pet builds. Raw/peak DPS numbers are not everything, a kiting pet build using Dying God is going to deal much less damage than a tanking pet build using Ishtak, the Spring Maiden.
Related to that, keeping your pets alive is very important. This means either they don’t die or you can re-summon them as fast as they die in the worst case conditions. Once your pets start dying, you become the target, you start kiting, your pets deal less damage, enemies live longer, and so you and your pets take more damage. It is self-reinforcing.
Additionally, pets get extra buffs from the crucible buffs if they were alive when you applied the buffs. For any non-temporary pets, this means their DPS drops permanently once they’ve died or been re-summoned.
Of particular note is the effect this has on Skeletons. Summoning Skeletons will always summon 3 (or more if you use Conduit of Undying Whispers or Mask of the Lost), replacing existing Skeletons. If you had 10 buffed skeletons and lose 1, re-summoning would leave you with 7 buffed and 3 unbuffed. Most of the time, I’d rather have 9 buffed. I wouldn’t re-summon until I lost at least a second Skeleton. Also note that re-summoning always replaces the OLDEST skeletons, so you will always be replacing buffed skeletons with unbuffed ones as long as you still have buffed skeletons around.
Build related advice to keeping your pets alive:
[ul]
[li]On Shaman based builds, Wendigo Totem is really really good. Pets have very high HP so the % healing is massive. Get it to 12/12, and if you have +3 or more, go for 15/12 where you get an extra 1%[/li]
[li]On Skeleton builds, either minimize the cooldown or stack resistances. Mantle of Lost Souls + Mogdrogen’s Ardor do a lot to keep skeletons alive in waves 150+[/ul][/li]
The Pet Attack command is very important. Use it for the following:
[ul]
[li]Move your pets out of AoE ground damage areas as needed to keep them alive. This somewhat depends on their resistances, what you’re fighting, how much healing you have, etc, but if you see their health dropping, try to keep them alive.[/li]
[li]Move your pets away from Aleksander’s meteor[/li]
[li]Focus pets on one target at a time. This is mostly relevant for “boss” type enemies that take more than 1 second to kill.[/li]
[li]If you’re using Ravens or have Skeletons with either Flame Torrent or Guardian’s Gaze, move your pets right next to the target they’re attacking to maximize DPS.[/ul][/li]
A lot of the following is true for non-pet builds as well, but I’m saying it here because it is part of my pet piloting strategy.
Know the spawn locations of important enemies on particular waves. It is consistent between most of the crucible maps, but Crucible of the Sands is different (and it has some nice advantages).
When there is a mix of boss enemies and regular enemies, focus on either just the boss until it’s dead, or just the regular enemies until most of them are dead rather than splitting your damage between them. This will minimize the damage you and your pets take. After enough experience you get a feel for what to focus on during which waves, but here are a few of the things I try to do:
[ul]
[li]Wave 154: Try to start this wave at the spawn location of Thalonis(on Crucible of Sands) or Gabal’Thunn(other Crucibles), and kill both of the Chthonics before going for Kuba. They go down much faster and their debuffs are painful. If you’re playing a build that can kill Kuba before the Chthonics reach you, killing him first is fine but you don’t want to fight all 3 at once.[/li]
[li]Wave 159: Start where the Sentinel is going to spawn and kill him immediately. If you’re on Crucible of the Sands, the possible spawn for Ilgorr is just to the left, kill his first phase next so that you can kill his second phase before ending the wave(On other Crucible maps he is in the opposite corner from Sentinel and is impossible to reach before engaging other bosses). Either way, take out Ekket’Zul next. He always uses his Fissure skill right after his chaos breath, so when that happens you usually want to pre-emptively relocate your pets to avoid them getting shredded.[/li]
[li]Wave 160: I always take out the AoM Nemesis first, as they tend to be far more dangerous. For most pet builds, the order of danger is Reaper, Grava’thul, Aleksander, Kuba. Regardless, I usually start this wave in the same location as Sentinel’s spawn and take out whatever Nemesis spawned there first.[/li]
[li]Wave 161: Take out the healers, then Aleksander, then everything else. Always try to get Aleksander’s meteors to hit arches/other environmental features.[/li]
[li]Wave 162: I usually try to start where Yuvolloth spawns and take him out before I find out if the other boss spawn was Mad Queen or Amalgamation.[/li]
[li]Wave 163: Unless I can take out the council very quickly (chaos/vit skeletons mainly, the council has good good elemental/physical resist), I take out everything else first.[/li]
[li]Wave 165: Try to start the wave where the AoM nemesis spawns and kill him first. Depending on how quickly he is going down, I sometimes turn attention to Namadea when he reaches me, as he hits like the Reaper but dies much quicker.[/li]
[li]Wave 166: Shar’Zul, then Alkamos, then Lucius.[/li]
[li]Wave 167: Try to take down the first form of Karroz early so you can take out his second form before the wave ends.[/li]
[li]Wave 169: Try to take out the first form of Theodin first, so you can take out his second firm before the wave ends. I usually go for Anasteria last, and avoid her as long as possible as she has a huge resistance debuff and takes a while to kill.[/li]
[*]Wave 170: Same as wave 160. If you’re on the Crucible of the Sands, try to start wave 170 at the Upper Right spawn location as you’ll be able to fight the AoM nemesis that spawns there one-on-one for a decent length of time before anything reaches you.[/ul][/spoiler]