UPDATE: I have fine tuned this build for internal trauma damage with Blind Fury and Bull Rush. It can now consistently clear crucible 150-170 in less than 5 minutes.
I theorycrafted this build a while ago but the first time I tried it, it sucked. Then I tried to build a Blademaster that also sucked and went back to Grim Tools to see if I could make this Blitz Warlord viable…
…and that’s exactly what I did.
Behold the Blitzer Physical Warlord, one of the most simple yet satisfying builds I have ever played:
-
[Shield Melee] [1.1.9.7] (cr) (sr) Blitz Physical Warlord (whatever9876)
- Damage: Physical, Internal Trauma
- Active Skills: Blitz, Cadence, Ground Smash, Doomforce, Ascension, Summon Guardian of Empyrion, Overguard
- Passive Skills: Oleron’s Rage, Field Command, Presence of Virtue, Counter Strike
- WPS Skills: Shattering Smash
- GRIM TOOLS: (Warlord, Level 100 (GD 1.1.9.7) - Grim Dawn Build Calculator)
OVERVIEW
The Blitzer Physical Warlord, as the name suggests, uses Blitz as its main source of damage. Blitz into your enemies, use Cadence to activate the buff from Deadly Momentum and trigger Shattering Smash for flat Physical RR. By the time you’re ready to hit Blitz again your enemy will have 370 reduced DA and 76% + 33 flat Physical Resistance reduction.
When the second Blitz lands, if it crits, it’s gonna hit for up to 73% ADDITIONAL Critical Damage.
HOW IT WORKS
-
Blitz is the main source of damage and enemy debuff: a disgusting 370 DA shred that will make it even more likely for you to land a critical hit.
-
Critical hits from Blitz receive +15% critical damage bonus from your amulet. On top of that, you’ll have critical damage bonuses from your amulet (+4-6%), medal (+4-6%), Tainted Heart (+5%), and Divine Mandate (+35%), adding up to +73% crit damage bonus for Blitz. If you are fully buffed and your enemy is fully debuffed when you land a critical hit with Blitz…

-
While you wait for Blitz to cooldown, you’ll keep dealing lots of damage from several other smaller sources activated on attack, on block, and when hit.
-
Blitz will also proc Maul that reduces enemies armor by 33%, which will ensure that some physical resistant enemies like The Iron Maiden will consistently suck your d*ck.
-
Your 2 Guardians of Empyrion will proc Blind Fury and Shattering Smash will proc Bull Rush for extra area damage
-
With up to +3400 OA, you will be dealing critical hits all the time.
-
All of Blitzer’s attacks deal Area Damage, which means that the more enemies surrounding you, the more damage you deal to all of them. That’s perfect for Crucible and Shattered Realm.
-
Additional damage sources are: Ground Smash (boots, active skill), Doomforce (relic), Targo’s Hammer (devotion, 33% chance on block), and Tip the Scales (devotion, 33% chance when hit).
This build is very simple to play and doesn’t require many buttons to be pressed. For trash mobs you will only need to use Blitz, Ground Smash, Doomforce, and Cadence. For heroes and bosses you activate Ascension and Overguard for additional damage and defenses. Finally, use Violent Delights for mobility and to disengage combat when needed.
TANKINESS
This build can facetank almost everything, except Mogdrogen and Callagadra. It’s possible to facetank Ravager if you’re lucky. If you are unlucky with your critical strikes and can’t kill Lokarr fast enough then you’ll also have to kite once, but that’s all.
Here are the main sources of tankiness on this build:
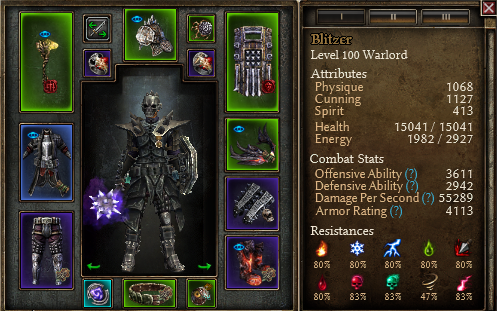
- Stats: +14k life, +2900 DA, +4000 Armor
- Up to +53% Physical Resistance
- Circuit breakers: Resilience, Menhir’s Will
- Healing skills: Tip de Scales (when hit), Maul (on hit)
- Consumables: Aetherward Oil (Malmouth’s Resistance), Cursed Tincture (Coven’s Refuge), and Hungerer Oil (Barrowholm).
GEAR
This build is defined by 5 MI items:
- Bloodbriar’s Thorn (amulet): -1 seconds skill recharge to Blitz, +15% Crit Damage to Blitz. Drops from Ol’ BloodBriar in a secret cave not so next to the Pine Barrens rift.
- Milton’s Casque (head): -0.4 second skill recharge to Blitz, 128 physical damage to Blitz, 15 Physical Damage, +50% Physical Damage and +100% Internal Trauma Damage to Shield Training. Drops from Milton Hart, north of the Wightmire rift.
- Warden’s Fortress (shield): -0.5 second skill recharge, 100 Physical Damage to Blitz, and 540 Internal Trauma damage over 3 seconds to Blitz. Drops from the Warden Krieg, northwest of the Warden’s Laboratory rift.
- Wendigo Glare (medal): 140 Physical Damage to Shattering Smash, 180 Physical Damage to Blitz. Drops from Wendigo champions, Vollarius, Waraplius, Anaxius, and Ravagrad, spread throughout Gloomwald and Ugdenbog. The hardest item to farm for this build.
- Bargoll’s Root (mace): 40% Weapon Damage to Shattering Smash, 40% Weapon Damage to Blitz. Drops from Bargoll, the Mouldering Mound which spawns randomly in Ugdenbog.
You should target to overcap your resistances and get bonuses in OA and DA. Here’s a list of some good affixes:
- Prefixes: Relentless, Formidable, Tempest, Menacing, Agressive, Impervious, Resistance.
- Suffixes: of Attack, of Ruin, of Readiness, of Vengeance, of Fervor.
Rings: Mythical Ring of the Black Matriarch and Bladetwister Signet for the Physical Resistance reduction (20% in total).
Gloves: Mythical Colossal Grasp for its passive shield bonus and modifiers to Overguard.
Pants: Mythical Chausses of Barbaros for its stats, proc, and skill bonuses.
Boots: Mythical Earthshatter Threads for the Physical Damage bonuses plus the Freeze and Petrify Resistances.
Belt: Tempest Ugdenbog Girdle of Attack or Aggressive Ugdenbog Girdle of Supremacy. If you don’t have this exact combination of affixes, go with Mythical Reforged Chains of Oleron while you farm the belt (fastest way to farm it is to kill Carraxus Foul in Ugdenbog Crossing.
Shoulder: Gargoyle Spines for stats and 24-36%% of Vitality damage converted to Physical damage.
Chest: Mythical Myrmidon Chestguard for its bonuses to both Physical and Vitality damage and 24/36% of Vitality damage converted to Physical damage.
Relic: Doom is BiS.
COMPONENTS
- Weapon: Seal of Blades
- Shield: Seal of Might
- Head: Runestone
- Rings: Bloodied Crystal
- Medal: Tainted Heart
- Chest/Shoulder: Living Armor
- Pants/Boots: Ugdenbog Leather
- Gloves: Restless Remains
- Belt: Ugdenbog Leather
DEVOTIONS
- Crossroad Primordial
- Bull (Bull Rush bound to Shattering Smash)
- Remove Primordial
- Assassin’s Blade (Assassin’s Mark bound to Cadence)
- Anvil (Targo’s Hammer bound to Field Command)
- Sailor’s Guide
- Dire Bear (Maul bound to Blitz)
- Shieldmaiden
- Hammer
- Owl
- Rowhan’s Scepter
- Oleron (Blind Fury bound to Summon Guardian of Empyrion)
- 4 points in Scales of Ulcama (Tip the Scales bound to Divine Mandate)
SKILLS
- Hardcapped skills: Blitz, Field Command, Decorated Soldier, Blindside, and Deadly Momentum (Soldier); SafeGuard, Shattering Smash, Divine Mandate, and Celestial Presence (Oathkeeper);
- Softcapped skills: Scars of Battle (Soldier); Presence of Virtue, Haven, Rebuke (Oathkeeper);
- Other skills: Cadence, Fightning Spirit, Menhir’s Will, Military Conditioning, Overguard, Shield Training, Fighting Form, Veterancy, Squad Tactics, and Counter Strike (Soldier); Resilience, Ascension, Summon Guardian of Empyrion, and Clarity of Purpose.
ATTRIBUTES
- Physique: enough to wear armor
- Spirit: enough to wear jewlery
- Cunning: all remaining points
FACTIONS
- Side with Barrowholm them to have access to their consumable, Hungerer Oil.
- Side with Kymon’s Chosen for the Kymon’s Blessing augment.
- The Outcast: whatever.
CELESTIAL BOSSES
This build can kill all celestials: Ravager, Avatar of Mogdrogen, Lokarr, and Callagadra.
I haven’t tried to kill Crate of Entertainment but I assume it can be done if you just evade the exploding crates.
The strategy is the same for all celestials: facetank as much as you can. If you notice that Menhir’s Will is triggered, start kiting. Hit with Blitz and disengage with Violent Delights. Finally, use Aether Cluster to gain some precious seconds of invulnerability and unleash hell for a faster kill.
SHATTERED REALM
You can farm SR 76 consistently without dying unless you get really unlucky with the mutators. Since patch 1.1.9.0 the boss room is much easier. You’re more likely to get killed when surrounded by mobs in the normal shards. If you find a Shrine of Oleron, take it, it’s going to make it much easier.
Finally, always keep an Aether Cluster ready. It has saved me from death plently of times.

CRUCIBLE
You can do Crucible 150-170 four times using one round of blessings (Ulo, Empyrion, Amatok and Ulzuin) plus 3 Stormcaller Beacons.
The secret for fast clearing is to attract all the mobs around you. The more mobs surrounding you the faster you’ll kill all of them. Just be alert and don’t save on consumables.
When I first wrote this guide my computer was so slow I couldn’t record my gameplay (below you can see what happened when I tried recording).

I now have a decent gaming computer and recorded this video demonstrating how you can comfrotably clear Crucible 150-170 four times in a row with a single round of blessings:

FINAL REMARKS
- Before posting this build, I checked to see if anyone else had posted something similar and I found this build by Ceno. If you know of any other similar build let me know so I can link them here.
- If you have any suggestions to improve this build, I’m keen to hear it.
- I tried to use colors to improve readibility. Let me know If I failed to do so and I’ll fix it.
Cheers! 


