This is a city layout I’ve been tweaking for a while, I’ve got two different settlements (both vanquisher, one pacifist) where I used this, and I thought I’d share it because it’s worked well for me.
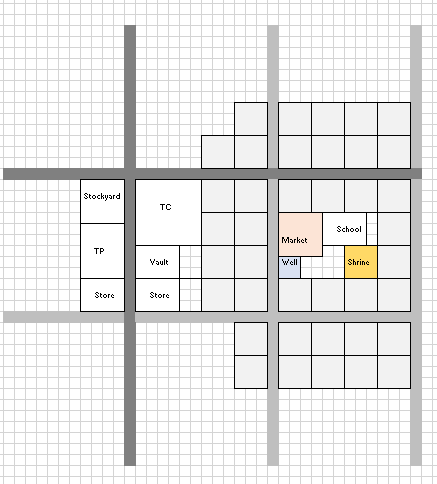
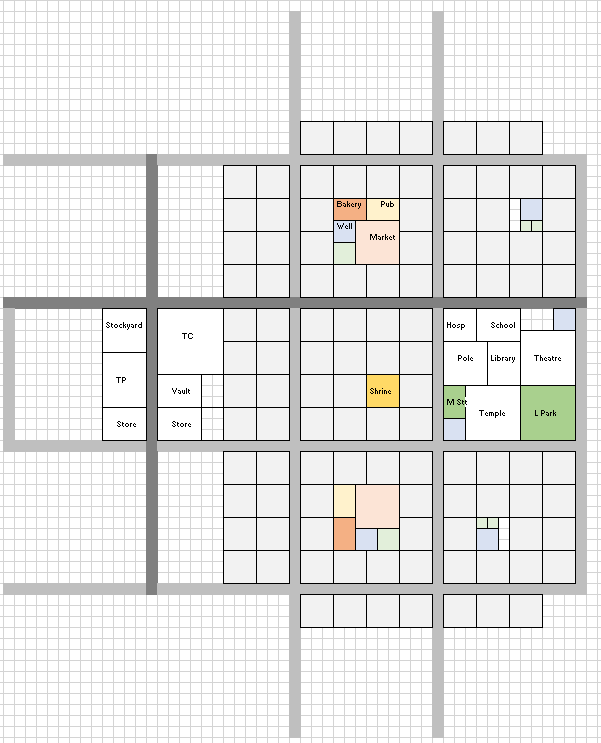
At full size it’s got space for 2000+ villagers but, rather than having only a final layout, I’ve also drafted the way to get there. There’s a smallish layout (~200 pop with T2 housing) and a medium layout (~600 with T3) that shows you where to place things on the way to the big city. Crucially, there’s minimal rearranging needed to go from one to the other for the sake of efficiency.
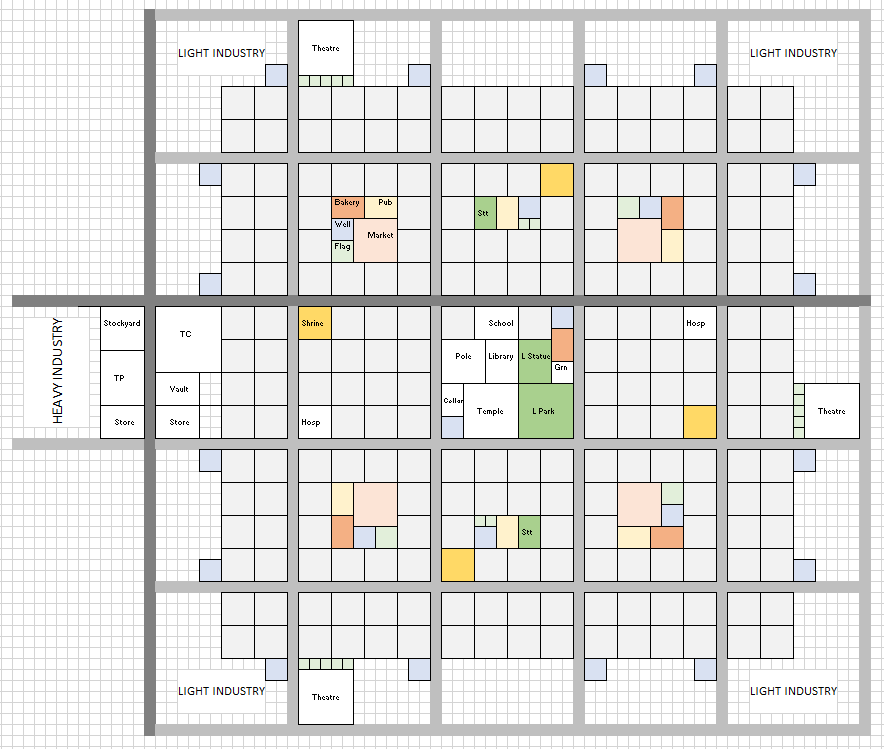
The central idea is to have things as densely packed as possible in order to need fewer amenities and services buildings to cover everyone (saving construction and maintenance costs), and to minimise walking time for restocking or commuting. The grid structure and symmetry makes it easy to plan out and helps fight smallpox epidemics by spreading out walking paths. The excess of markets are there to provide enough grocers to keep everyone stocked up. The number of shrines / pubs / theatres are there to provide sufficient spirituality and entertainment points, though you may need a few more if you play for 80+ years. Similarly, the outside wells and small 1x1 green decorations are purely indicative (and could even be towers or appiaries).
I haven’t shown all the storage, food, or production buildings because where they go depends a lot on the map, but obviously wrap the neutral ones around the housing and place undesirable ones a little further away. Heavy industry should be tucked away behind the TC, while things like windmills and barns can be placed just on the ring road without affecting the houses. You can then wrap the whole thing in walls following your terrain’s contours.
As it stands, the final layout has high enough desirability to get all the houses in the 9 central squares to T5, and most of those on the outside ring too. And that’s using only 1 large statue, 2 medium ones, 1 large park and 4 flag poles as decorations! Sprinkle a few urns or small statues around the outside and you can get them all up to mansions easily enough. The earlier layouts can also easily get houses to T2/T3 and T3/T4 respectively.
If you want an extra failsafe layer of protection you can rearrange the TC district to
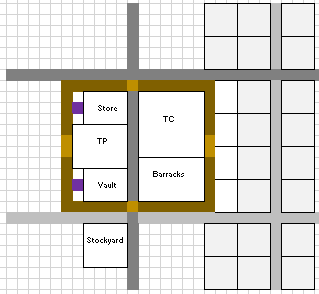
Having your expensive storage, town centre, trade post and barracks in a fortified enclosure makes you pretty much immune to early and middle game raiders.
Finally, this is what it looks like in the game, at various stages of completion:
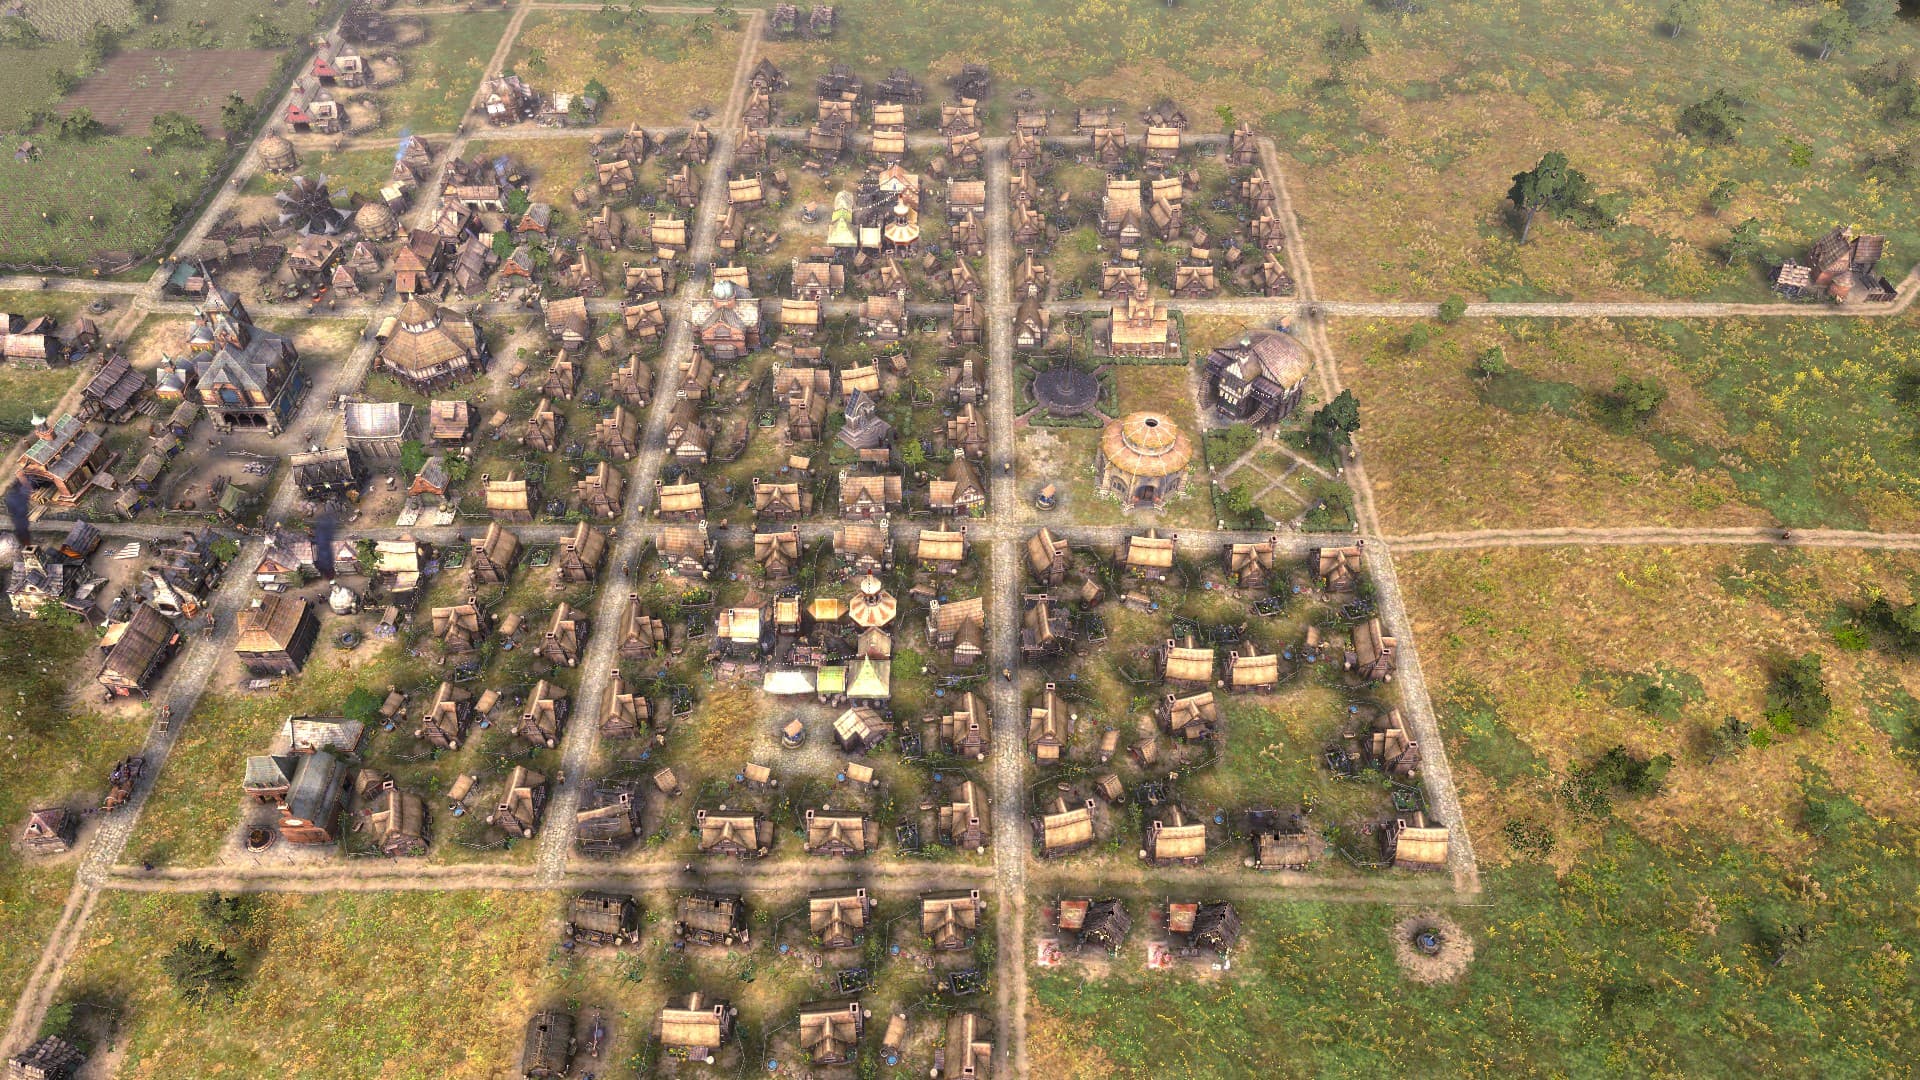

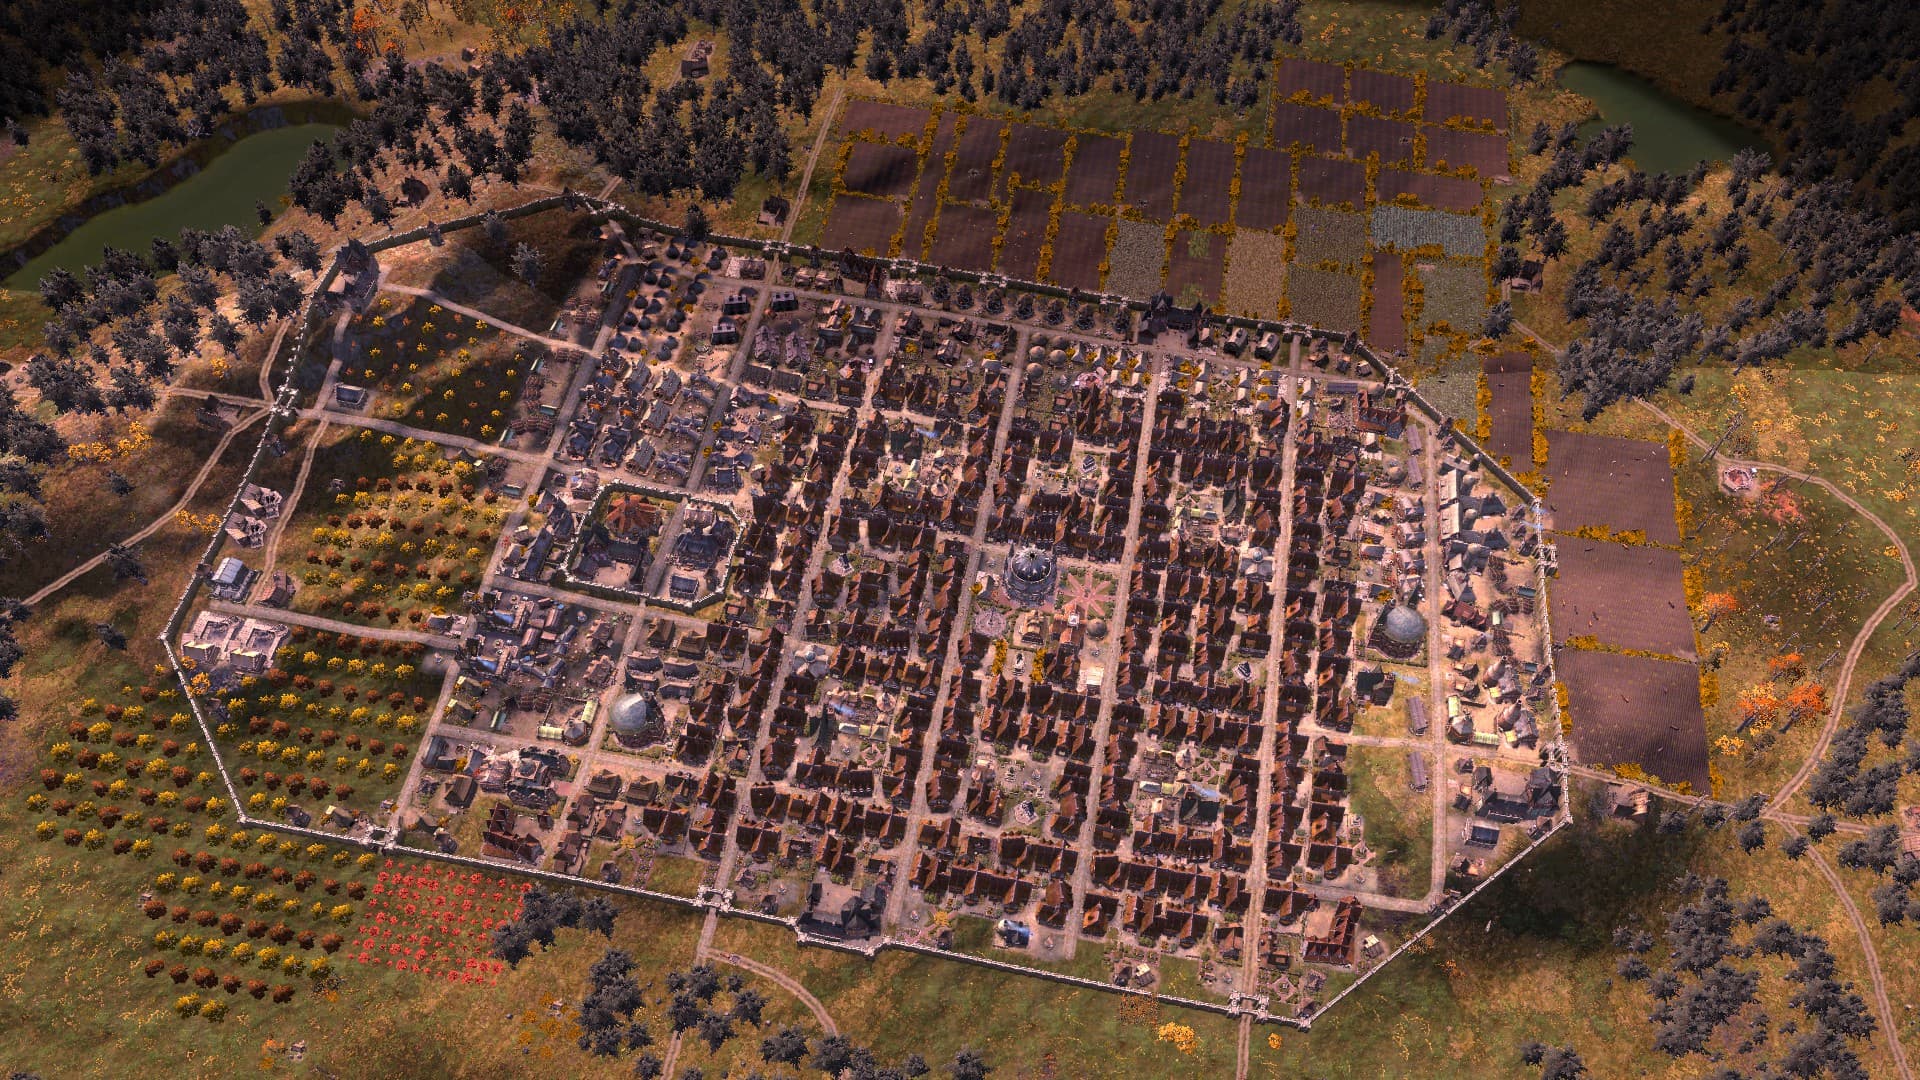
On a purely aesthetic side, I admit that it looks very gridy and urban rather than villagey, but I like the look of having one central town square with the key buildings, and then houses in nested courtyards arranged around it.