Format: Numeric list
Font: Font Face
Colors: limegreen, teal, orange, red, blue
Language: AE
Parts Index
- World Editor Tools I
- World Editor Tools II
- World Editor Tools III
- World Editor Tools IV
- World Editor Tools V
- World Editor Tools VI
Index
1.0 Editor Mode
1.1 Preparation
1.2 Placement Tool
1.3 Group Link Tool
1.3.1 Respawns
1.3.2 Unified Entities
1.3.3 ProxyPatrollers
1.3.4 Unique Entities
1.3.5 Inverse Unique Entities
1.3.6 Any Entity
1.3.7 Decorations
1.3.8 Patrol Points
1.3.9 Monsters And Weapons
1.3.10 Patrollers
1.3.11 Wander Points
1.3.12 Npc Wanderers
1.3.13 Riftgates
1.3.14 Dungeon Entrances
1.3.15 Devotion Shrines
1.4 Hill (Raise/Lower) Tool
1.5 Noise Tool
1.6 Smooth Tool
1.7 Plateau Tool
1.8 Raise Plateau Tool
1.9 Copy Terrain Tool
1.10 Ramp Tool
1.11 Brush Tool
1.12 No Pathing Tool
1.13 Sector Paint Tool
1.13.1 Fog/Lightning Layer
1.13.2 Name Layer
1.13.3 Sound Layer
1.13.4 Boss Layer
1.13.5 Day/Night Cycle Layer
1.13.6 Bloom Layer
1.13.7 Climate Layer
1.13.8 Damage Layer
1.13.9 Adjustment Layer
1.13.10 Level Limit Layer
1.13.11 Riftgate Disable Layer
1.13.12 View Distance Layer
1.13.13 PvP Layer
1.14 Water Tool
1.15 River Tool
1.16 Wave Tool
1.17 Zoom Tool
1.18 Undo/Redo Tool
1.19 Ingame Zoom
1.20 Ingame Camera Angle
1.21 Map Selecting Tool
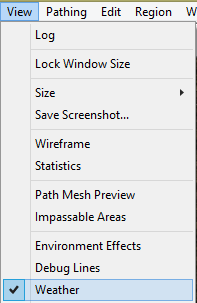
1.13.2 Name Layer
Name Layers will give region names.
To create a new name layer, click “New” and select the newly created style. As before, you can rename it now and choose whether you want it to be visible on the ground.
There are now 3 options in the Name Options window:
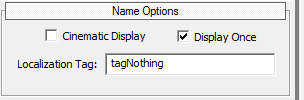
Options:
- Cinematic Display determines whether the name of the region will be displayed in the center of the screen when the player enters this name layer for the first time.
- Display Once will make Cinematic Display only display when the player discovers a new name layer for the first time. If disabled, it will always be displayed when entering a namelayer.
- Localization Tag is as the name says a tagbased name which means that the tag put in here needs to get a text related through the localization (text) files in the mod. Otherwise the game will show Tag not found: tagname in the game.
1.13.3 Sound Layer
Sound layers are responsible for music and ambient sounds that are not related to soundobjects that can be placed using the Placement Tool.
Creating a new layer of this type works as usually.
There are 3 options in the Ambient Options window:
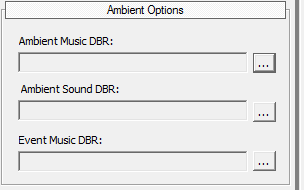
Options:
- Ambient Music DBR determines which music is played in this area.
- Ambient Sound DBR determines which ambient sound gets randomly played in this sector.
- Event Music DBR determines which music will be played when a special event is triggered.
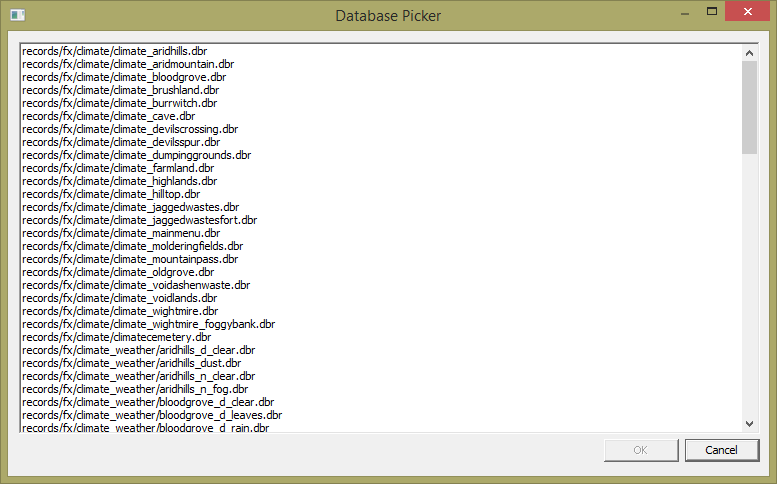
When clicking the […] buttons a Database Picker window will open:
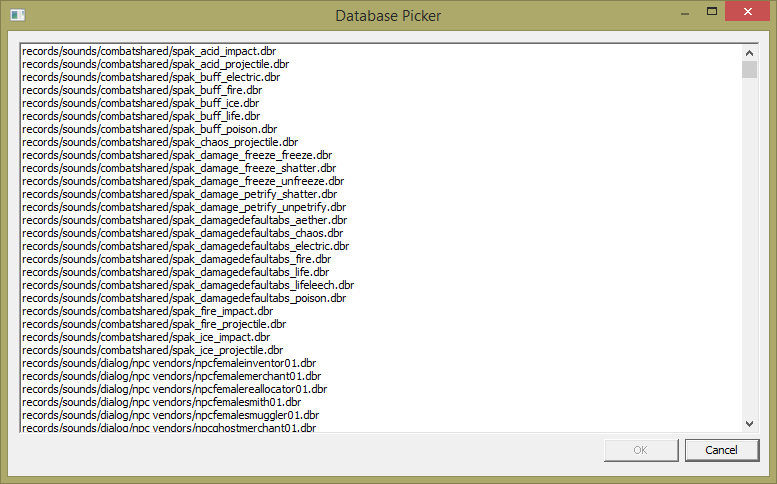
As you can see, it only shows dbr paths from the folder records/sounds/ which means that if you want to add a new sound or music so that you can use it with this layer type, you’ll have to put the corresponding record into that folder as it otherwise won’t find the sound / music.
Ambient Music DBR and Event Music DBR will only work with a record of the type “MusicSession” which can be found in “records/sounds/soundpak_musicambient/”.
Ambient Sound DBR will only work with a record of the type “AmbientSession” which can be found in “records/sounds/soundpak_ambient/”.
1.13.4 Boss Layer
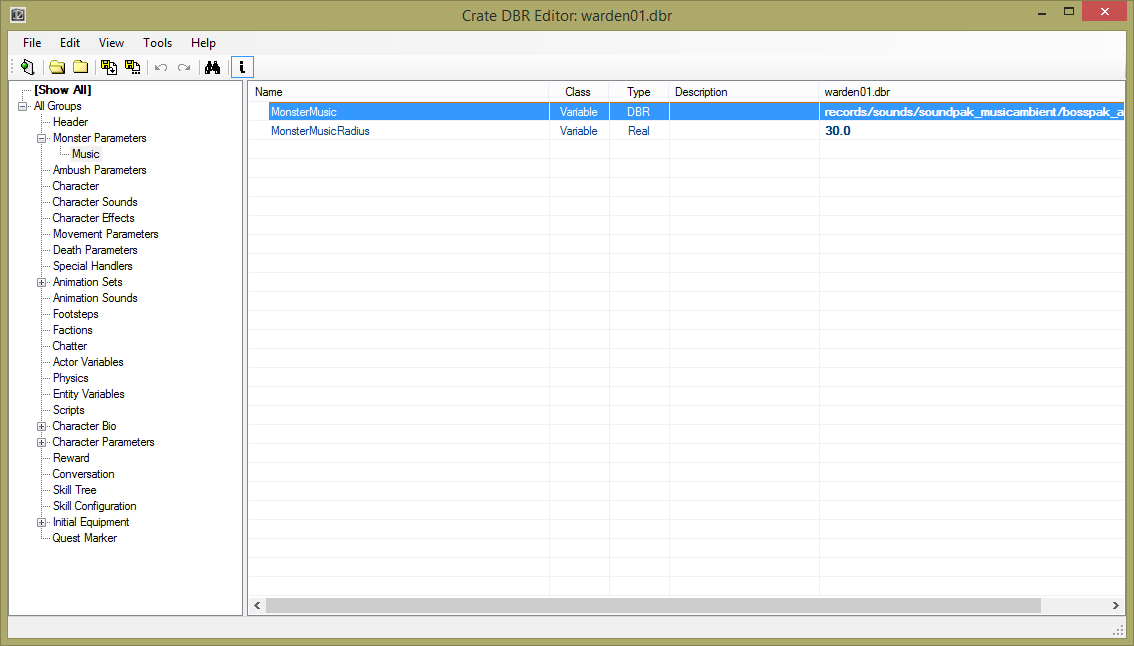
The layer of the type “Boss Layer” comes without proper options: It marks the area in which bossmusic will be played when the player enters a layer of this type and a bossmonster that has a music assigned to it is in the same layer.
Bossmusic can be assigned in the corresponding boss dbr file in monster Parameters -> Music -> MonsterMusic:
1.13.5 Day/Night Cycle Layer
The Day/Night Cycle layer sets, as the name says, the cyrcle that the artificial sun does. This also can be set to things like all time day or all time night, as it is done in caves.
When selecting the Day/Night Cycle Layer type and creating a new style, this window will open:
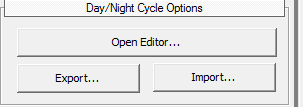
If you want to save a day/night cycle, you can do so by clicking “Export”. This will enable you to save cycles as .DNC (Day Night Cycle) file. You also can import them by clicking “Import”.
When clicking “Open Editor”, this window will open:
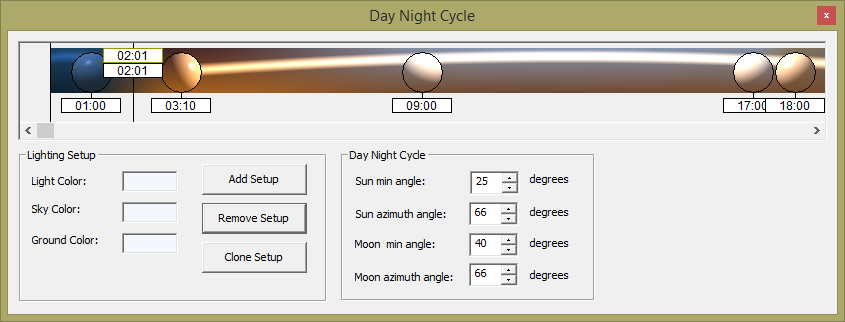
You can change it’s size, when you release the left mouse button, it will adjust the window’s content to the new size.
Now there are a bunch of options again.
To edit the cycle, you can either select one of the existing circles (that have times beneath them) or click “Add Setup” which will add a new circle in the middle of the currently shown part of the window.
You can change the currently shown part of the window by dragging the scroll bar beneath the visual cycle right or left.
If “Add Setup” doesn’t add a new circle, you’ll have to change the currently shown part a bit to make space for a new circle.
Options
- Remove Setup will remove the currently selected circle
- Clone Setup will clone the currently selected circle
- Light Color will change the color of the light that the artificial sun will have when the time of day reaches this time.
- Sky Color will result in a different color of reflected artificial sky.
- Ground Color will result in a different color of reflected light from the ground on objects.
- Sun min angle is the angle at which the sun will raise / go down at least. It can’t go deeper.
- Sun azimuth angle is the horizontal angle between the point where the player looks and where the sun line goes round
- Moon min angle is the angle at which the moon will raise / go down at least. It can’t go deeper.
- Moon azimuth angle is the horizontal angle between the point where he player looks and where the moon line goes round.
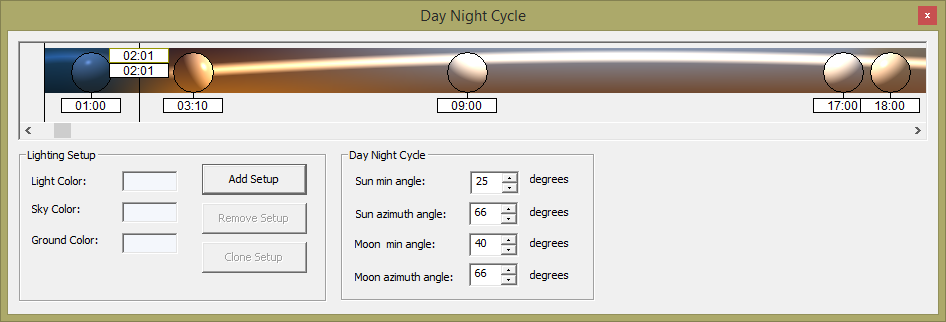
Sun and Moon rise
If you look close at the coloured field that contains the circles and times, you’ll notice a vertical line with two times.
There are 4 of these, a black and a yellow one at the beginning of the day (on top of each other) and the same at the end of the day.
When moving the black one, the line that indicates how the sun or moon is rising and sinking will change. This is usefull for regulating at which point moon or sun may rise or sink.
Usually the black and the yellow line at the beginning should be at the same place, as the both in the ending of the day too.
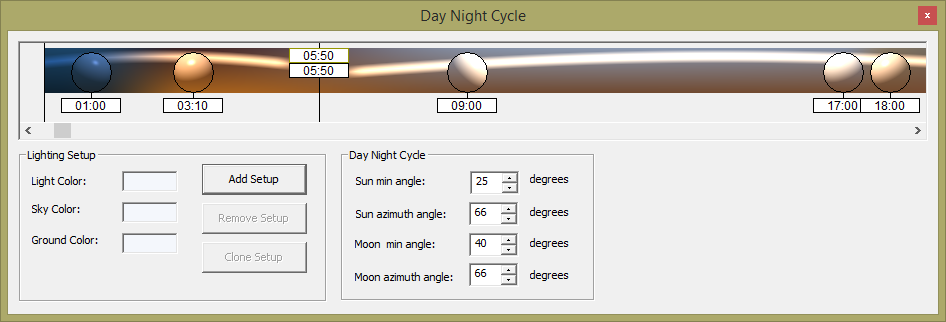
Before:
After:
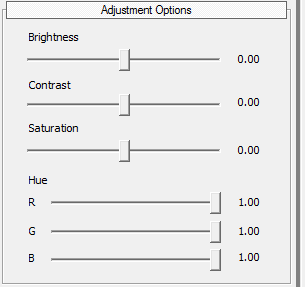
1.13.6 Bloom Layer
The Bloom layer can be used to adjust the Brightness, Contrast and Saturation in a certain area.
When creating a new style, this window should get enabled:
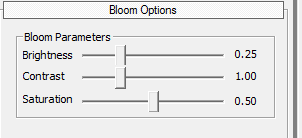
There are 3 options.
Options
- Brightness will change how bright it will be in this area.
- Contrast will change the contrast in this area.
- Saturation will change the saturation in this area.