Format: Numeric list
Font: Font Face
Colors: limegreen, teal, orange, red, blue
Language: AE
Parts Index
- World Editor Tools I
- World Editor Tools II
- World Editor Tools III
- World Editor Tools IV
- World Editor Tools V
- World Editor Tools VI
Index
1.0 Editor Mode
1.1 Preparation
1.2 Placement Tool
1.3 Group Link Tool
1.3.1 Respawns
1.3.2 Unified Entities
1.3.3 ProxyPatrollers
1.3.4 Unique Entities
1.3.5 Inverse Unique Entities
1.3.6 Any Entity
1.3.7 Decorations
1.3.8 Patrol Points
1.3.9 Monsters And Weapons
1.3.10 Patrollers
1.3.11 Wander Points
1.3.12 Npc Wanderers
1.3.13 Riftgates
1.3.14 Dungeon Entrances
1.3.15 Devotion Shrines
1.4 Hill (Raise/Lower) Tool
1.5 Noise Tool
1.6 Smooth Tool
1.7 Plateau Tool
1.8 Raise Plateau Tool
1.9 Copy Terrain Tool
1.10 Ramp Tool
1.11 Brush Tool
1.12 No Pathing Tool
1.13 Sector Paint Tool
1.13.1 Fog/Lightning Layer
1.13.2 Name Layer
1.13.3 Sound Layer
1.13.4 Boss Layer
1.13.5 Day/Night Cycle Layer
1.13.6 Bloom Layer
1.13.7 Climate Layer
1.13.8 Damage Layer
1.13.9 Adjustment Layer
1.13.10 Level Limit Layer
1.13.11 Riftgate Disable Layer
1.13.12 View Distance Layer
1.13.13 PvP Layer
1.14 Water Tool
1.15 River Tool
1.16 Wave Tool
1.17 Zoom Tool
1.18 Undo/Redo Tool
1.19 Ingame Zoom
1.20 Ingame Camera Angle
1.21 Map Selecting Tool
1.14 Water Tool
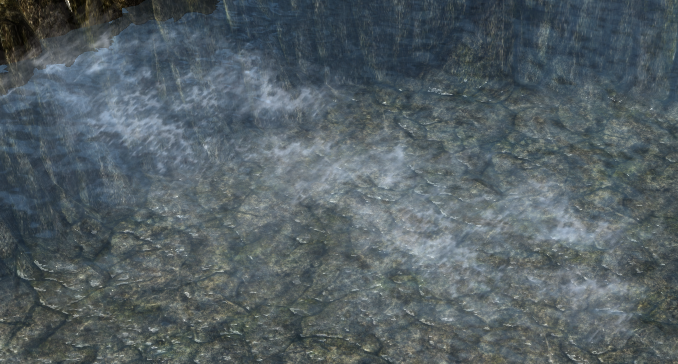
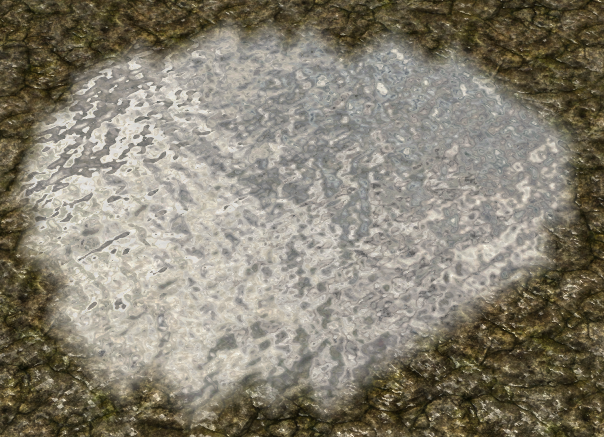
The Water Tool is used to create water in lakes, seas etc. Also Blood and other types of fluids can be created using it:
The Water Tool can be found here:
When clicking the Water Tool, these two windows (Water Brush Properties and Water Types) should open on the right:
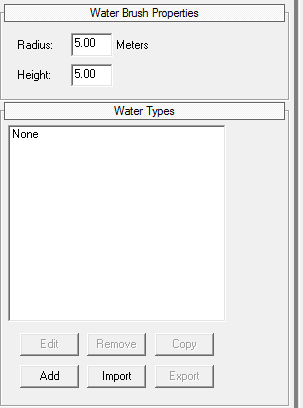
First, you need to create a new watertype. To do this, click “Add”. When you select your new watertype which should appear in the list above, you can draw it on the ground as the cursor will turn into a brush.
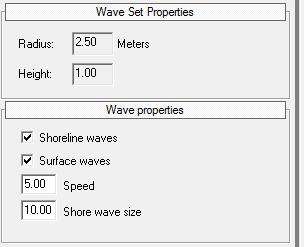
You can set the Radius of the brush in the Water Brush Properties as well as the Height of the water (0 is on the ground, negative is below it).
Also here you can im- and export watertypes by selecting them and clicking “Export” or by clicking “Import”. Watertypes are saved as .wtr files.
Copying watertypes also works by selecting them and clicking “Copy”.
If you want to remove parts of the water, just hold shift pressed and draw over the places where you want the water to vanish.
To edit a watertype, you can either select it and click edit or double click it’s name in the list. (I recommend double clicking as clicking edit crashed my editor)
When editing a watertype, this window will open:
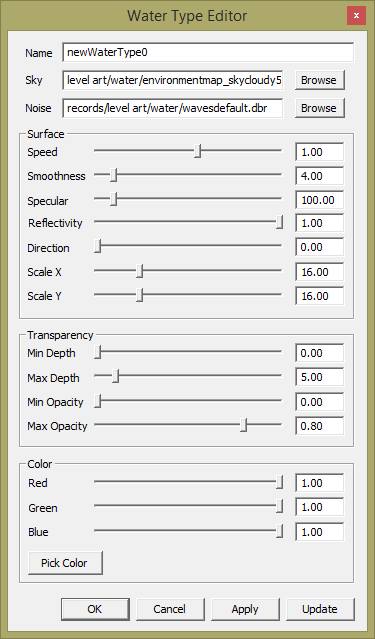
There are a bunch of options.
Options:
- Name is the name of the watertype in the Water Types list.
- Sky is the texture of the sky. When clicking Browse, a resource picker window will open. Caution: When moving the window it will turn blank for some reason.
- Noise is the texture that is used to simulate noise in the water. When clicking browse, the same window as for sky will open.
- Speed indicates how fast the water is flowing and if forward or backward dependant on the direction.
- Smoothness indicates how smooth the water is.
- Specular indicates how specular the water is.
- Reflectivity indicates how strong the water reflects the sky.
- Direction sets the direction in which the water will flow.
- Scale X will stretch / compress the waves in x direction.
- Scale Y will stretch / compress the waves in y direction.
- Min Depth is how good one can see through the water minimum.
- Max Depth is how good one can see through the water maximum.
- Min Opacity determines how strong the minimum opacity is.
- Max Opacity determines how strong the maximum opacity is.
- Red indicates how much red the color of the water has.
- Green indicates how much green the color of the water has.
- Blue indicates how much blue the color of the water has.
- Pick Color will open an advanced color pick window.
The buttons “Update” and “Apply” aren’t needed anymore as changes will be shown directly on the painted water of this type when you change it’s properties.
1.15 River Tool
The River Tool can be used to create rivers, as the name says:
It can be found here:
![]()
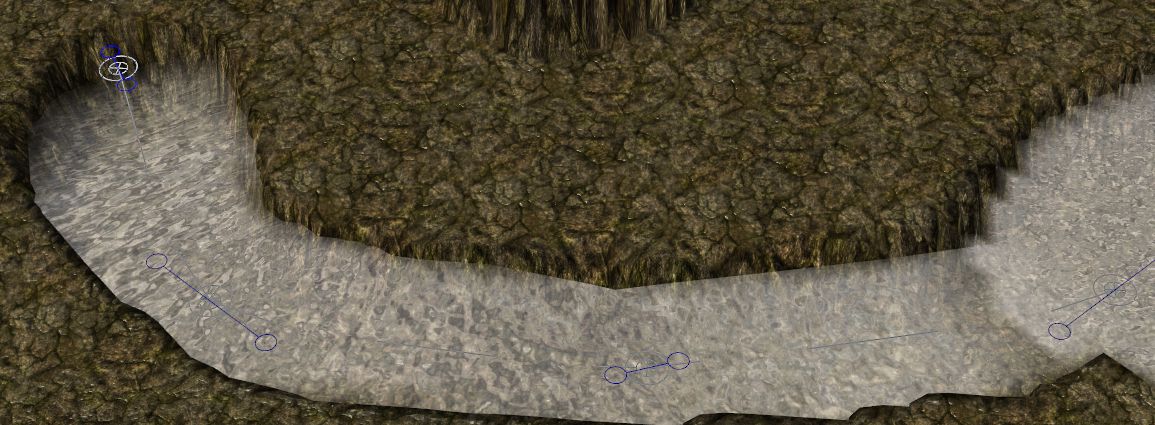
To use the River Tool, you first need to create a watertype and draw it at the place to where the river may flow.
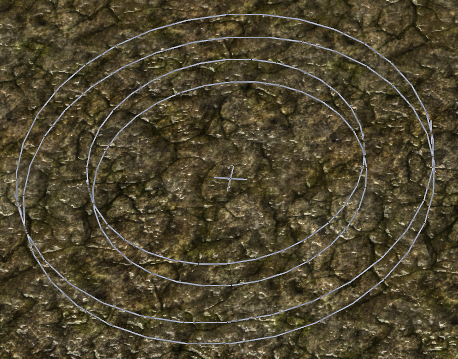
Then select the River Tool and in it’s window (which looks like the water tool window) the watertype that you want to work with and hold shift pressed. Your cursor should turn into something liket his:
 (http://epvpimg.com/9f7if)
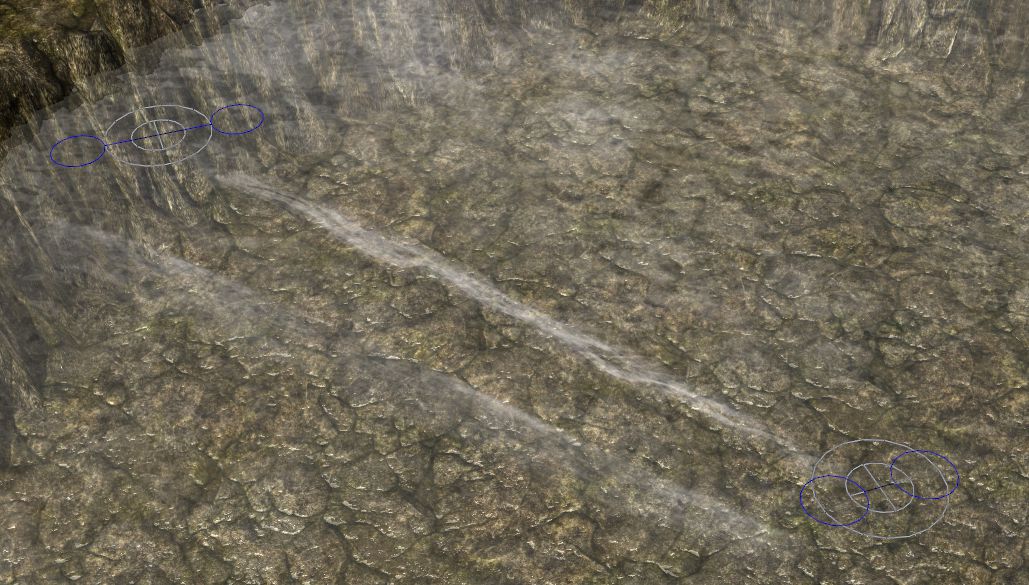
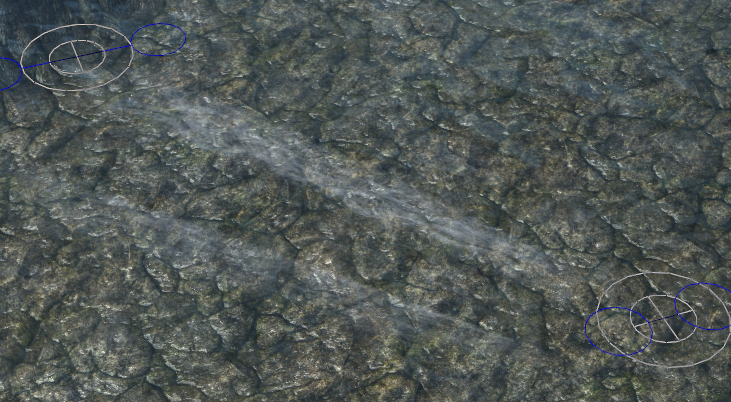
Now hower over the beginning of your water, press shift and left click in the water:
A point like the one in the picture above should appear.
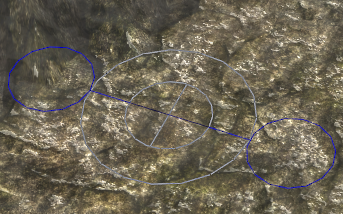
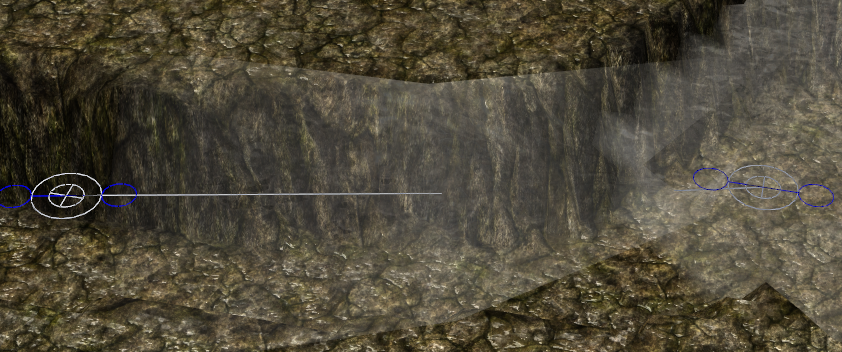
Now hold shift pressed again and click to where you want your water to come from. It should look like this now:
Looks a bit strange, no?
No problems since we can change that.
When you put the cursor between the inner and the outter circle, it should turn into an up / down arrow. When holding left mouse button you can now move the whole river up and down.*
Also you can adjust the width of the river: Put your mouse between both circles on the left or right side of the point. It should turn into a right/left arrow. When dragging it now, the width of the river will change. Caution: This tool is very sensitive.
Now we just need to adjust the direction in which the river flows. This can be done by adjusting the two blue circles that are connected by a blue line. Click them and hold left mouse button down to adjust them. When you move them around you will notice that the direction in which the river flows will be changed.
Now add some points more to make an entire river out of it:
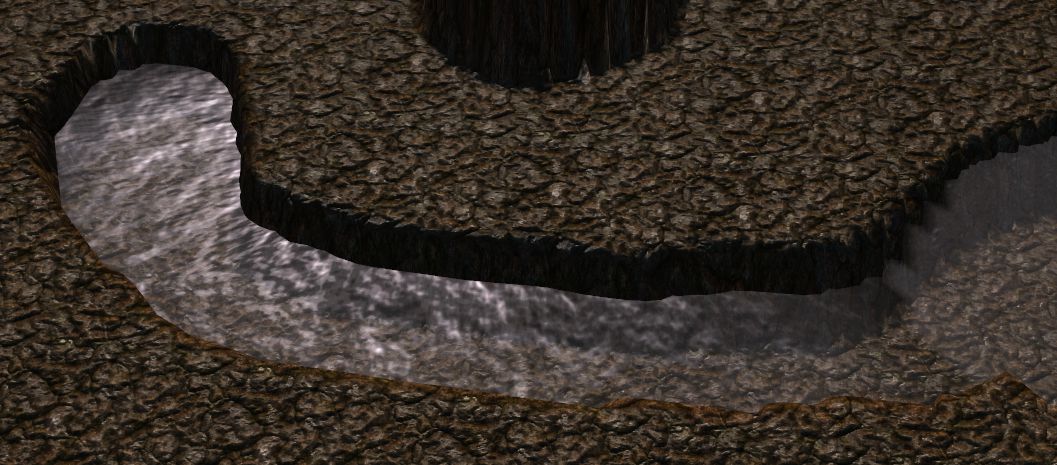
And that’s all the magic!
Now if you accidentially put wrong points, you can delete the last point by pressing Backspace (The button you press to delete characters when misspelling a word).