Oh, are you going so far? That will save us time.
Just in case:
FontForge only targets the C drive folder, so create a folder like “fonts” in the document in advance and copy the font you want to synthesize there.
-
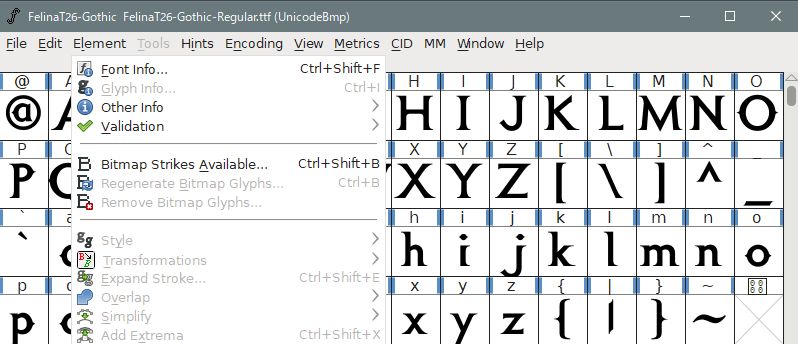
Click the font information from the element.
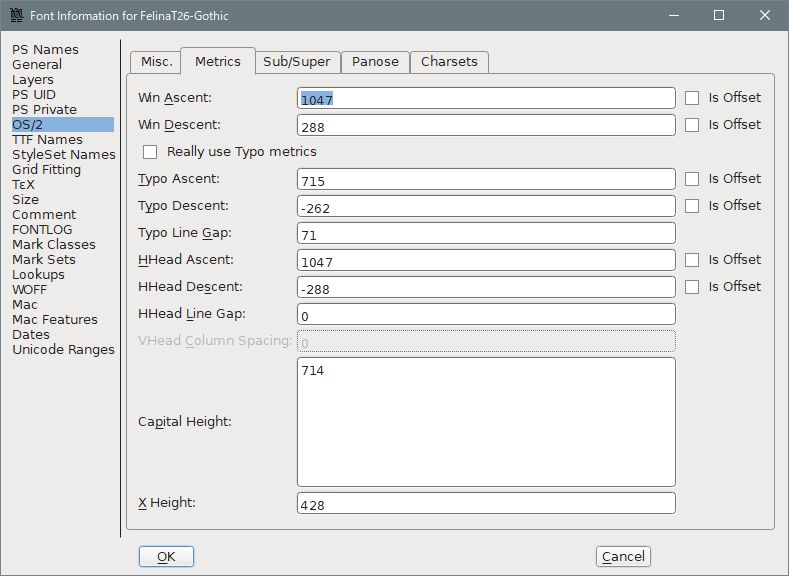
If you select OS / 2 in the left column, there is a metric tab on the right side of it that opens it.
There are various items, but to lower the font position, just change the “Win Ascent” value in it.
(If you can’t enter the value directly, you can paste.)
-
Increase the value by 100 units and press the OK button.
-
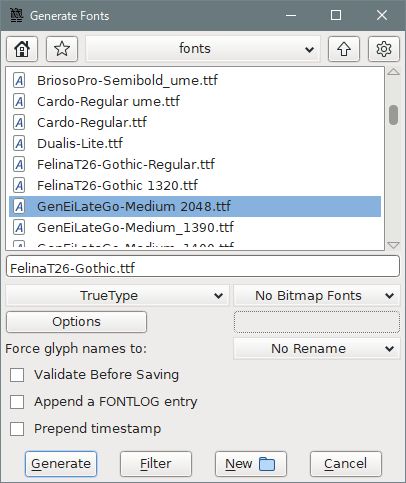
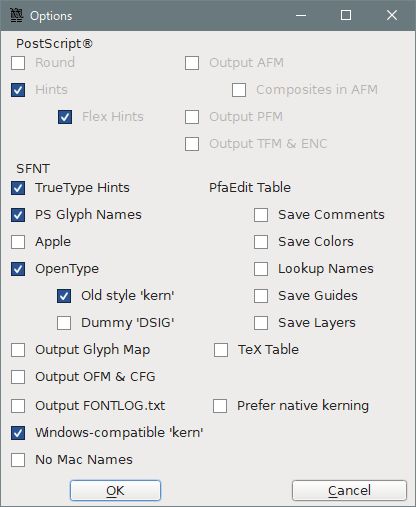
Select “Generate Fonts (G)” from the file and change the name of the font. At that time, check the options as shown in the figure.
-
Copy the changed font to the source of the font MOD folder in the working folder, and create linbiolinum_shadow-lg_spaced.fnt and nevisshadow-lg_spaced.
The database value is
linbiolinum_shadow-lg_spaced
Size 14, 20, Bold Outline, 1
(Monster health value during battle, Monster level)nevisshadow-lg_spaced
Size 18, 26, Bold Outline, 1
( Race name, Monster name)

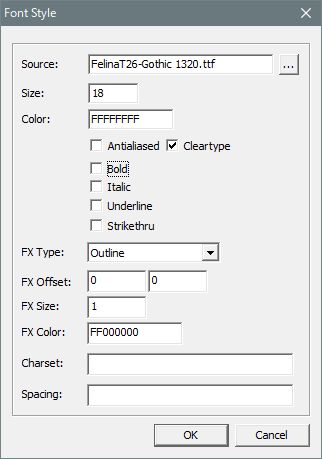
- For FX, choose the outline or shadow you like, and decide the FX Offset and size as you like.
Choose either Antialiased or Cleartype. Check bold as you like (on in database).
It’s done, but it won’t fit in well if you don’t make it a few times, so it’s hardest to determine the “Win Ascent” number.