Hey, Sandcaster the artist back again with another behind-the-scenes art post!
This week, we want to offer you a look at some of the process of creating a new building for Farthest Frontier - from the earliest idea right up through the completed in-game building!
If you’d rather indulge in more of Farthest Frontier’s mechanics however, you’ll be pleased to know that Farthest Frontier’s official Game Guide (much like Grim Dawn’s before it) has just gone live! You can check it out for in-depth information on many of the game’s systems!
When we first start out to make a new building for Farthest Frontier, Medierra will describe to me the building itself, what role it will serve, what materials it will require, and how far along the town will need to be before it is unlocked. With that core information, I can start generating ideas for us to consider.
Today we’ll be using the upgraded Trading Post as an example building to show you guys the whole process. We needed a bigger, fancier version of the Trading Post that would come somewhat later in the game, and would use a lot of bricks in its construction. I also knew it should look related to the un-upgraded Trading Post, so that building one would feel like a natural visual progression.

From Concept
At this point, it’s idea time! To get things started, I dive into my folder of reference photos of historical architecture from time periods and locations that match Farthest Frontier’s setting.
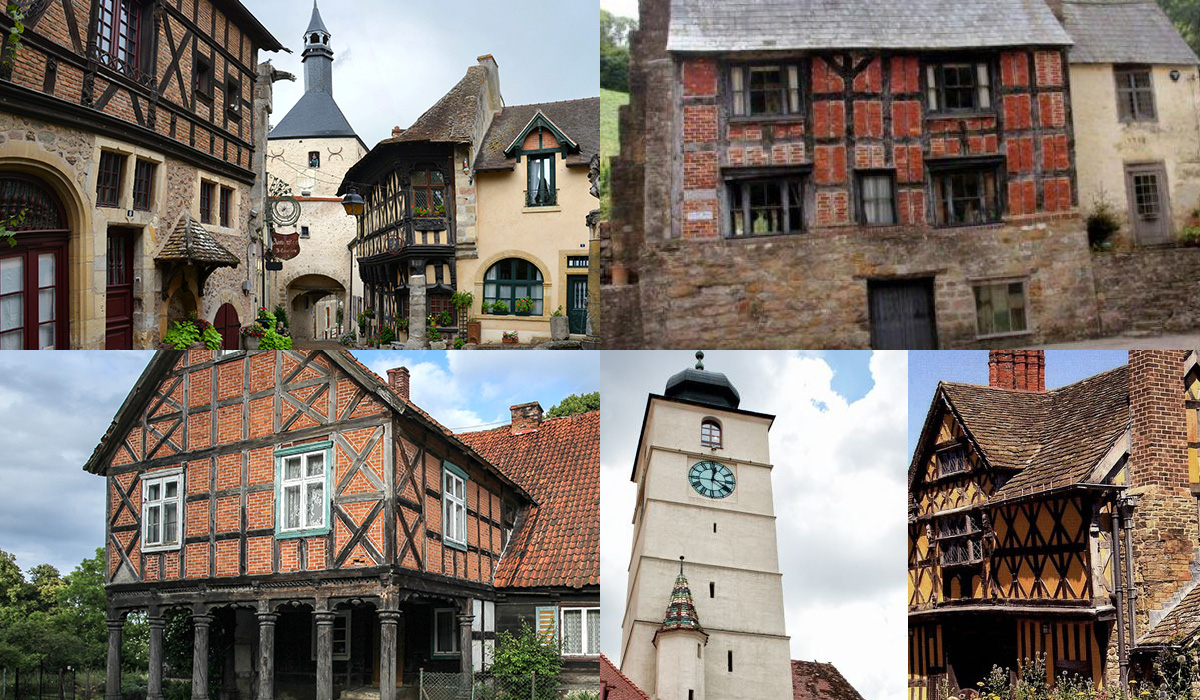
Armed with these references, I start sketching out ideas for the upgraded Trading Post on (digital) paper. These concept sketches are simple and fast - each one a different idea for the shape the building could take, without digging too deep into specific details. At Crate, because we are a small team and the people drawing the concepts are often also the same people who are creating the in-game asset, we don’t usually put a ton of time or detail into our concepts. Just enough to get the idea down, and work out some of the fun features and details that will make it pop in-game.
To Reality
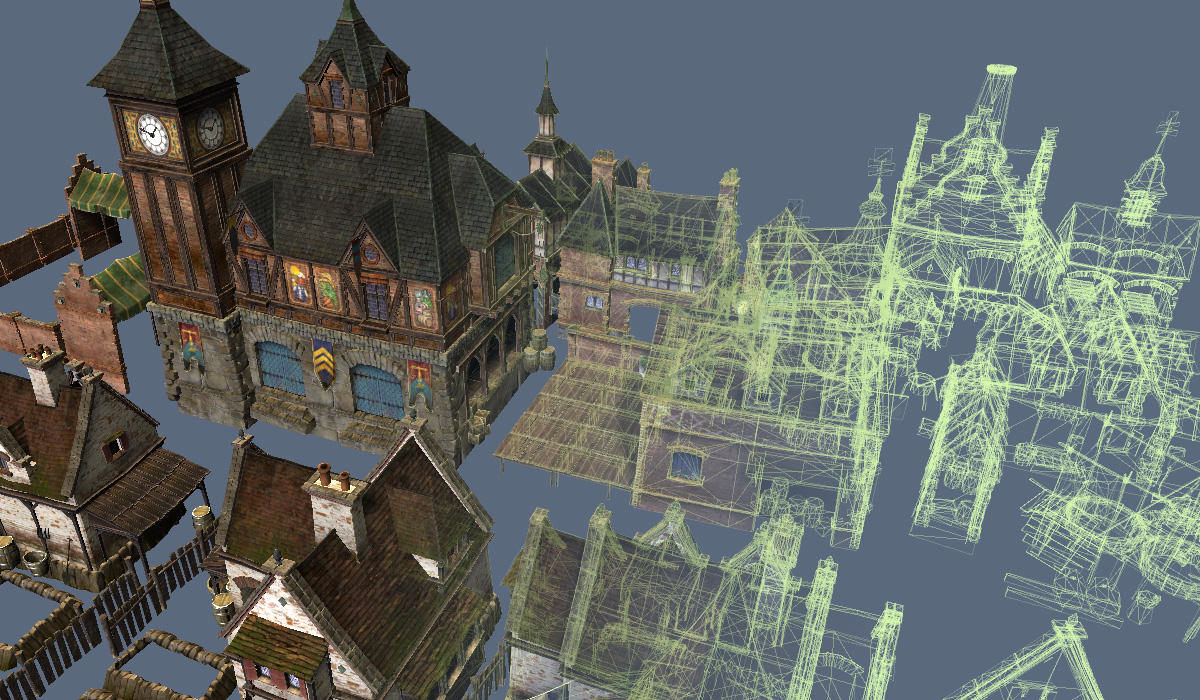
Now it’s time to get into the real work: modeling the building in 3D. While modeling and texturing typically go hand-in-hand, I prefer to get the bulk of the modeling done before getting into any texture work. I’ll start big, trying to capture the proportions and angles from my concept drawing, and gradually work my way down into smaller details.

Once the building is fully modeled, it’s time to start texturing it. In game art, “texturing” refers to the process of painting a 2D image which is applied to the surface of the model. It’s how we put bricks on walls, and shingles on roofs. For me, it’s the funnest part of the process - but before I can start, I need to “unwrap” all the surfaces of the 3D model into a single 2D layout. This will determine which areas of my texture sheet will be applied to which faces on the model. Some faces, like repeated windows, can share parts of the texture - this is great, and allows me to be more efficient with the space I use! Here’s a peek at what all those unwrapped faces look like:
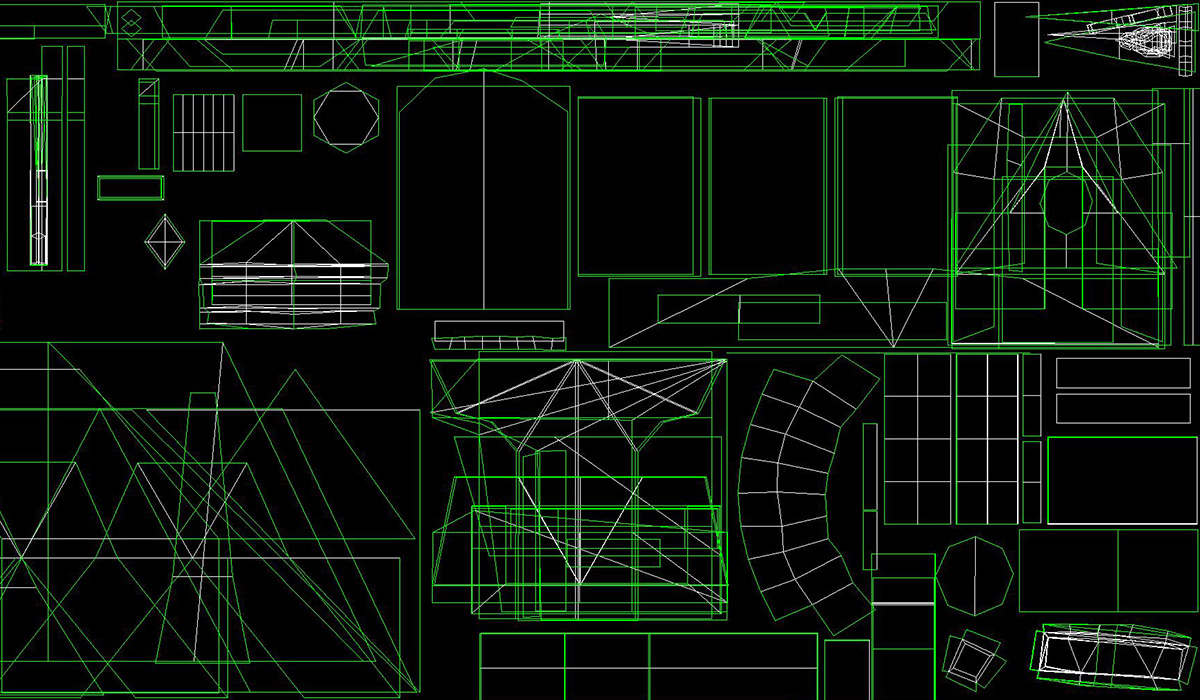
I’ll take that into photoshop to use as guides, showing me which part of the texture sheet is going to end up where. And then it’s time to start painting! On Farthest Frontier, I use a mix of photographs and hand-painting to texture our buildings. Even when I use photographs, I nearly always do a lot of touch-up work by hand to add stains and wear.

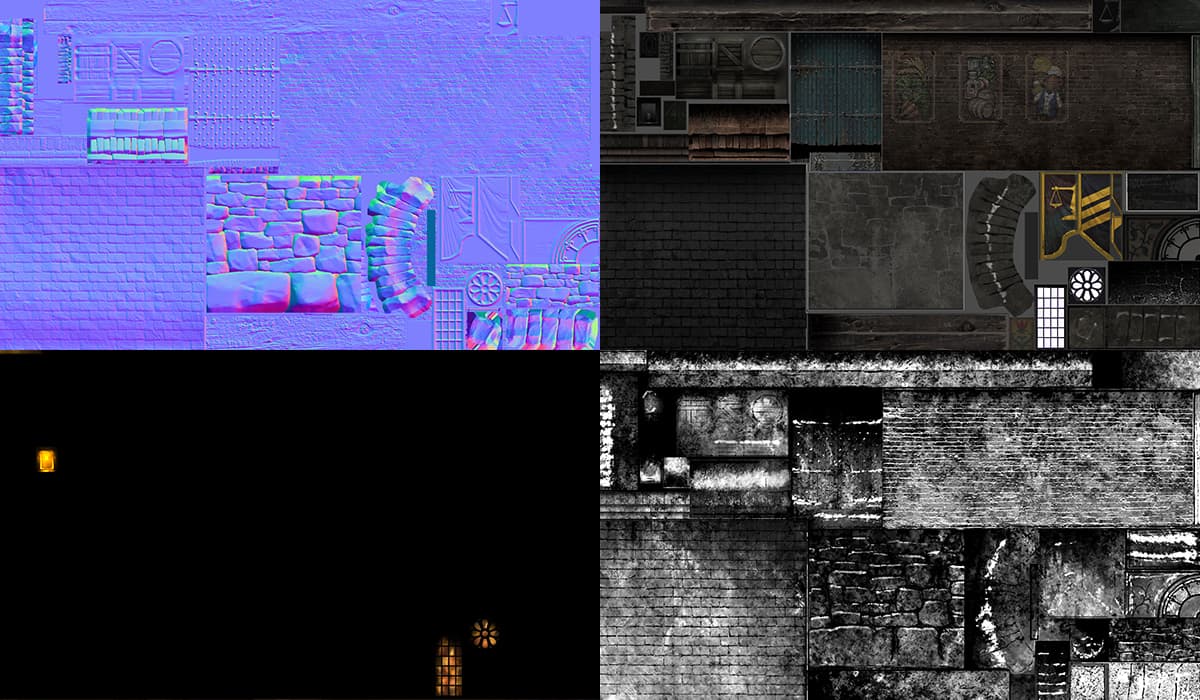
But! The texturing process isn’t done yet. We use a “normal” texture map to bring out additional surface details. Specular maps show the highlight color of reflected lights, and how shiny areas of the building are. Glow maps show what areas of the building should light up in winter and what color that should take. Finally, snow maps show where snow should appear in winter.
At last, with all the texture maps complete, it’s time to set up the building decal. In Farthest Frontier, each building sits on a decal which is applied to the terrain around it - showing things like cleared dirt, paving stones, cart tracks in the mud, etc.
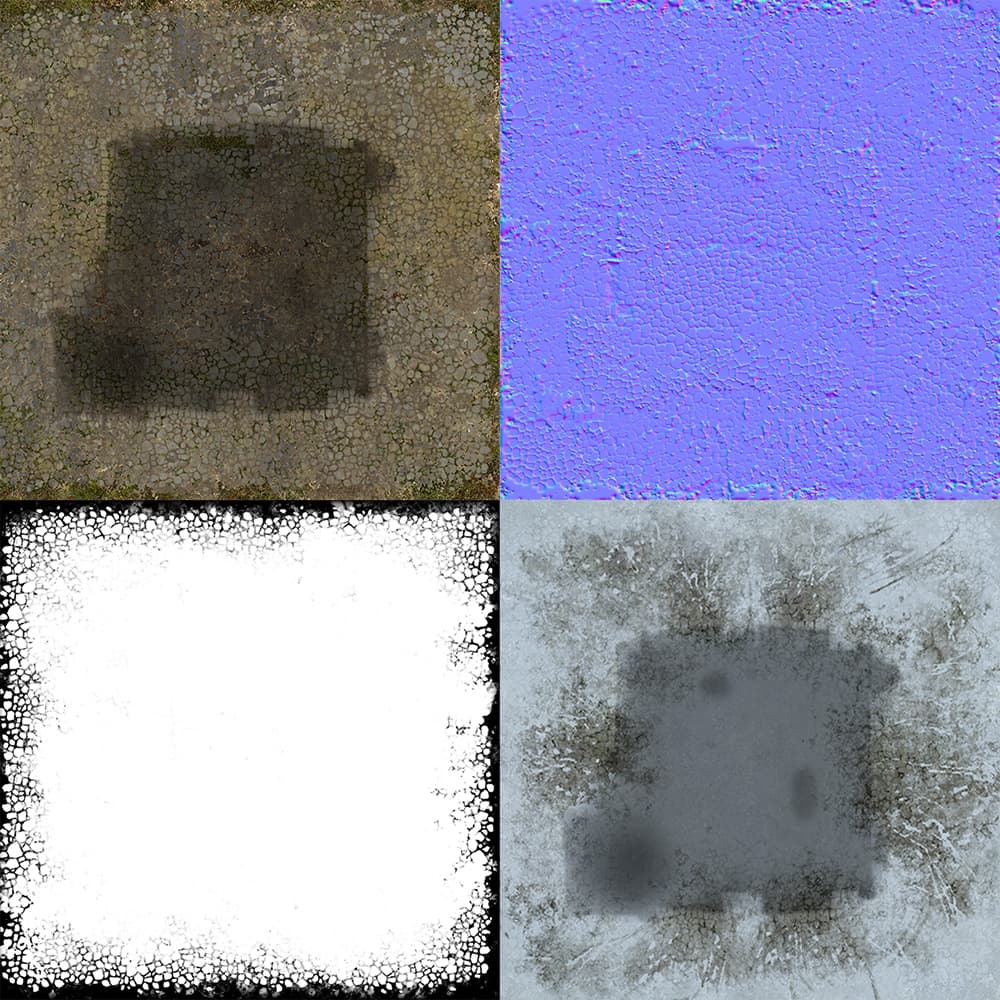
This comes with its own set of texture maps. You might be wondering what that dark blob in the center of the texture is - that’s the footprint of the building itself.
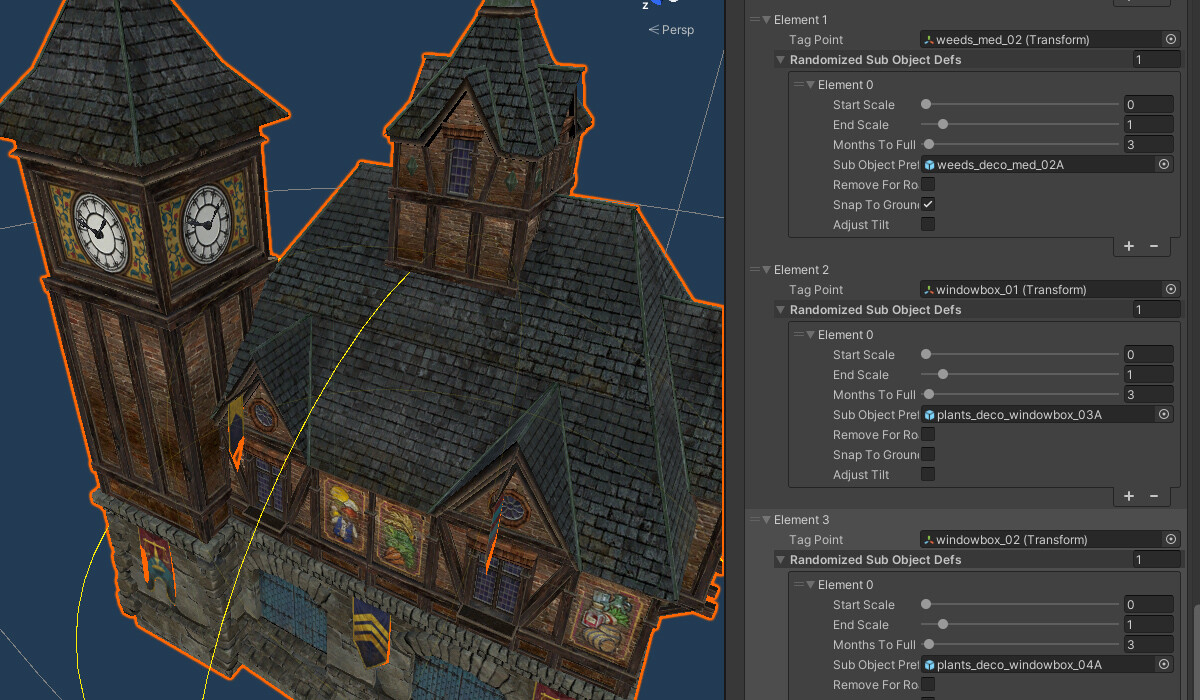
Only one step remains - and that’s adding all the little plants and weeds that grow around our buildings. Using Unity’s SubObject system, I add nodes within the model and then link each node to the list of objects that can grow around the building.
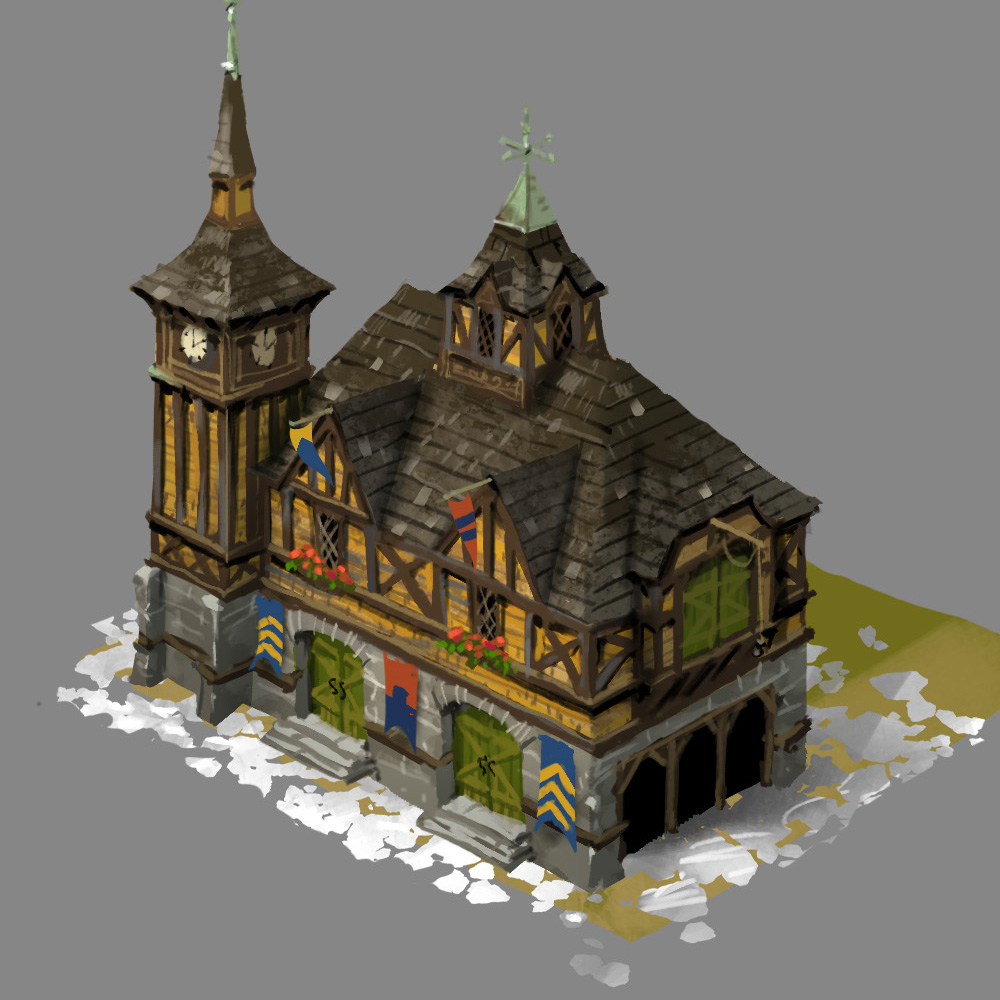
And In-Game
Finally it’s time to see it in-game! Model, texture, decal, and detail objects all together create the finished product. Here’s how the upgraded Trading Post ended after the whole process:

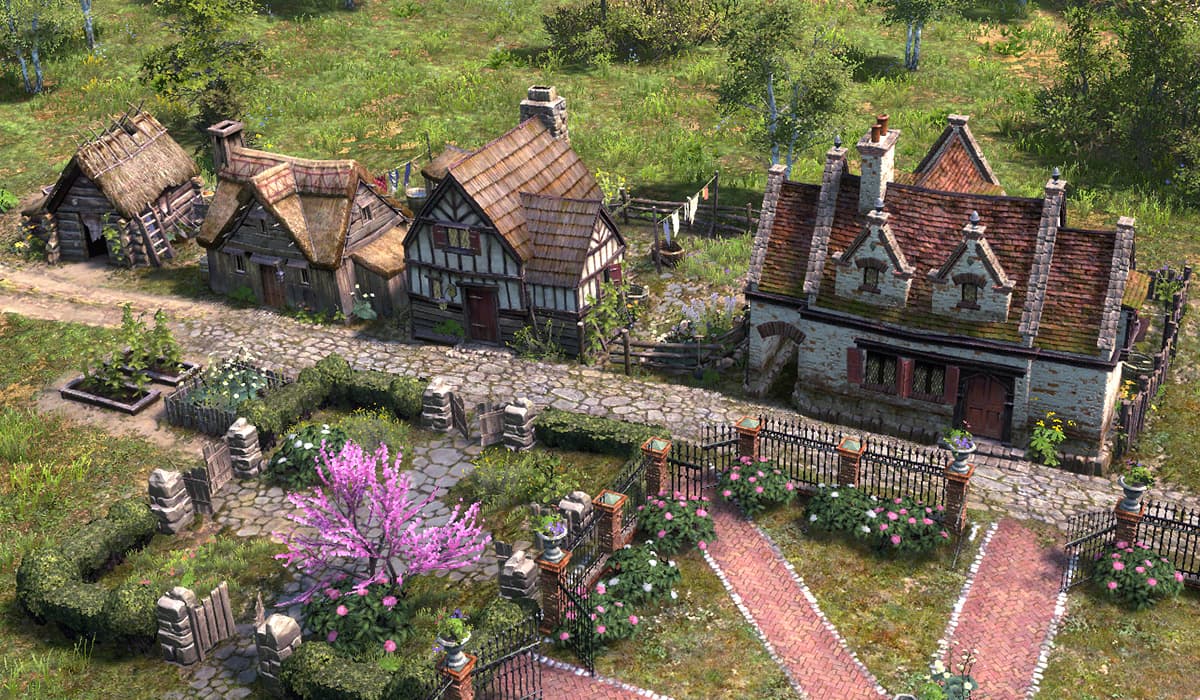
Visual Progression
This type of satisfying visual progression is something we strived for throughout Farthest Frontier. Upgraded buildings don’t just offer improved functionality, but also visually represent just how far your settlement has come from its humble beginnings.
There’s no better example of this than how homes upgrade as your town grows and prospers. Your earliest homes are nothing but crude log huts where villagers take shelter from the elements. But as your town grows more prosperous and secures more resources, your villagers will upgrade their homes to greater and greater heights.
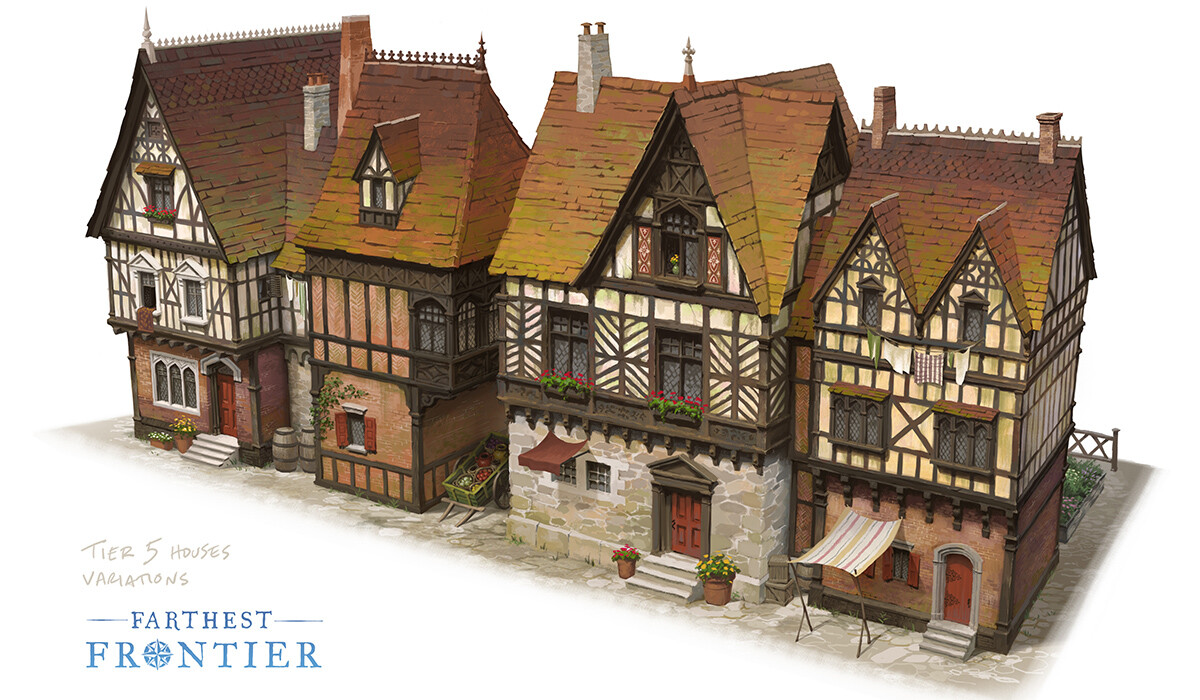
When Early Access begins next month, you will be able to upgrade your homes all the way to Tier 4, but you can look forward to the 5th and final tier down the line. These mansions will truly showcase the wealth and splendor of your bustling town! Here’s a sneak peek at what you can expect to see…
Hope you enjoyed seeing the behind-the-scenes process of creating a building for Farthest Frontier. If you’re eager to learn more about the game, check back on 08/01/2022 for our final Journey Log!


 Amazing you can make such beautiful artwork from all that Sandcaster.
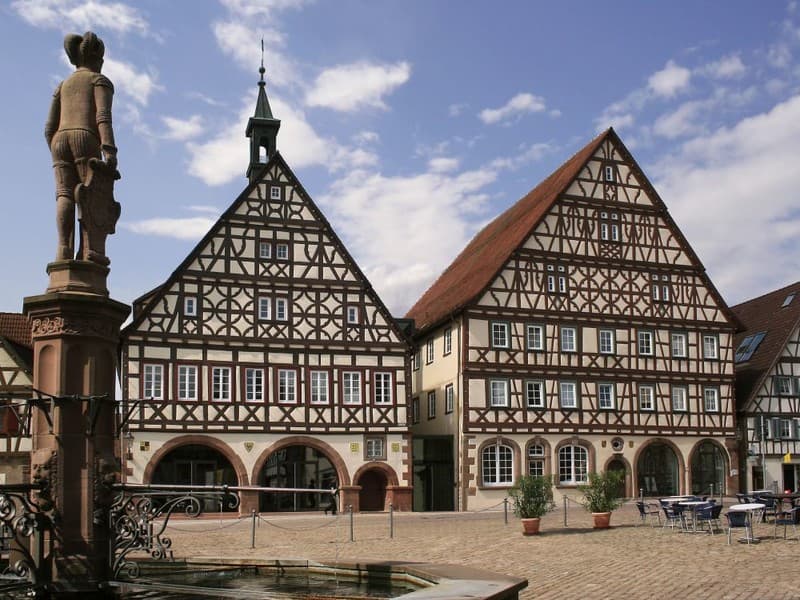

 (Just kidding!)