External link to the tutorial
You can view it with nicer formatting and an index (WIP) on my site. May also be more up to date than this post.
===========
+++
date = “2016-12-06T23:22:39Z”
title = “Grim Dawn PSEditor Tutorial”
+++
[WIP] Tutorial to using Grim Dawn’s PSEditor
Preamble
This tutorial is targeted at intermediate users. If you are a beginner to modding, I recommend you to start out with one of the following tutorials:
<p class=“todo”>TODO: link to other tutorials</p>
This tutorial will neither nor is intended to explain all functionalities offered by PSEditor, most of which are self-explanatory anyways. Instead, it will mostly cover how to avoid common and uncommon pitfalls in the use of PSEditor and go into its limitations.
If you have any questions or a suggestion on what to add to this tutorial, please comment on this thread in the Grim Dawn forums.
Getting Started
PSEditor is an editor for Grim Dawn allowing you to create and modify .pfx files used by the game for particle effects. It is a very powerful, but easy-to-learn tool, however it has a few quirks which you’ll need to pay attention to for your work to go smoothly. Please note that if you are using an ATI card, the editor is likely to crash more often than it already does. It’s not stable and some loading times are abysmal.
After starting up PSEditor, you will be presented with a blank window. Your only option is to either create a new effect (File->New) or load an existing one (File->Load). If this is the first time working with PSEditor, you will likely want to load an existing effect for examination.
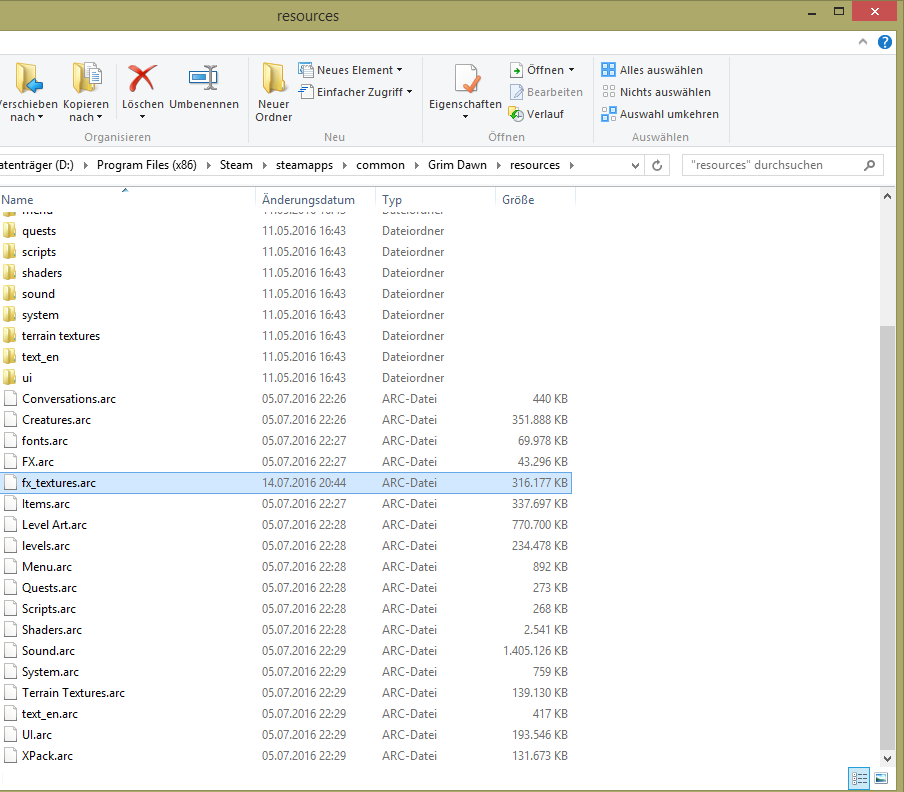
Set up directories
In order for PSEditor to be able to load up anything, your files must be organized in a particular way. When starting out with a new mod, you have set a working directory via the Asset Manager. PSEditor will always use your working directory as a root. There’s no way to change this, unfortunately.
Under the root, create a new directory called source. This is where PSEditor will be able to load effects from. In order to be able to load Grim Dawns existing effects, run the following command from within your Grim Dawn installation folder:
ArchiveTool.exe resources\FX.arc -extract "C:\<path o\your\working\directory\>source"
Note: The path to source must be absolute. This will take some time to complete. Once done, you’ll have all particle effects of the game residing in source\fx\particlesystems (and a lot more). Please mind that existing particle effects use other resources residing in FX, so don’t delete the other folders.
While I recommend sticking to Grim Dawns way of organizing your projects, I have created a directory in source\WIP which I use for faster access to my own effects that I’m working on.
Use your effect in a mod
Once you’ve created or modified your first own effect, your next step to actually use it will be the Asset Manager.
Inside the asset manager, navigate to the folder dedicated to your mods effects in source, right click in the file window, and select “Import…”. Now select your custom effect from where you saved it to inside PSEditor (note that this will be somewhere in the source folder inside your working directory). It will create a new entry in the file list with the same name.
Next, you need to create an asset from the source file. Right click it, select “Auto-Create Asset” and hit “OK”. Next time you build your mod, the effect will be included in its FX.arc if it is referenced within your database.
Your last step will be to create a database entry to use the particle effect. Then you’re done.
Basics
Refer to the Titan Quest wiki page for PSEditor until I finish writing this bit.
Introduction to emitters
An emitter is, as the name suggests, a place where particles are emitted from. The attributes of an emitter determine what your effect will look like, where an effect consists of multiple emitters. I will give a short overview of the different settings for emitters (and the particles they emit alike), but your path to success will mostly be through experimentation.
The settings mainly consist of particle texture, shader, emitter attributes like size, position and lifespan, particle attributes like size, color, transformation, physical attributes like friction and gravity, and a few specific options concerning light and motion.
An effect consists of multiple emitters, each of which can have these options individually adjusted.
Curves
Curves are the main way of changing attributes. They represent a graph of the attribute in relation to the lifespan of the emitter or particles. In order to edit a curve, click on the appropriate attribute button. See below for a sample screenshot of a possible gravity curve:
TODO: insert screencap of gravity curve
As seen in the screenshot, a curve consists of what I will henceforth call “nodes”, the square dots which determine the path of the curve. You can add and remove nodes with right click, and adjust a node’s position holding down left click.
There is also a red line in the center. This red line represents the x-axis, or the zero value’s height on the y-axis. This line is either in the center of the curve for attributes which can assume negative values, or at the bottom for those that can only be positive.
At the top of the screenshot, you are given information on the timespan this curve covers with its x-axis, and can set a selected (left click to select) node’s y value precisely or even undo your last actions. Be careful though, there’s no redo!
Most importantly however, you can set the value range of the curve, which is the maximum value on the y-axis. You will have to experiment to see what value ranges are appropriate for different attributes.
Note how the attribute “color” under Particle Options has four different curves as seen below. Each represents one byte (ranging from 0 throu 255) of an RGBA value. Each of the curves can be adjusted individually.
TODO: insert screencap of color curve
Setting overview
Global
These apply to the PSEditor as a whole, and have no effect on your finalized particle system.
As you may have noticed, you can change your camera angle by holding right click in the preview window and dragging your mouse around. You can also zoom out with your mousewheel. If you want to reset the camera angle and zoom, click “Reset Camera”.
“Run System” will run your particle system in the preview from the start. This is important for non-looping emitters or resetting the “Max Particles” count, which counts the highest amount of alive particles since the last click on “Run System”.
Everything else is self-explanatory. “Debug Lines” to toggle debug lines, including an emitters bounds and the axis display. “Simulate Flight” to see how your system behaves in motion, it will simulate an orbiting flight around the center of the preview. This can be important for emitters attached to a projectile or character, for example. And “Pause” pauses everything, including all attribute changes, the motion of emitters and the decay of particles.
Emitters
Emitter settings apply to the whole emitter and can determine where and how particles are emitted.
Emitter Life Span: Perhaps the most important attribute of an emitter, this value is its time to live in seconds. After this time, the emitter will stop emitting projectiles (unless it’s looping). It also determines the x-axis value range of all attribute curves.
“Velocity” determines the velocity/speed at which particles are emitted. Unless the emitter is rotated or the emit angle is changed, particles will be emitted with a velocity along the vertical y-axis, displayed as a green line in the preview.
“Offset” determines the emitters position in the respective axis over time. Generally you will not want to reposition an emitter.
It is important to notice the difference between “Rotation” and “Initial Rotation”, or why it is important to have values for “Initial Rotation”. “Rotation” does not determine the rotation of the emitter at a given point in time, but rather the rotation speed at which the emitter rotates at a given time. “Initial Rotation” on the other hand is absolute and can be used to have an emitter emit particles in a certain direction.
While you can’t set the precise angle at which a particle is emitted with “Emit Angle”, you can set the total angle at which particles can be emitted. Imagine a cone: The higher the emit angle, the broader the base of the cone, and particles, if they have a velocity, will fly in a random direction from the cones tip to its base. At 360, they will fly into any direction.
“Emit Rate” determines how many particles will be emitted at a given point in time, and can be useful for thinning out an effect or making it more prominent.
The “Type” of an emitter determines its shape. There are different shapes available, all useful for different scenarios. Particles can only be emitted within that shape. TODO: find out what shell and skeleton is
Now this is where it gets interesting:
“Flatten Motion”: When set, particles will no longer move along the y-axis. Their motion will instead be flattened along the plane defined by x- and z-axis.
“Emit Locally”: When not set, particles will ignore the emitters motion, meaning that, after emitted, they will remain at the location they were emitted, taking velocity and other position-changing attributes into account. When “Emit Locally” is checked, they will “follow” the emitter, which is useful for particles which should be centered around a projectile and not leave a trail.
“Implode”: When set, a particles motion will no longer be affected by anything other than its velocity. Instead, particles will be drawn to the center of the emitter, where they then despawn. “Velocity” will still determine their speed.
“Looping”: Particle systems are attached to an object in game, for example a projectile. A particle system will be run once when the object spawns. This means that after the expiration of all emitters, no new particles will spawn. However, if “Looping” is set, emitters will continue to live until the object is despawned in game. Their life span will still have an effect, they will just loop.
Finally, while “Render” does not have any effect in game since every emitter is always rendered, it can be useful to see what an effect would look like without a certain emitter, by simply not rendering it when unchecked.
Particles
Particle settings apply to each emitted particle individually.
Light
These are settings which apply to particles spawned by the emitter. They allow you to have them function as a light source in game.
If you’ve come this far, the light settings should be fairly self-explanatory. Mind you that “Off During Day” only applies to in game regions with a day-night cycle, and the light will otherwise always be on. It is also worth to mention that “Shadows” will determine whether the light source created by your particles will cast shadows.
Editor Options
Advanced
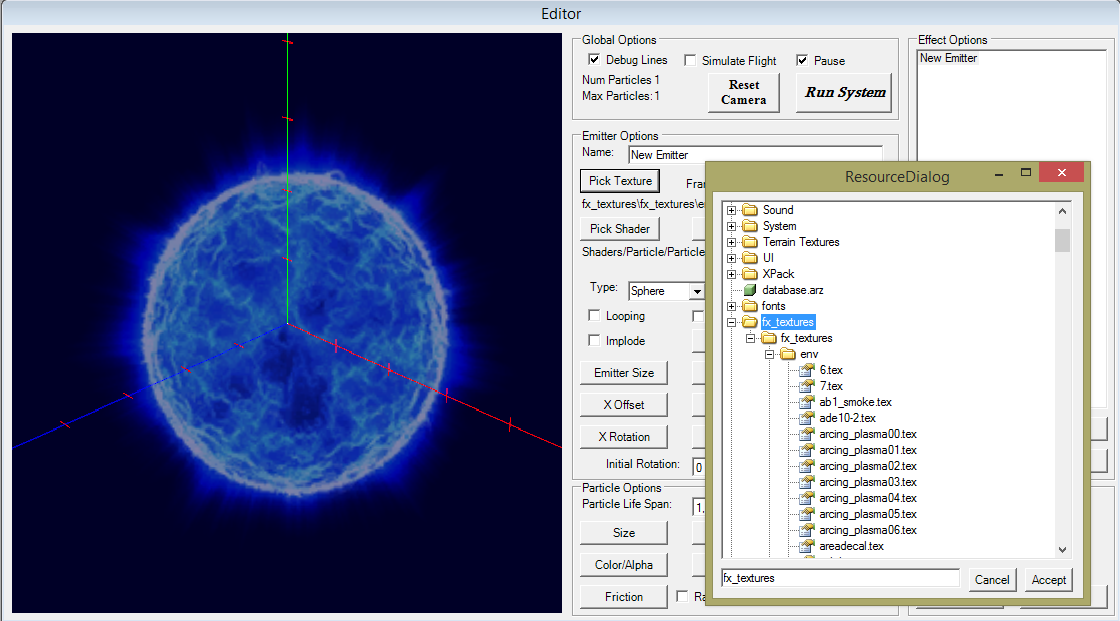
Custom textures
As you may have noticed when selecting a texture for your particles, PSEditor will load resources of the main game. This means than you must select a texture from the games own archives. To use your own textures, you have to put them in the game’s database folder. Please note that this is the Grim Dawn installation folder, not your mod folder and neither your working directory.
In order for the game to load up these textures, however, they must be present inside your mod’s FX.arc. To achieve this, you will have to import the texture into your sources, create an asset from it and compile the mod. This means that you must mirror the file structure you load the texture from in PSEditor in your mod’s source (effectively asset) directory.
For example, if you put your custom texture into Grim Dawn\database\fx extures (recommended), then you must also put it into MyMod\source\fx extures and auto create an asset from there. Otherwise, the game will not be able to load your texture.
Shaders and transparency
While working with dark effects, you may have noticed that it is not possible to create black particles by reducing the RGB values to 0 with the default shader. Rather, it would simply result in a grey texture. In order to achieve a dark effect, you will have to work with shaders.
There typically are three shaders to work with: Additive, combine and distortion.
Additive
Combine
Distortion
Tips & Troubleshooting
Save before you exit
While this sounds trivial, always make sure you save before you try to exit. PSEditor will not prompt if you want to save and will exit immediately, discarding any unsaved changes.
Do not set a curve’s value range to 0
It may seem like a good idea to simply set a curve’s y-axis value range to zero when you need to null it, but this will permanently disable the curve. There’s no way to restore it, even after reloading the effect.
Change background
You can change the PSEditor background color to any color of your liking via “Options->Background Color”. See Editor Options for reference.
The editor is black after loading an effect
As was pointed out in the forums, there seems to be an issue with certain installations of the DirectX SDK, particularly those from 3DMax. You will need to completely remove your installation and reinstall from the game’s _CommonRedist. If you don’t know how to remove your installation of DirectX SDK, google will help you.