Hello again, people! This is my second build post in the forum. I’m bringing something more tradicional when it comes to Pet builds this time.
Introduction
Defensive version with Tree of Life devotion and improved DA.
Aggressive version with Mogdrogen devotion, Bysmiel’s Domination and glassier setup.
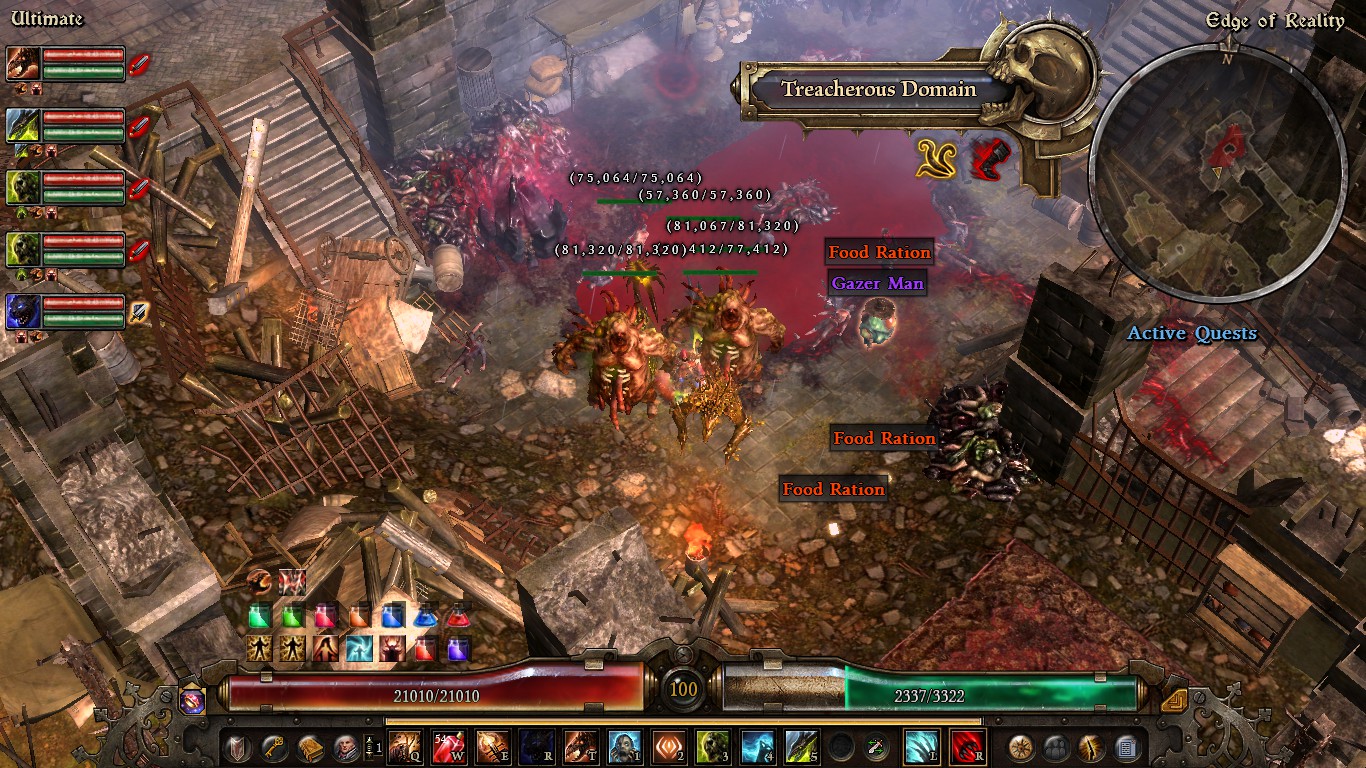
My previous build (Bane of the Winter King Pets) had a much riskier playstyle that involved get into the fights with the Pets in order to keep enemies debuffed with Veil of Shadow. This one mostly stays out of combat and attacks from a distance with Bone Harvest. We use ill Omen and Devouring Swarm to debuff the enemies and proc devotions.
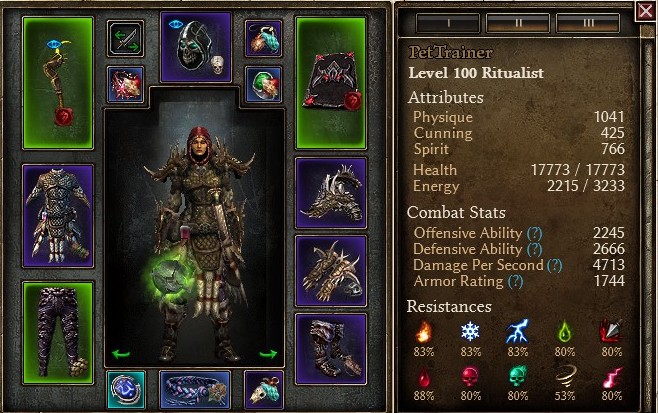
All buffs are active.
Skills and Equipment
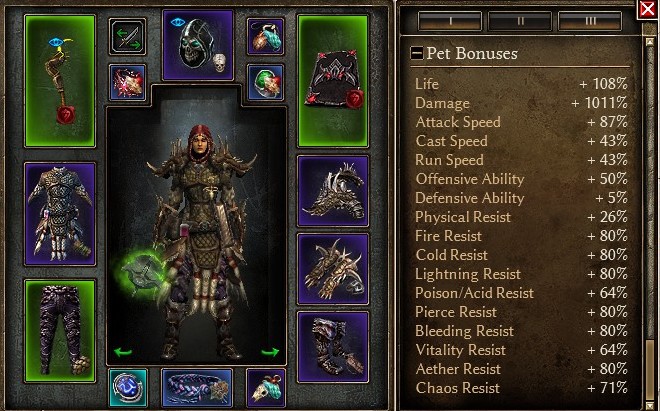
This build uses the Ghol’s Malice set to summon 2 Blight Fiends and use their huge AoE skills to debuff and keep enemies at bay. We also have a maxed Briarthorn, a maxed Conjure Primal Spirit, the Eldritch Hound from the Bysmiel’s Command devotion skill, 3 Spiders (from the gloves), a Wraith (from Reap Spirit), the Skeletal Servant (from the relic) and the Eldritch Talon (bonus from complete Ghol set). That’s a lot of minions! It can be a bit tricky to keep track of all of them. Toggled skills include 2x Presence of Might (from Seal of Might), Primal Bond, Mogdrogen’s Pact and Spectral Binding. This last one is a 1 pointer.
The item that enables this build is the Scorpius Pummeler. It converts all the Physical damage from Briarthorn and Blight Fiend into Acid damage and gives them a 50% crit damage bonus. You can farm it in the Korvan Sands and the Sunbane Oasis. You will also find Gannar’Vakkar in the Oasis. The amulet must be farmed from him. If you don’t want to use it, you can go for a Zaria’s Pendant. The Bloodsworn Codex is quite easy to farm but don’t become too obsessed with finding double Pet affixes. That can take an insane amount of time.
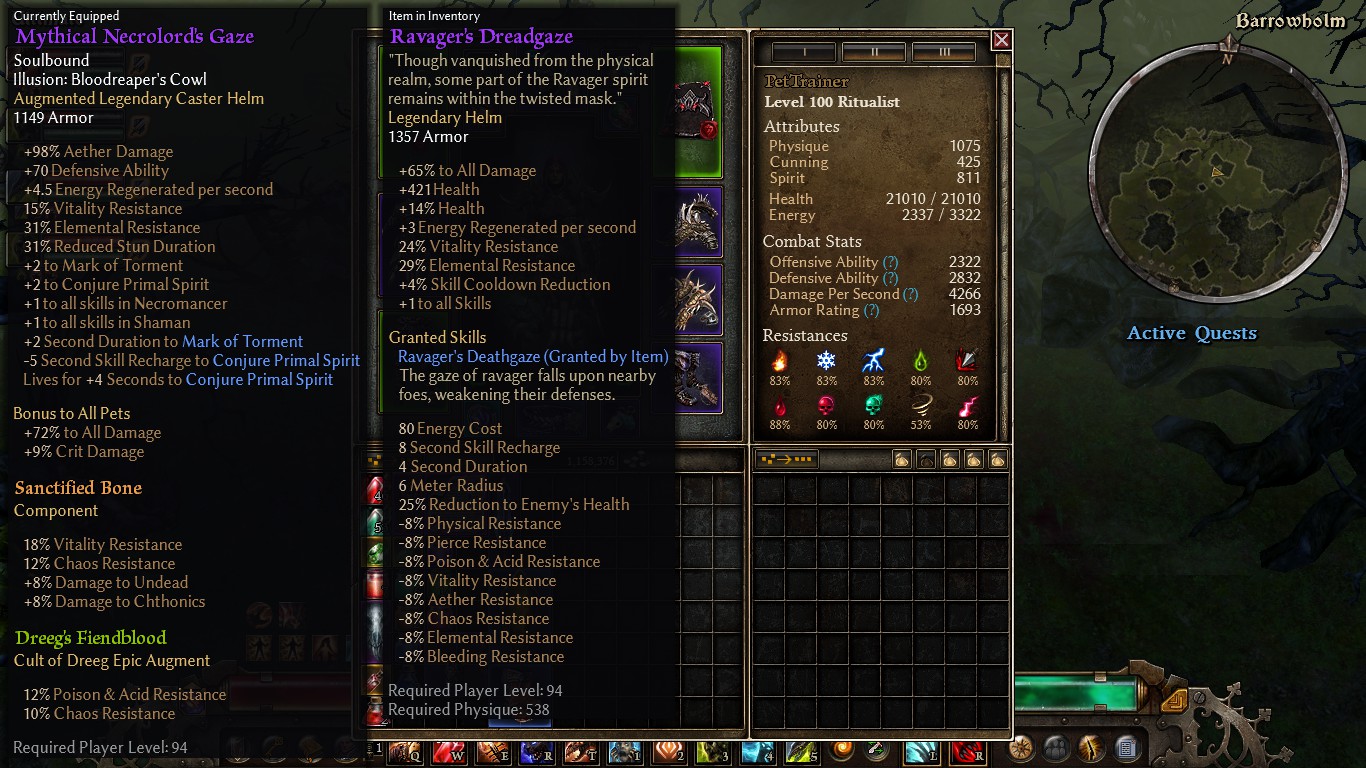
The Mythical Necrolord’s Gaze is craftable and has really good synergy with the build. A decent alternative is the Ascendant Cowl. The Ghol set also defines the build and can’t be swapped. The Mythical Fiend Flesh Greaves is very important and i wouldn’t recommend anything else. The Mythical Shadow Fiend’s Cord is really good but you can swap it with the Mythical Nosferattis. The Wildpact Emerald is covering the Poison and Acid Resistance for the player and Pets so i wouldn’t recommend replacing it. The other ring can be replaced with a Bloodsworn Signet. The pants can be farmed very easily but you can also use the Mythical Wildshorn Legguards. The relic is optional and you can swap it with any other you want. Just be sure to compensate for the loss of Vitality and Elemental Resistance.
Devotions
I haven’t really followed a plan. In fact, this is my first character ever. I used her to finish the campaign in Ultimate for the first time but i never really finished the build. Now, she is complete. I would have a devotion plan if i started this again from scratch. So, i just formulated a path using Grim Tools that is almost identical to the one i’m using. The only difference is that i’m going to replace Fox with Raven as it just makes more sense.
UPDATE: I wasn’t really satisfied with the old setup, so i changed it to improve defenses. This means that the build loses Mogdrogen the Wolf, but offensive capabilities are good enough already. Defense ability (and defense in general) was really lacking, but now it is a lot better and we also have Turtle Shell for emergency damage absorption and Healing Rain for the Pets.
Purple Crossroad → Shepherd’s Crook → Remove Purple → Green Crossroad → Spider → Remove Green → Red Crossroad → Jackal → Bysmiel’s Bonds → Yellow Crossroad → Turtoise → Panther → Eel → Solemn Watcher → Sailor’s Guide → Blue Crossroad → 4 points in Tree of Life (for Healing Rain) → 4 points in Murmur (for Rumor) → 5 points in Huntress (for Rend).
The extra spirit is important to enable the usage of the off-hand as it requires a high amount of spirit. Only throw enough attribute points in spirit to equip the item. The rest should go into physique.
This devotion path is very similar to the one i’m using. It’s probably not perfect but that’s more or less how i finished the build. If someone finds a better devotion path that keeps all the procs, feel free to share in the comments.
UPDATE (1.1.9.7): I’m an idiot and actually forgot to update the devotions on my character. Due to this mistake, the build remained the way it was before the Tree of Life update and kept Mogdrogen. So i decided to split the build in two versions. The defensive version includes Tree of Life and has better DA and survivability. This new version switches the relic for Bysmiel’s Domination and goes full on aggression and speed at the cost of survivability. Read more below (copied from update post at the bottom).
I made a few adjustments to make the build more aggressive. The Dirge of Arkovia relic was removed and it was replaced with Bysmiel’s Domination for its stats and proc. As a result of the loss of +1 to All Skills in Necromancer, a few skill points were moved around to compensate. Particularly, Oak Skin loses 4 points and Wendigo Totem/Ground Slam loses one point each. I also still had a wasted point placed on Reap Spirit for some reason so that got removed as well (i actually forgot to change devotions after the last update so… ![]() ). Bump Ill Omen to level 8 for more Damage Reduction, place one point back in Blight Fiend to cap it and the final point (or points in my case) can go anywhere. I placed them in Devouring Swarm (in hindsight, it was better to just softcap Ill Omen… Oh well.
). Bump Ill Omen to level 8 for more Damage Reduction, place one point back in Blight Fiend to cap it and the final point (or points in my case) can go anywhere. I placed them in Devouring Swarm (in hindsight, it was better to just softcap Ill Omen… Oh well. ![]() ). Devotion setup for this version below.
). Devotion setup for this version below.
Purple Crossroad → Shepherd’s Crook → Remove Purple → Falcon → Nighttalon →
Jackal → Fox (or Raven) → Bysmiel’s Bonds → Blue Crossroad → Eel → 4 points in
Murmur (for Rumor) → Behemoth → Remove Jackal → 5 points in Huntress (for Rend) → Empty Throne → Mogdrogen → 2 points in Spider (leftmost node for spirit, required for Bloodsworn Codex) → Final point at your discretion (I chose the head of the Huntress for health and pierce resistance).
Achievements
I managed to complete SR 65-66 with the character. I made several terrible mistakes and things still went relatively fine. I also killed Lokarr but that was before i completed the build and made all the changes to equipment. I tried Crucible and failed. I died in the final wave. Two times. Feels bad… I should be able to complete it with some effort but i don’t think i was going to complete it within the timer (8 minutes) so i’m not going to pursue it.
I recorded both and i decided to include the failed Crucible run in the video. The SR run is the first part of the video and the Crucible run comes after. Video below.
")
UPDATE (1.1.9.7): Bourbon clones, Ravager of Flesh and Mogdrogen defeated with aggressive version. Screenshots below.
Special thanks to @Gnomish_Inquisition, @Maya and @Ulvar1. They helped me when i posted about this character on the forum. It was my first post and i learned a lot thanks to them.