Hi there, you have been told to not play with matches, don’t you? But what about a flamethrower?
I propose a Sorcerer(-ess) (Arcanist + Demolitionist) build with a fire Albrecht Aether’s Ray (AAR).
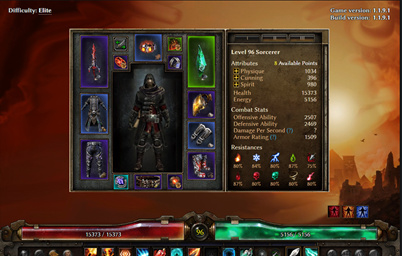
Grim tools : Sorcerer, Level 96 (GD 1.1.9.1) - Grim Dawn Build Calculator
Edit : the current build is now : https://www.grimtools.com/calc/4Vx0oWeV
Pros:
- Fun and easy to play (by my standards);
- Hardcore viable (I just finished Elite and started Ultimate, and I’m not dead, so far);
- Destroy enemies and bosses;
- Had a “panic button” (bless you Mirror of Ereoctes!), good resistances and health regen (I love health regen).
Cons:
- No so much mobility (one teleport and that’s it);
- Tenuous balance between survivability, damage and energy regen.
Gameplay:
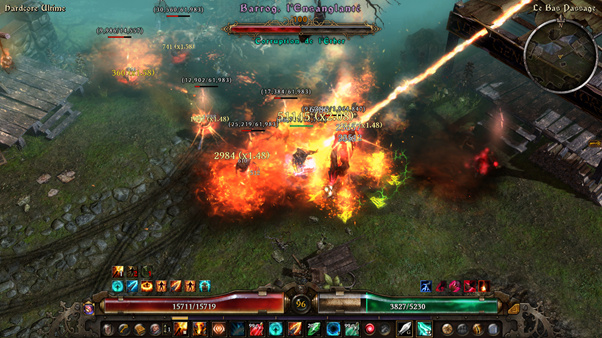
This is pretty simple, burn everything.
A burst of fire AAR and most of the enemies are already severely damaged, burning to death. The remaining ones will perish in flames of the mines, or under a rain of fire launched by the mortar.
An AAR playstyle can be tricky, in Grim Dawn’s higher difficulties I have the feeling that being immobile too long or being too close of some enemies is often equal to death. In consequence most of my hardcore characters have ranged attacks. Even with a massive health regen, monstrous life leach, and a good shield, I feel that some enemies can obliterate the tankiest character who came too close at the wrong time. I even wonder how some bosses can be killed at close range (yes, I’m thinking of you Slathsarr Aethergaze!).
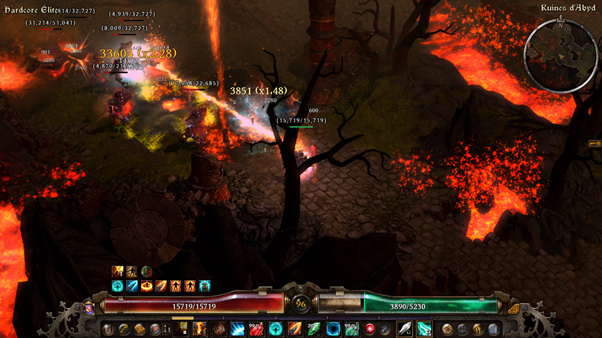
Thus, this build has a simple aim, destroy the enemies before they can reach me, and so far, it worked pretty nicely!
For this build, it’s all in the placement, find the bottleneck where to put the mines, positioning the character and destroy everything. The hardest situations are often when enemies came from every direction or when I flee a bad situation into an unexplored direction to fall into more ferocious enemies.
And they said to not put some oil on the fire…
Skills and devotion:
-
Fire AAR: main source of damage. Find a good spot, aim and shoot until everything is gone. I associated it with devotion skill Eldritch Fire for the good reduction of fire resistance (if you’re new at this game, reducing damage type resistance is also important that dealing that damage!). I saw some critics that it consumes too much energy per second, but with this build I never run out of power.
-
Thermite mine: I discovered this skill with this build, and this is pretty fun! (More than Wind Devil for sure). You can trap the field, put it under a static boss or in anticipation of his path. This skill highly contributes to the dynamism of the build. With the devotion skill Meteor Shower the mines can destroy enemies.
-
Mortar Trap: I’m not going to lie, this mortar is not doing so much damage compare to the two other skills. However, the Hexflamme and the Elemental Storm devotion skill allow the mortar to be particularly effective against bosses by reducing their fire resistance and relentlessly attacking them. A must to have at the end.
Successfully combining the damages and the fire resistance reduction of the three skills is the key of this build, and even the strongest bosses will melt.
The other skills are pretty standards and can be adjusted according to your preference. Mirror of Ereoctes is a must to have, as well as a teleport skill to be craft on the medal ASAP ! (Without this escape ability and the power peak of the end game, being trap by powerful monsters could be the end…).
I saw other builds suggesting to use Flash Bang, Grenade, Blackwater Cocktail, or Callidor’s Tempest, but for my game style AAR, mines and mortar are more than enough. I also put one point on Nullification, but I never use it (I know I should!).
Concerning the devotion skills, I started this build with the will of trying Elemental Seekers and Arcane Currents, but the results were far below my expectations. I still invested points on Blind Sage for the fire/burning damage.
The other devotion points are mainly here to have access to Ulzuin’s Torch and Blind Sage, but some are very important as Empty Throne for the stun resistance.
I selected Behemoth and Chariot of the Dead for the defensive aspect. I really like health regen and I didn’t expect to have so many with this build.
For those who don’t know, devotion skills only trigger when the attached skill is activated. For example, in my build I attached Giant Blood to Arcane Will. Arcane Will is only active when the health of the character is below 75%, thus Giant Blood will only trigger when my life is below 75%. This guarantee that my character will receive healing when part of this health is missing. Same logic with Blast Shield + Wayward Soul.
You just activated my trap skill!
The idea around this build:
When I start this build, I have several requirements: it should be hardcore viable, self-sufficient, and fun to play.
I had an AAR spellbinder in none-hardcore difficulty that I enjoyed but wad kind of boring and low on damage. However, I had some great time with the AAR skill and I wanted to use it again. I locked Arcanist for my first mastery and before selecting my second mastery, I considered what type of damage I wanted to deal. I selected one I never explored before, fire. Demolitionist was the obvious choice then for the second mastery.
I started to look for items or skills that converted the aether damage of the AAR into fire damage and I found only one: Hexflame. Which lead me to item part.

Excuse me good sir, have you some time to talk about our lord and savior Ulzuin ?
Items:
All this build is focus around one item: Hexflame
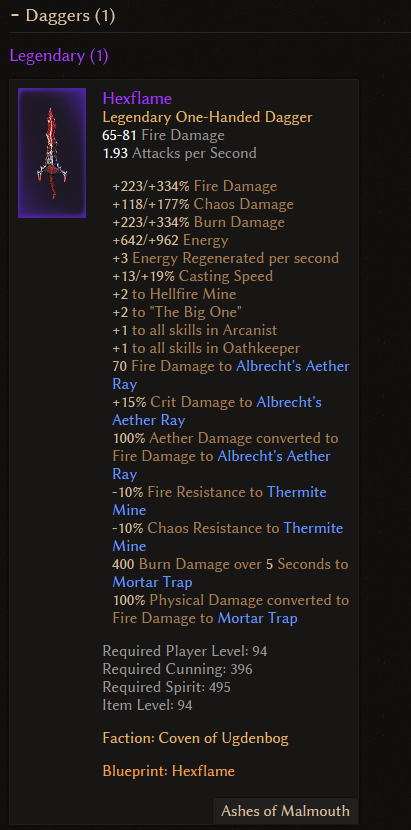
The problem is, this item is locked until level 94. Without Hexflame the build is pointless, most of the AAR damages will be aether damage.
So, this is an AAR build without AAR skill? Yes… and no, because of this life saver relic: Conflagration !
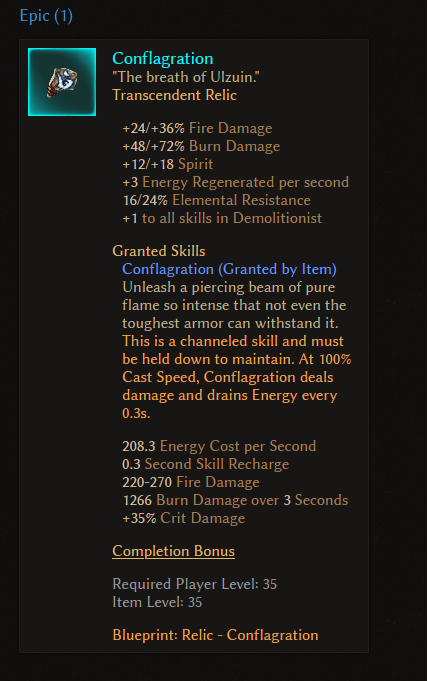
When I reached level 35 and used Conflagration (which is basically a fire AAR skill granted by the relic), I had the feeling to active a cheat code. I just melt down the enemies. I was worried that the power of Conflagration decline with time, but the fire damage bonus kept the skill at the top.
This relic carried me through the entire game until I can finally reach level 94 and obtain the precious Hexflame. At some point I started to be afraid that Hexflame + AAR dealt inferior damages compared to Conflagration. It was not the case.
In addition of Hexflame, I recommend:
Converting part of the damage of AAR into health is pretty neat.
Converting the electrical damage into fire damage allowed my damages to explode. However, your character become a one trick pony that can struggle against fire resistant enemies (so far, I always manage this problematic with some good fire resistance reduction).
For the rest of the items, I don’t have specific recommendation, this build can make a fire with everything. The hardest part is to find balance between high damages, good resistance, health and energy regen.
For example, I have chosen the Salvation relic instead of Iskandra’s Balance that I frequently saw in other builds.
Even if it was heart-breaking to renounce to such damage, the viability granted by Salvation had my preference.
Blast Shield and Maiven’s Sphere of Protection work pretty well together, and I recommend to prioritize items that grants physical resistance which this build lack.
One other aspect that I like in this build, it had a lot of toggle abilities !
In few words I wanted to share that build that I really enjoyed. The only times I was put in difficulty was against enemies that dealt violent and enormous damages. I’m not sure I recommended it for a first try in Hardcore, the beginning can be rough, but once you have Conflagration, it’s a delight.
I’m looking forward to see your comments, remarks, and I hope that I lighted the flame of interest for this build!
Thank you for reading!
EDIT :
A quick update after finish the first third of the game in hardcore Ultimate difficulty (meaning beating the crap of the Loghorrean).
The build slightly elvoled to be more defensive, let me know what you think off.
https://www.grimtools.com/calc/4Vx0oWeV
Contrarily to what is indicated above, I manage to max all resistances and having a nearly perfect mana regeneration, which wasn’t an easy business !
What can I say is that character is still very fun to play, annihilating all the folks who crossed his path.
Divinesteel Hauberk and Pyran’s Visage were nice additions.
I haven’t encountered any difficulties yet, except for Shar’Zul, Harbinger of Chaos who already had an over the top fire resistance and for whom I had the marvellous idea to fought with the mutators Toughened (+70% Health) and Resistant (15% Elemental Resistance)… So, it wasn’t a walk in the park but I managed to be victorious, so I guess the build is no so bad !
I also recently finished Port Valbury’s dungeon with this current build, and I smashed the hell of these disgusting Aetherials.
I can also add that I encountered Arcane Ennemies’ Heroes, twice , and I survived. For those lucky enough to not know, it means that they can cast nullification, and then remove all your buffs.
I’m convinced that spell, casted during a messy fight, can kill my character. The best way to deal with it is, I think, to hit the panic button (bless you Mirror of Ereoctes!) and run to safety.
Nothing much to add, I still looking for better equipments, especially pants and I will made another update after finishing Ashes of malmouth (if I survive!).
Good game everyone!
 Good luck !!