Praise the sunherald, I guess?
Introduction
I decided to explore another beginner build option, this time the idea came from @Ulvar1. I haven’t made a Commando until this character, although I was initially planning to build it around Forcewave with Shar’Zul’s Worldeater. With the recent buff to Sunherald’s Claymore, I gave this Blade Arc variation a shot.
Before we continue…
This beginner guide will assume that you have both Ashes of Malmouth and Forgotten Gods expansions, since the build revolves around Sunherald’s Claymore.
Also, you should be okay with target-farming a lot. This build requires several Monster Infrequents (MIs), and the build’s performance will vary with what affixes you will get. More information about this later in the guide.
Build Explanation
Build Template Grim Tools Link (no affixes)
This version only has the base (affixless) and faction items, basic components, and weapon/accessory augments to serve as a rough guide. The armor augments will depend on what resistances you are missing.
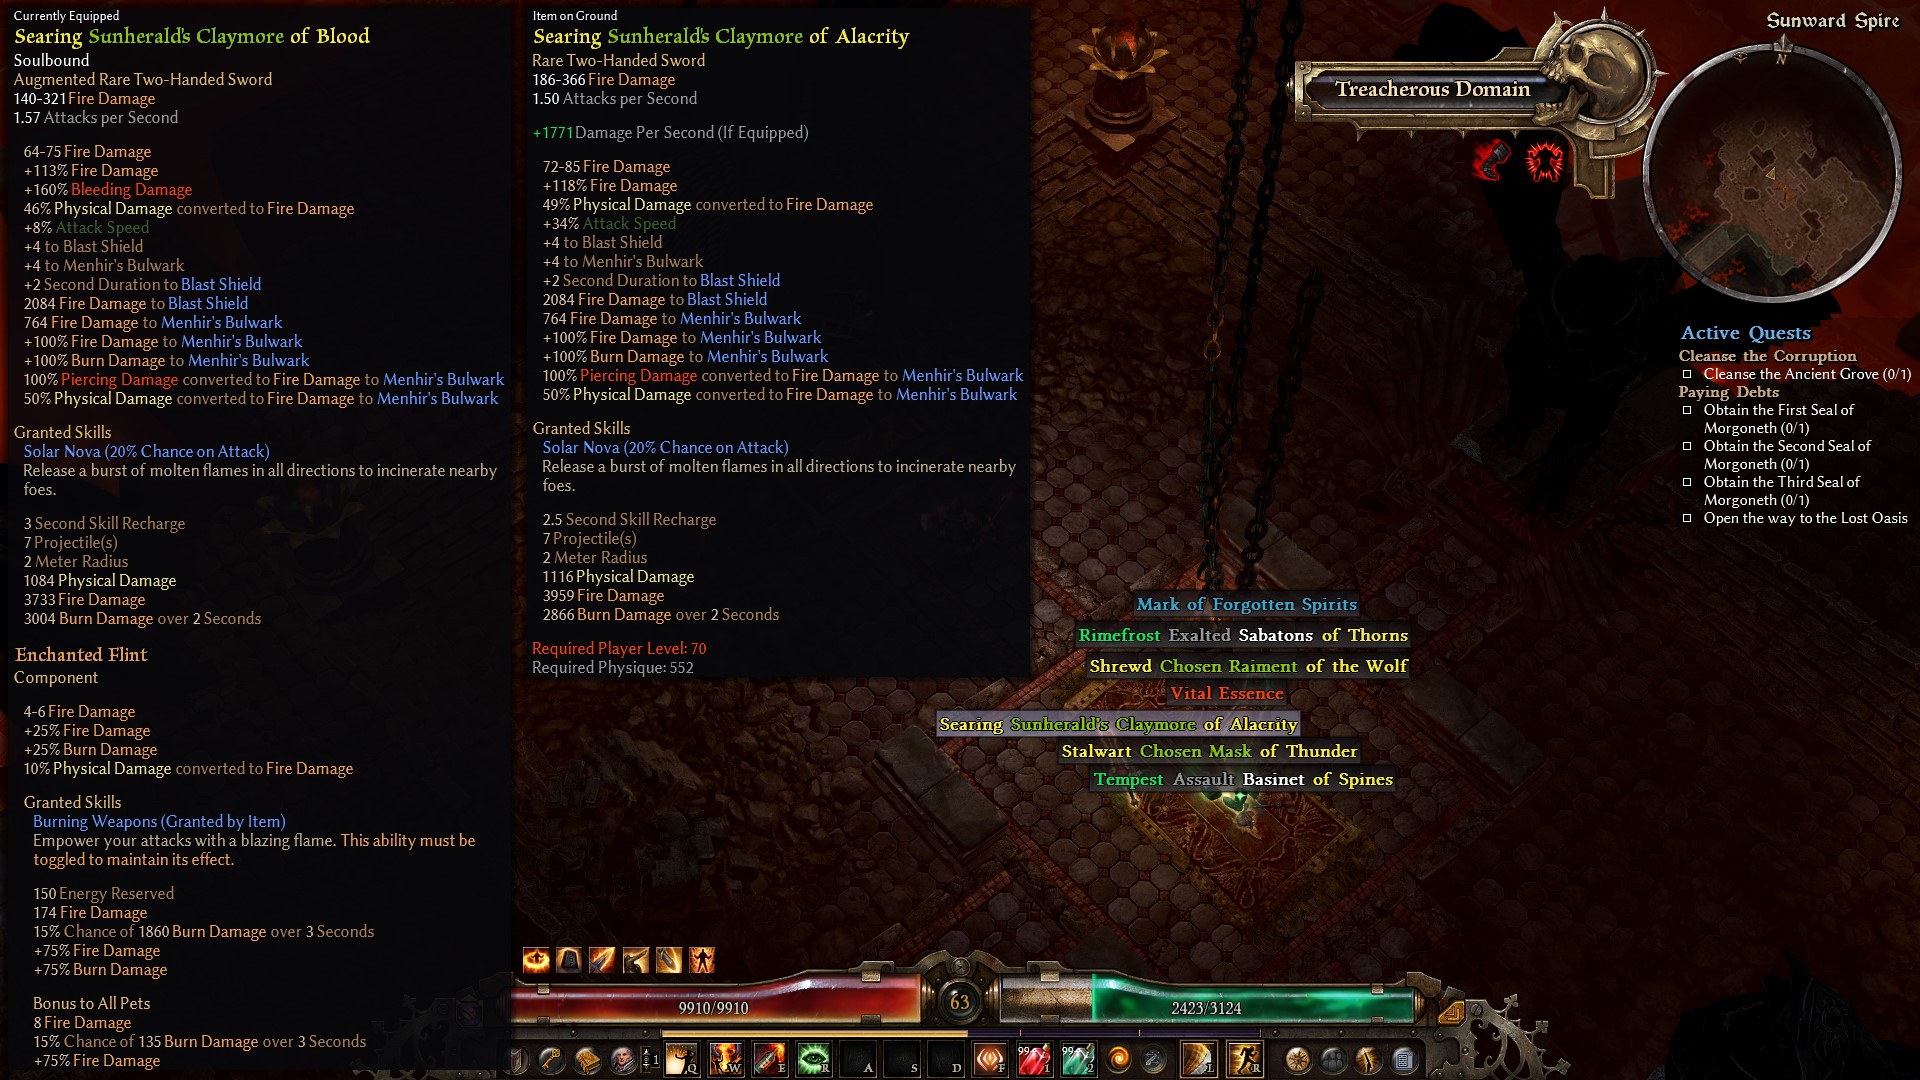
The build’s idea is to convert 100% Physical and Pierce to Fire using the Sunherald Claymore. The sword’s conversion is only applied to Menhir’s Bulwark, which means you need to keep that Exclusive skill active to enable the damage conversion. Since the conversion is applied to a buff, it means that it is a Global Damage Conversion. What it does is converting all relevant damage sources, including Devotions and item skill procs. Neat, right?
But wait, the sword has 100% Pierce to Fire but only 50% Physical to Fire. We still need to get the remaining 50% global Physical to Fire conversion elsewhere. Fortunately, the item has innate 12-18% Physical to Fire. The remaining conversion will depend on the weapon’s Prefix.
The 100% Physical to Fire global conversion REQUIRES that the weapon has at least 40% conversion. Why? Because the weapon component, Enchanted Flint, has 10% Physical to Fire. And thanks to the MI affix system, it will usually roll with relevant affixes, making it easier to get the 100% conversion. The sword frequently drops with the Searing (32-38% Physical to Fire at level 90) prefix, which is more than enough to enable full damage conversion.
If you get lucky and have at least a 50% Physical to Fire conversion on the sword itself, you can use weapon components other than Enchanted Flint, such as Seal of Blades for more lifesteal.
It looks a bit tedious, but all the Monster Infrequent items are easily farmable, and you only need to reach Homestead in Ultimate difficulty to start completing the build. Feel free to use whatever items you will get, especially with the non-MI slots.
Your stat priorities on affixes are as follows:
- Resistance cap and overcap (around 30% overcap in all damage-type Resistances besides Physical).
- Offensive and Defensive Ability (OA/DA, hit at least both 2600 before you start doing Skeleton Key dungeons and other endgame things)
- Fire and Burn Damage
- Attack Speed
- Crowd-control (CC) resistances (Stun, Freeze, Slow, Petrify, etc.)
With enough farming, you should be able to get the build to something like this:
Ultimate Loghorrean kill Grim Tools link
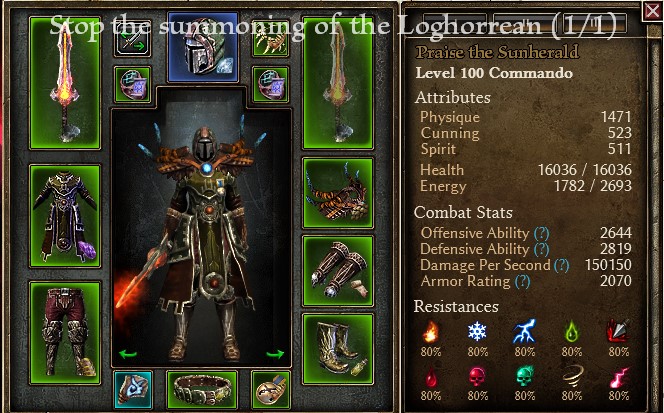
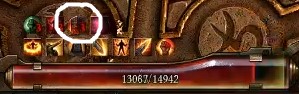
in-game screenshot after killing Loghorrean in Ultimate Difficulty
My in-game stats when I cleared Loghorrean. I also managed to kill Mad Queen before reaching Fort Ikon.
Build Introduction
Skills Information
The main skill for this build is Blade Arc from the Soldier Mastery. Additional active skills are Blitz (also from Soldier), Thermite Mine, and Blackwater Cocktail from the Demolitionist Mastery. I will also explain how Blast Shield works.
Blade Arc
Blade Arc is a Weapon Attack-based skill that requires a melee weapon and is based on your Attack Speed for how fast it swings. Although you can spam it using either left or right mouse buttons, it is NOT a Default Attack Replacer, so it will not trigger effects such as Markovian’s Advantage or Zolhan’s Technique.
It hits in a 180 degree arc in front of and around you in melee range, and increases to 280 degrees when at least a point is put in Laceration.
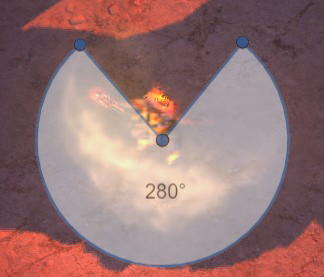
At maximum hardcapped Laceration rank (22/12 points), the maximum potential targets hit is 14, making it really good in clearing mobs of monsters. And since it is an Area-of-Effect (AoE), it’s single-target damage is not as good compared to skills like Cadence. The in-game tooltip that shows Blade Arc damage is for a single enemy, and all allowable targets within the AoE are hit with that damage, before their defenses are considered.
Doing some quick math, if your DPS tooltip says 100k, the potential damage output is 100k X 14 targets = 1.4 million DPS!!! Again, it is just potential damage, and you will just do 100k DPS against a single boss monster.
There is a Transmuter called Clean Sweep, which adds a 5 second Cooldown while increasing damage. This is usually taken with Bleed/Internal Trauma DoT (damage over time) builds. We will not use Clean Sweep for this beginner build.
Blitz

Blitz is a charging skill that makes your character run very fast towards your target. The damage will occur once you impact your target, and damage will be dealt to a maximum of 3 targets, which will be increased to a total of 8 if at least a single point in Blindside is taken.
For the purposes of this build, Blitz will both your main movement ability and used to lower your enemies’ Defensive Ability. This means that you need to use Blitz everytime it’s available to increase your chances of hitting and dealing crits.
NOTE: On Blindside vs Flashbang for Defensive Ability reduction
Since both skills have the wording “X Reduced target’s Defensive Ability for Y Seconds,” they will not stack and you have to choose one. I chose Blindside since the Soldier mastery has a lot of bonus points from the items, and we cannot afford to pump points into Flashbang to have the same effect. In some endgame builds, it would make more sense to softcap Flashbang and remove the Blindside node altogether.
Thermite Mine
Thermite Mine lets you place 3 mines in the ground, and up to 6 mines in total (which means 2 casts) which deal Fire and Burn damage and reduces your enemies’ Elemental Resistance. It has no cooldown which means you can quickly reposition them for maximum effectiveness.
The “sweet spot” for skill point efficiency is 13/16 points, but since Soldier has no relevant Resistance Reduction skill (sure there is the Terrify modifier for War Cry, but it maxes out at only 18 Flat RR), we are hardcapping this. We do not take the Hellfire Mine modifier since we do not need Chaos/Aether Resistance Reduction in the build.
Blackwater Cocktail

Blackwater Cocktail lets you throw a molotov which deals Fire and Burn damage. We are going to use this primarily as another source of Resistance Reduction via the Agonizing Flames modifier.
Blast Shield
Blast Shield is a Defensive Skill proc that activates when your Health is at a certain percentage; in this case it procs when your Health drops below 60%. This and other similarly worded abilities is commonly referred to by the Grim Dawn community as “circuit breakers,” a.k.a. something that can prevent you from taking too much damage or dying. Another example of a circuit breaker is the Ghoul Devotion proc called Ghoulish Hunger, which activates at 45% Health.
Blast Shield is great because it provides Flat Damage Absorption, a chance to avoid Projectiles, large boosts to Pierce and Elemental Resistances, increases maximum resistances, and also gives Fire Retaliation damage. In other words, it makes you quite tanky when it’s active.
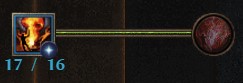
When Blast Shield activates, you will see the skill icon in your buff area above the health bar:
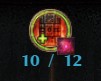
You will also see a small number on the lower right of the icon counting down. After the active duration ends, the cooldown timer begins:
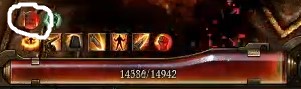
This time, there will be no countdown number indicator. This means that even if you go below 60% again when this icon is present, Blast Shield will not activate since it is still on cooldown.
It has a base active time of 4 seconds before it goes into cooldown for 11 seconds. I have to emphasize that the cooldown does not count down when the skill activates; it only starts counting down when the active duration ends. The cooldown can be reduced by Cooldown Reduction (CDR) stats like on offhands or on items such as Mythical Heart of Ulzuin.
The Sunherald’s Claymore adds 2 seconds to the active duration, bumping it from 4 to 6 seconds and adds 120 flat Fire damage when it is active. So in a sense, you actually want to have Blast Shield up as frequently as possible. Here is where the playstyle comes in: you want to take calculated risks when fighting. You want to go and whack as much as you can while Blast Shield is up and be ready to disengage when things get a bit sketchy, or you can man up and just let all your other Defensive Procs activate until Blast Shield is available again, after which you are a bit vulnerable for some time. Knowing your Defensive Cooldowns is important in playing this build and other better endgame builds in general.
Class Choice
The Sunherald’s Claymore has bonuses and modifiers to both Soldier (Menhir’s Bulwark) and Demolitionist (Blast Shield), hence the Commando class. There are very few endgame build options for this class compared to others due to limited synergy and Resistance Reduction skills, so I made this attempt to show more love to this combination that’s available since the start of the game.
Leveling Guide
Items to look out for
The number one priority for leveling gear will always be Resistances. Make sure you cap/overcap resistances first before changing into additional damage/skills.
Affixes
Most of the loot that you will get along the way will have random affixes, so here’s some of the useful ones for our build:
-
Searing
This prefix provides the much-needed Physical to Fire Conversion, and is quite common to get on the sword. -
Impervious
This prefix gives Pierce + another type of Resistance. Look out for Pierce + Poison combo. -
Hellfire/Infernal
These are upgraded versions of the Searing prefix with added bonuses and damage procs. -
of Scorching
Straightforward suffix, gives Fire and Burn damage. -
of Alacrity
Gives Attack Speed, which we mainly want for Blade Arc.
Monster Infrequents
Grim Dawn has an item class called Monster Infrequents (MI), which are Rare/Green class items that drop from specific monsters in the game. These items mostly have skill bonuses (such as +2 to Blade Arc, +1 to all Soldier Skills, etc) and some have unique Item Modifiers which have varying effects like additional damage, damage type conversion, etc.
The following items are not required but are highly recommended to help with the leveling process. These will be listed in order of Main Campaign progression and skill availability. Click the item names to view in Grim Tools.
-
Martin’s Crest

First available encounter: Cronley’s Hideout
Drops from: “Moneybags” Martin
At first I thought the added damage to Thermite Mines was low, then I remembered that the mines scale with Player bonuses. It actually adds a lotta damage which makes the early level enemies melt.
-
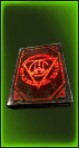
Zarthuzellan’s Codex
First encounter: Misery, in front of the Steps of Torment
Drops from: Grand Priest Zarthuzellan
Ah yes, the staple leveling MI for BWC enthusiasts. It makes the early leveling phase so much easier.
-
Ugdenbog Girdle

First encounter: Gloomwald
Drops from: Ugdenbog Spikeshell and other variants (I just call them Ugdencrabs)
The base item has Acid to Physical conversion, Vitality resistance, Petrify duration reduction, increases Armor, and +1 to Soldier skills. You can also buy this from the vendor inside Ancient Grove (though it’s still weird that a plant runs an MI selling business, but who am I to judge?)
-
Moltenclaw Slicer

First encounter: Infernal Wastes
Drops from: Moltenclaw (those fire dinosaurs)
Provides Fire and Burn damage, converts Piercing to Fire (mostly referred to as the Fire Bat conversion), Chaos resistance, Cooldown Reduction, and some other skill bonuses that we are not interested in.
-
Sunherald’s Claymore
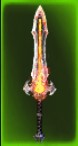
First encounter: Inside the Sunward Spire
Drops from: Astros the Sunherald
Finally, the star of the show. This is the reason why this build exists in the first place, otherwise we would be using another character to farm some chaotic harbinger in a very dark place with lots of doors for his large, flaming, eater-of-worlds mace.
-
Balthazar’s Crest

First encounter: Staunton Mine
Drops from: Nicholas Balthazar
Gives very relevant bonuses to Blade Arc and Flame Touched. Be extra careful when fighting this guy; his Forcewave + Blade Arc combo hurts a lot.
-
Cronley’s Signet

First encounter: Cronley’s Hideout
Drops from: Darius Cronley
The base item gives Bleeding damage, Attack Speed, Pierce Resistance, and +3 to Laceration. Mostly intended for a Bleed build but the bonuses are also relevant to ours. This is the most annoying thing to farm since Cronley likes to put up his safety bubble and he has a Skill Disruption hit.
-
Mogara’s Fangs

First encounter: Jagged Wastes
Drops from: Mogara, the Prime Matriarch
Base item has flat Physical damage, Attack Speed, +1 to Soldier skills, and more flat Physical damage to Blade Arc. Keep an eye out for Groble Shamans that can heal the boss and prolong the fights.
Skill Allocation
The main skill nodes that you want to get ASAP for leveling are:
-
Blackwater Cocktail
Main leveling skill until you can respec to Blade Arc. Completely max out all the nodes and take the High Potency Transmuter for better sustained damage. When you have Blade Arc, keep Agonizing Flames maxed and reduce the main skill node and Demon Fire to 1-pointers, keep High Potency as well. -
Thermite Mine
Main skill for debuffing enemy Elemental Resistance. The “sweet spot” for skill point efficiency in most builds is 13/16 because of diminishing returns, but we want to max this out later since we only have two sources of -XX% RR (the other one is the Eldritch Fire devotion proc). -
Flame Touched
Increases Fire/Burn damage and Offensive Ability. Softcap at 12/12 first to get other skills, then hardcap when Blade Arc is maxed out. Temper is enough as a 1-pointer while leveling and increase it as you need more Defensive Ability. The flat Physical damage part will be fully converted to Fire once you get the Sunherald’s Claymore, so we also hardcap this at the end. -
Vindictive Flame
Deals damage when you are hit, but we are taking this mainly for the Total Speed and Health Regeneration. Sweet spot is at 11/16, and Ulzuin’s Wrath is just a 1-pointer. -
Blast Shield
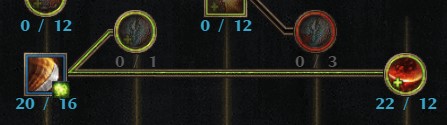
One of our Defensive Skill procs, sweet spots are at 5/12, 10/12, 14/12, 18/12, and 22/12. Max that the build can reach is 17/12, and I chose to put it at 10/12 to give way to other skills. You can definitely max it when possible. -
Field Command
A toggle buff that gives Offensive and Defensive ability and increases Armor, as well. The Squad Tactics modifier gives All damage bonus and Attack and Casting speed. Hardcap Field Command, Squad Tactics only at 15/12 sweet spot. -
Blade Arc
The main endgame skill of choice for this build since there is a lot of MI support. We hardcap both main skill and Laceration for maximum damage. -
Menhir’s Bulwark
Our Exclusive Skill. This is required for the build to work in the first place. We hardcap this for maximum benefits. -
Blitz
The main movement ability and enemy Defensive ability reducer. 1 point Blitz and try to get Blindside to 12/12.
The next skills listed are mostly 1 pointers and can be adjusted depending on item skill bonuses:
-
Fighting Spirit
Provides damage bonus and Offensive Ability when you take damage. This will be almost always active since we attack in melee range. I put it in 6/12 for the recharge skill reduction; we would like to max this out but we lack the skillpoints. -
Menhir’s Will
Another Defensive cooldown that heals when you drop below 33%. 1 point is enough. -
Military Conditioning
Increases Physique and Health by a lot. Just softcap 10/10 is fine for us. -
Veterancy
Provides more Health Regeneration. 1 point for this. -
Decorated Soldier
We take this for the Elemental and Slow Resistance. 8/8 softcap works best in the build. -
Scars of Battle
Gives Bleed, Stun, and Freeze resistances and the very important Armor Absorption stat. This enables to have 100% Armor Absorption with only Scaled Hide and Ancient Armor Plating components, which frees the Chest component slot. 1 point will carry us.
Devotions
My thought process on making this Devotion setup and pathing is to start from a caster build and respec to the final melee two-hand build once you get the Sunherald’s Claymore. Feel free to explore other options.
TL;DR version
(+ means add, - means refund)
+Green Crossroad
+Bat (bind to Blackwater Cocktail)
-Green Crossroad
+Fiend (bind to Thermite Mine)
+Solael’s Witchblade (bind to weapon component skill, Fireblast from Searing Ember or Greater Fireblast from Flintcore Bolts)
+Quill
+Blue Crossroad
+Eel
+Yellow Crossroad
+Lion
-Yellow Crossroad
+Alladrah’s Phoenix (bind to Blitz)
+Chariot of the Dead (bind to any permanent/toggle buff as a caster, bind to Blast Shield later)
-Fiend
+Magi (bind to Thermite Mine)
+Viper
-Blue Crossroad
+Red Crossroad
+Ulzuin’s Torch (bind to Flashbang, rebind to medal movement ability later)
At this point, you still have 5 Devotion points left. Around this time, you will be respeccing into Blade Arc (around level 60 and only when you have the sword)
+Kraken
-Eel
-Red Crossroad
+Ghoul (bind to any permanent/toggle buff)
Tier 1
Bat
We take this for the affinity and because this will be our main sustain proc since we have global 100% Pierce to Fire from the sword. Bound to Blackwater Cocktail for highest proc chance.
Fiend
This is just for the early affinity and additional damage. We will remove this once we have the Chariot since they have the same affinity bonus.
Quill
Required for both Green and Purple affinities, also has relevant bonuses.
Eel
Early DA bonuses and movespeed, will be removed later once we have Kraken.
Viper
Taken for the 20% Reduced Resistances node and the affinites.
Lion
This is required for unlocking the Alladrah’s Phoenix Devotion.
Ghoul
We take this much later once we respec into Blade Arc. The proc is one of our Defensive Cooldowns a.k.a. circuit breakers.
Tier 2
Solael’s Witchblade
Mandatory for Fire builds since it has -XX% Resistance Reduction, which stacks with other similarly worded RR types. Bound to Thermite Mines in the end build.
Alladrah’s Phoenix
I chose this for the Flat Fire damage and Flat Damage Absorption, which synergizes with percentage Damage Absorption from Menhir’s Bulwark. Note that if you bind this to Thermite Mines, the mines will get the proc effect instead of your character (the mines are actually Player-scaled pets). This is bound to Blade Arc since we need it up all the time when available.
Chariot of the Dead
I chose this for the heal + Armor and Defensive Ability proc when hit, also has great bonuses on the nodes. We bind this to Blast Shield in the endgame build so it’s used as an emergency heal.
Magi
Fire damage nodes, and the proc deals shotgun damage when directly under an enemy. We bind this to Blitz for high activation chance.
Kraken
Sort of mandatory for two-hand builds since the bonuses are really good.
Tier 3
Ulzuin’s Torch
The only Tier 3 Devotion in this setup. The nodes are really nice to our build and the proc deals massive AoE damage. There is a catch on using this: “Only one Meteor Shower can be cast at any one time.” This means that you need to wait for the final Meteor to disappear before the skill can be proced again.
We bind this to our medal movement augment skill that has damage. I chose Emblem of the Charging Bull (Solael faction item) since it has 4 second cooldown and works like Vire’s Might (does not need an enemy target to be used, so you can charge past enemies). Meteor Shower’s cooldown is 3.5 seconds, so you can proc it as soon as the Rush skill is available again.
Leveling Journal
This will be divided into character levels and areas so you know what to look out for and what to do next. The early levels are not set in stone; it’s just what I ended up when clearing the area of interest. If the section does not indicate an area, it means that it’s a key level (usually major item changes).
Level 1 to 18 (Normal Krieg kill)
We are going through Normal and not on Veteran; the additional difficulty is not worth the time spent in my opinion. But if you really want to start at Veteran, more power to you. Also, we are going to be a Fire Caster first so the Devotions make sense while leveling.
Start with Demolitionist. Get the Francis’ Gun from a house near Devil’s Crossing. At Level 2, put only one point to Fire Strike to serve as your autoattack with the gun. Dump all points to the Mastery bar until you can get Blackwater Cocktail (BWC), and put one point to Flame Touched for now. Put points into the Mastery Bar again until you reach High Potency. Put 1 point each to Flashbang, Searing Light, and Vindictive Flame.
At this point, you should be able to pick up some Searing Embers. Put those in either your main hand or offhand, and use the given ability called Fireblast instead of Fire Strike as your spam ability. Do not forget to refund the Fire Strike point. The next skill points will be 1 BWC and 2 Mastery Bar until BWC is maxed. Next to max out is Demon Fire; use the same point allocation (1 DF, 2 Mastery Bar). Put one point to Temper and Ulzuin’s Wrath when available.
For stat points, put 1 each to Physique, and Spirit until you reach around 15-20 on both, then stop putting points to Spirit and put all remaining points into Physique. You need some Spirit to be able to equip the leveling offhand later.
For Devotions, get Bat first. Bind it to Blackwater Cocktail for high proc rate.
Level 18 to 22 (Devil's Crossing to Twin Falls rift)
Before you go to the west side towards Old Arkovia, make sure all your items have Components. Silk Swatch in both Pants and Shoulders are great options for Pierce Resistance; a lot of enemies are ranged and use hitscanning Pierce shots.
Also, you can craft Flintcore Bolts and use Greater Fireblast as your spam ability while the other skills are on cooldown.
You have the option of getting a free Relic called the Bone Talisman if you lie about it during the Missing Elder quest in the Arkovian Foothills. If you missed it, you can just craft any Relic you like at the Blacksmith. You can get an upgraded version of the Bone Talisman in Elite and Ultimate.
While in this area, you might want to get Martin’s Crest since it adds a lot of Fire Damage to Thermite Mine. Balthazar’s Crest will be more useful later once we respec into Blade Arc.
Level 22 to 35 (Twin Falls Rift to Amalgamation)
Our next goal is to get to the Steps of Torment to get Zarthuzellan’s Codex, which boosts Blackwater Cocktail by a lot. Just finish the quest to get the Skeleton Key and blueprint but do not enter the Steps of Torment; there’s nothing of interest for our build there.
You might also want to farm some Dynamite in the Cronley mines. There is the optional area to the right of Prospector’s Trail rift that needs 3 Dynamite to enter. I recommend you clear that area for levels, reputation, and a couple of Devotion Shrines. Proceed with the Main Campaign afterwards.
You might reach level 35 at this point, in which case you can check out Faction Gear in Devil’s Crossing and the Rovers camp (you should be at least Respected with both Factions before you can buy the level 35 gear). There will also be some blueprints unlocked; get the Runestone from Rovers first for your Helm component. The rest of the blueprints can wait until Honored/Revered so you can buy them at a much larger discount.
Level 35 to 38 (Homestead to Fort Ikon)
It’s time to face the Chthonians. If your Chaos Resistance is low, try using an Imbued Silver in your weapon slots so you won’t take too much damage. Don’t hesitate to use one Chthonian Seal of Binding in the Blood Grove Devotion Shrine; you want to get your Devotion points as fast as possible so you can level the proc nodes quicker.
For faction choice, it really doesn’t matter, but Kymon’s Chosen provides gear with Fire damage so we choose their side. Make sure to complete all the faction quests to get to Respected/Honored faster and unlock the gear.
Level 38 to 41 (Fort Ikon to Loghorrean kill)
You can just ignore most of the trash mobs on the way to Fort Ikon and just kill whatever’s in your way. Be sure to clear the Tomb of the Archon for some Kymon reputation to hopefully get at least Respected by the time you reach the Necropolis Interior Rift. After killing Loghorrean, we don’t need to enter Bastion of Chaos since there’s no relevant items there for us.
Don’t forget to do the Hidden Path questline for the bonus stat and skill points and the shrines in East Marsh and inside the Temple of the Three, then proceed to the Coven.
Level 41 to 47 (Devil's Crossing to Lone Watch rift)
While in Ugdenbog, don’t forget the shrine in the Ancient Grove and talk to Mogdrogen for another free Skeleton Key. Don’t enter the dungeon yet; wait until you are at least level 50 so you can equip better gear before going inside.
You can either be friends or enemies with Barrowholm since their augments and gear doesn’t matter to our build, but friendly is recommended if it is your first character for the Mandates. You might want to use the Ugdenbog Girdle for the +1 Soldier skills, just make sure to not sacrifice Resistances.
We want to go inside the Ancient Grove for one particular reason, and no, it’s not Ugdenbloom farming at this point in the game. We only want to go inside to buy the blueprint for Prismatic Diamond. You can also get it as a random world drop (particularly in Treasure Troves or Monster Totems) but the vendor in the Ancient Grove has a high chance of selling it.
If you don’t see the blueprint during your first visit, do not go out of the dungeon. Go to the next area (Tainted Wood), wait for around 15 to 20 seconds, then go back to the previous area where the vendor is (Feral Thicket). Repeat until you bought the Prismatic Diamond blueprint, then reset the game to exit or you can kill Gargabol for a hard time (that tree has high Fire Resistance).
Level 47 to 52 (Lone Watch rift to Theodin kill)
The only things to watch out for in Malmouth are the Aetherial Colossi, since they can smack you hard with Physical Damage, and Theodin himself, which can do the same.
This area is completely optional after unlocking the Malmouth reputation (the wagons quest), but I cleared everything for reputation and some levels. We are not in a rush to be Revered and get the Experience potions since everything is self-found.
Level 52 to 55 (Conclave of the Three to Korvaak kill)
The quests do not give much experience compared to the Malmouth ones in Normal. We want to finish everything for the reputation farm.
For cult choice, I sided with Dreeg first for the Rift augment. While on the Infernal Wastes, clear the fire dino monsters for a Moltenclaw Slicer. This item converts Piercing to Fire, which is helpful to the Bat proc. Don’t be tempted to use Canister Bomb; we are almost ready to respec into Blade Arc.
Clear Korvaak first before going to the Sunward Spire. Respecing into Blade Arc at this point is not viable since we still lack skillpoints; we need to reach Menhir’s Bulwark before doing that. After killing Korvaak, try your luck to get a level 55 Sunherald’s Claymore so you can use it right away once you respec at around level 60. If you are unlucky and overleveled, you might get a level 70 version; you need to level more as a Caster before respecing into Blade Arc.

Congratulations, you cleared Normal difficulty! Hopefully, you didn’t die during the process (especially in Hardcore), but if you did, try to follow rule # 1 next time: “Just don’t get hit. 4Head” 
Level 55 to 61 (Devil's Crossing to Twin Falls rift, Elite Difficulty) BLADE ARC RESPEC
This is the most important part of the leveling process since we will prepare to respec into Blade Arc. Just complete the quests and get to Twin Falls ASAP. Once you reach that point, try to get the Sunherald’s Claymore back in Normal if you haven’t gotten it already, and also get Balthazar’s Crest and Cronley’s Signet. You can also get a Shambler’s Heart as a filler amulet; we will replace this once we get to Homestead later. I didn’t bother with the Cronley rings since I need the resistances on my current ones.
Blade Arc Respec Grim Tools Link
You need to be around Level 60 to put at least 1 point into Menhir’s Bulwark, Blade Arc, and Laceration without sacrificing too much of your damage and tankiness. Take skill points from Blackwater Cocktail and Demon Fire until you have 1 point left in the nodes, keep Agonizing Flames Maxed since it is our Flat RR source, and adjust Thermite Mine until you have 13/16 points for now; we will max it out much later. Don’t forget to respec some of your Devotions, as well. Refer to the Devotions section above on how to respec those.
The next level of Sunherald’s Claymore will be at Level 70, so you might want to go back and get something like this:
Just get it 4Head. Spoiler: this was my weapon until I got a level 94 upgrade
Level 65
This is one of the milestones for any GD character because you can equip the level 65 Faction gear from the expansion factions (Coven, Malmouth, FG Cults). Once you hit 65, unlock the next riftgate and go back to Normal. Check out the level 65 Faction items, taking into consideration the Resistance penalty in Elite. You can also check if you are Honored with any of the factions for some Augment upgrades (I got Honored with Coven at this point).
You can also powershop the rare item (not the faction one) vendor in Malmouth for blueprints. The blueprint that you want is for Juggernaut Relic if you haven’t gotten this one already (I got mine from a Treasure Trove in Tyrant’s Hold in Normal). This will carry you until the endgame. This is quite expensive to craft since it needs Chthonic Seals of Binding, but you can farm it in Elite Blood Grove and Tomb of Korvaak.
Once you’re done with the shopping spree, go back to Elite and continue the Main Campaign as per usual.
Level 70 (Elite Loghorrean kill)
Before going to Loghorrean, check your Faction reputations to see if you can upgrade anything. At this point, I wasn’t Revered with anything yet. Make sure you are capped with Acid, Vitality, and Chaos Resistances, and you are good to go.
After killing Loghorrean in Elite, you have several options for progression. You can go straight to Ultimate, provided that your Resistances are taken care of. Or you can follow along with me and venture to Elite Ugdenbog. I only intend to clear the Ashes of Malmouth area until Elite Barrowholm and unlock the Lone Watch rift; the Malmouth area can wait until later since it scales up to level 90 (and Elite Theodin is no joke).
After getting to the Lone Watch rift, I went to the Elite Forgotten Gods area; you can choose either Bysmiel or Solael this time. Also, we only need to reach the Korvan Sands rift for the meantime; I’ll explain in the next part.
Level 75
Level 75 is another milestone because of a special item: the level 75 Fettan Mask, which gives +1 All Skills . The level 50 Fettan Mask used to have the +1 All Skills too (F for that version) but it was probably too good for its item level.
I transitioned to Ultimate once I got the Fettan Mask and crafted the Prismatic Diamond for it. Don’t forget to do the Hidden Path questline in Elite for stat and skill points.
Level 81 (Ultimate Krieg kill)
Same as Elite, just beeline to Krieg as fast as possible. All 55 Devotion points should have already been unlocked, so you can skip everything and save those for later (hint: leveling new Devotion procs). Once you finish all reputation quests in Devil’s Crossing, you should be Revered with them now, and use the Survivor’s Ingenuity augment. The next best accessory augments are available at level 90, so this will carry you until then.
Just continue with the Main Campaign until you reach Level 84.
Level 84
Level 84 unlocks the next tier of AoM/FG Faction items and base items, as well, so it’s time for another gear check. At this point, you should be almost maxed out on your main skills (Blade Arc, Laceration, Menhir’s Bulwark). I decided to clear Elite Malmouth to reach Revered and clear most of Elite FG, right before Korvaak, then continue with Ultimate Main Campaign up until Homestead.
Level 90 (Target-Farming Endgame gear)
All Augments and Level 90 Faction gear/blueprints are available to you (provided you are Revered with the Factions). Remember to still prioritize Resistances over damage when changing items.
Your first goal is only to get up to Homestead and Pine Barrens rift; you can also try to reach Sunward Spire in Ultimate but I don’t recommend it since the enemies there are a bit tough for your current gear. You can now start to target-farm all your endgame gear; here is the farming route:
[Elite]
- Korvan City rift > Sunward Spire - Sunherald’s Claymore (level 94 version can drop here)
[Ultimate]
- Arkovian Foothills rift > Staunton Mine - Balthazar’s Crest
- Cronley’s Hidout rift - Cronley’s Signet X2
- Broken Hills rift - Solael-Sect Legguards
- Pine Barrens rift > Jagged Waste - Mogara’s Fangs
Don’t forget to clear Totems that spawn near the target-farm locations for additional loot, and remember to get the Level 94 Fettan Mask near the Korvan Sands rift in Ultimate.
Level 100 and beyond
Here is what my character looks like when it hit level 100. If you look at the pants and belt, those are still low level gear. I wanted to at least get a level 94 version of the pants for the armor increase before I try and kill Loghorrean in Ultimate. Remember to prioritize resistances and defenses before damage when changing gear; a dead DPS is zero DPS.
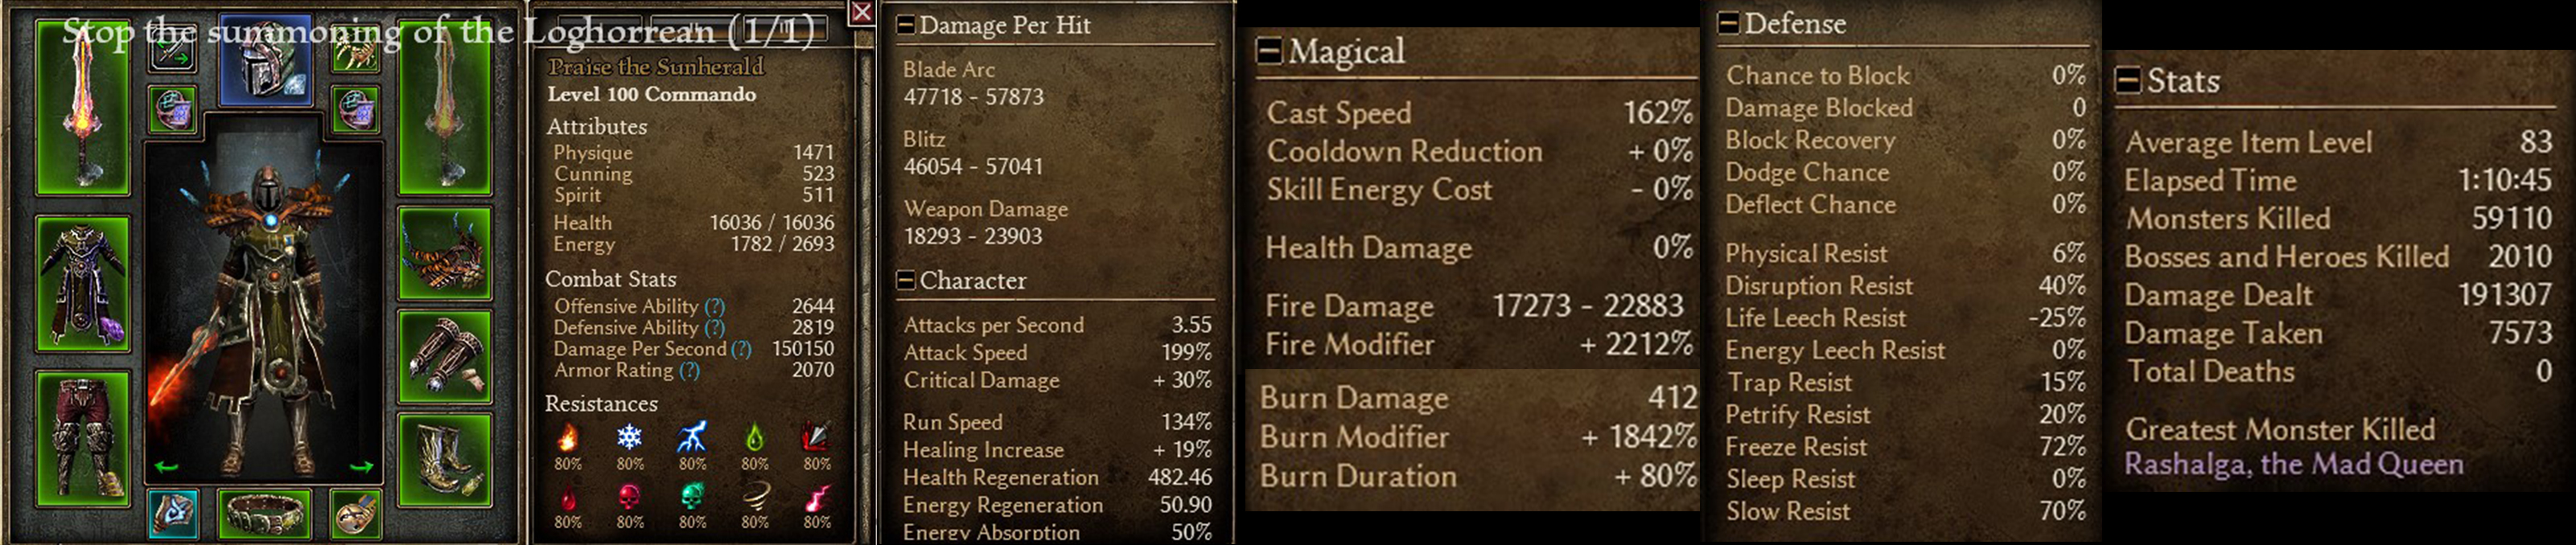
Endgame stats Grim Tools v1
This is what I have when I decided to try out the Skeleton Key dungeons. I am not using any other Epic or Legendary items for demonstration purposes. You can definitely use better items at this point.
Endgame stats Grim Tools v2 (changed gloves to Mythical Obsidian Grasp)
This is the version before clearing Shattered Realms; you should only be missing 1 Attribute and 3 Skill points
I found this very nice gloves upgrade that’s too good to pass. I used this to clear Ancient Grove, Tomb of the Heretic, and Shattered Realms 35-36
Build Performance
Here are some videos showing the build’s performance:
Ancient Aetherwarped Totem
Kubacabra
Korvaak
Alkamos
Shar’Zul
Overlord Van Aldritch
Gargabol
Grand Magus Morgoneth
Rashalga, The Mad Queen
Shattered Realms Shard 35 Boss room
Lokarr
Conclusion, Feedback, and Final Thoughts
Final stats screenshot:
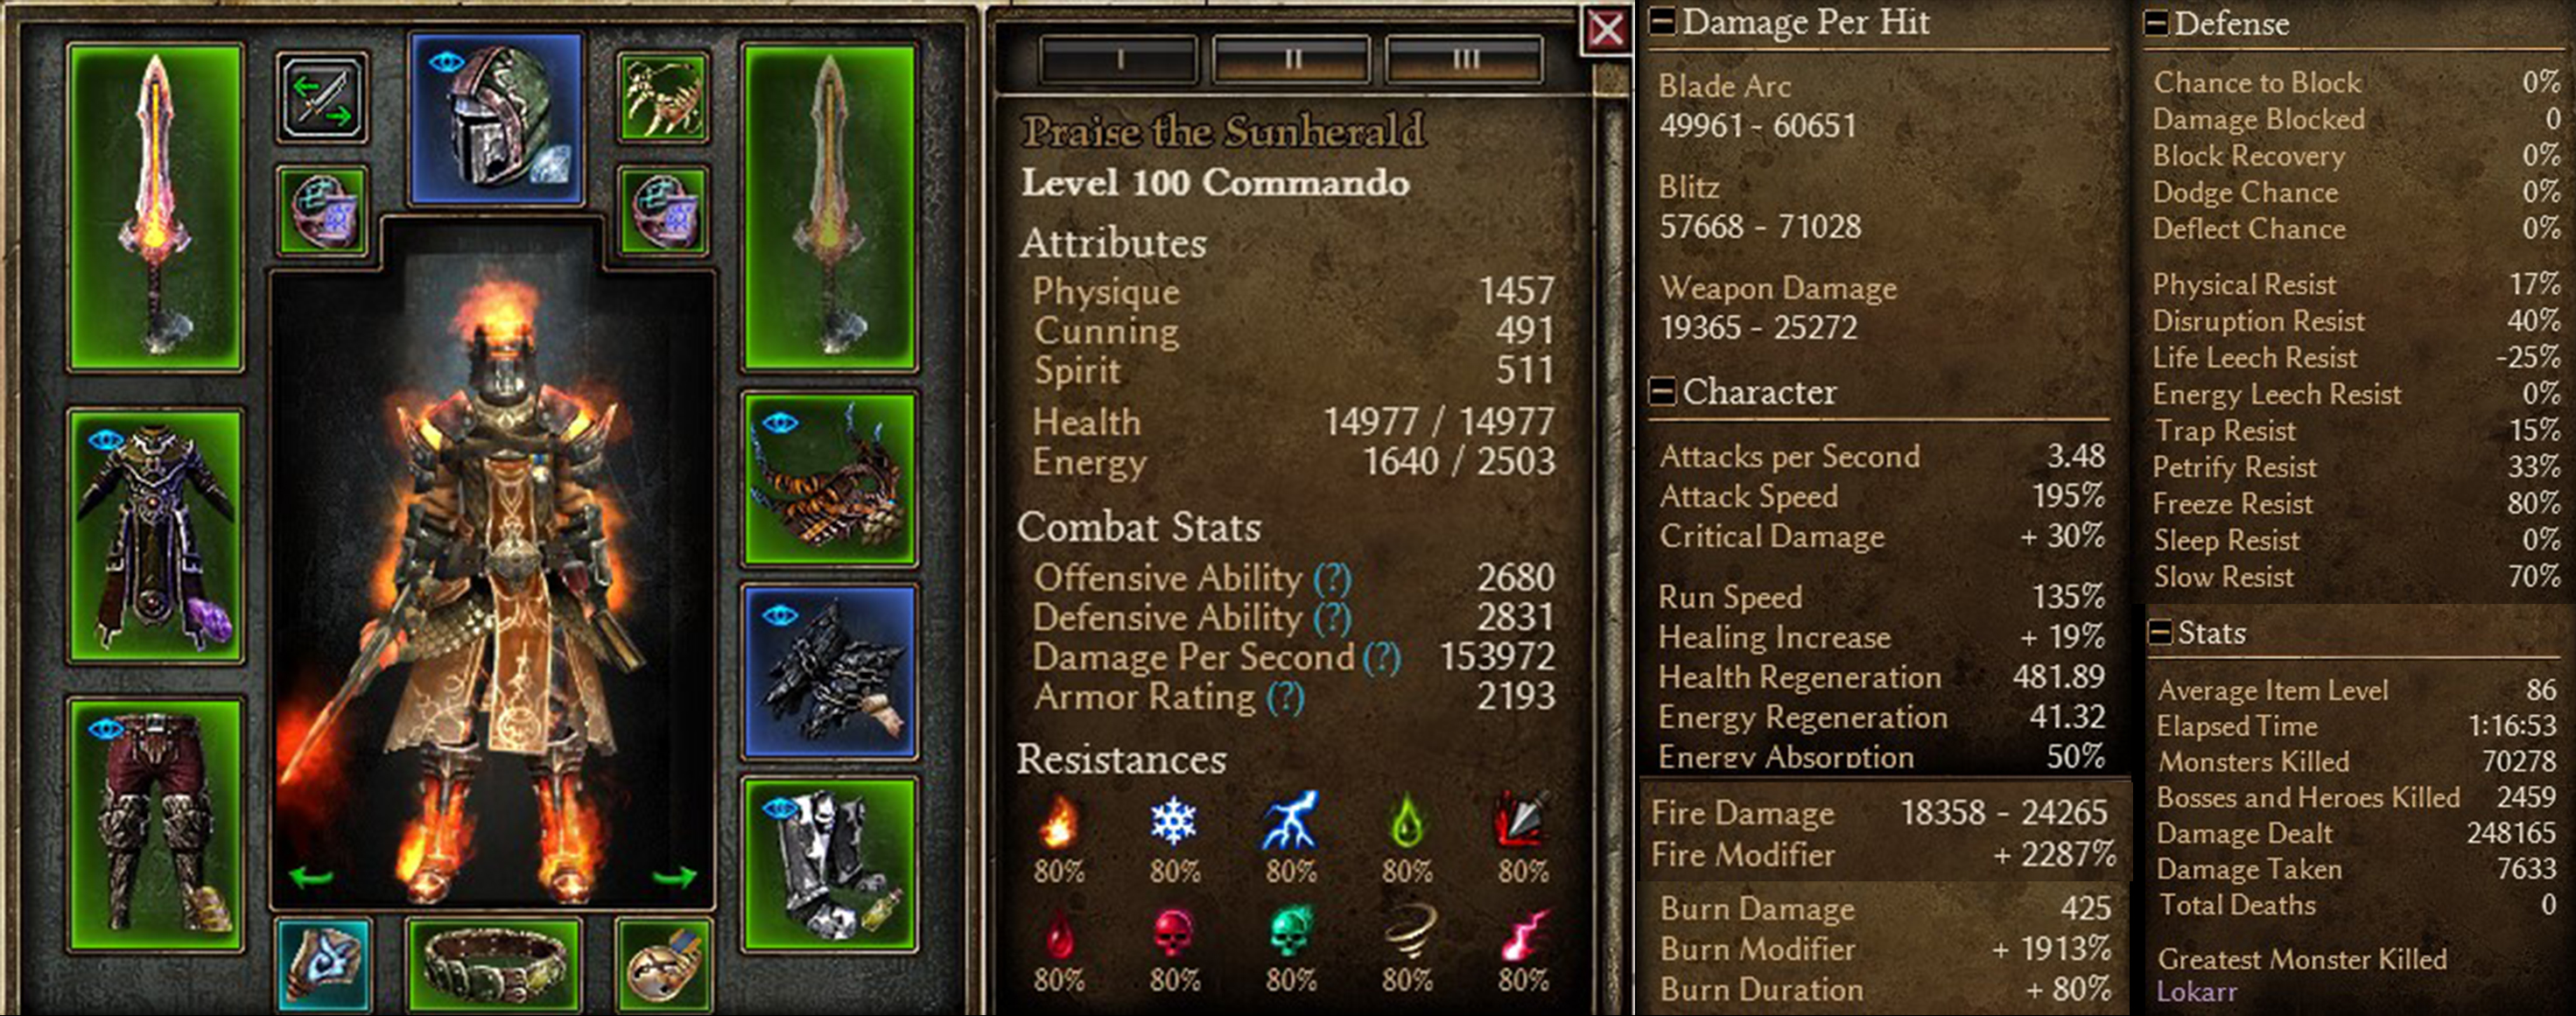
The build’s performance is above my expectations with a single RR mastery class (Soldier doesn’t provide Fire Resistance reduction) and the RR sources are as follows:
- -31% Elemental from Thermite Mines and -23% Fire from Eldritch Fire proc
- 26 Flat from Agonizing Flames
- 20% from Viper
There can be another -8% Fire if I use a Mythical Combustion Band but that’s it. Ulvar’s original concept was to use the Revenant devotion for the flat RR but has no Ulzuin’s Torch proc; I feel like the build will lose damage without the Meteor Shower that’s why I went for it.
The Resistance Reduction problem clearly shows itself when fighting against enemies that are innately Fire resistant and can roll with even more Fire resistance on the gear that they are wearing (most notably the Malmouth mages and Kymon’s Chosen hero mobs). I deal almost no damage even with all RR sources applied.
Nevertheless, I had fun tackling this particular class and its limitations. Since 1.1.9.0 is going to be the game state for a (most likely) very long time, I hope that other people will also enjoy playing as a Commando.
Here are similar endgame options past the items that I have:
Thanks to @Ulvar1, @Stupid_Dragon, @Nery, @Monceaux for their Beginner Guides. These helped me to figure out things when I was starting out in Grim Dawn. Thanks also to @RektbyProtoss and @Relinfearous for their endgame Fire Blade Arc builds. And special thanks to you for reading, until next time. 

 but sun heral/fire blade arc, i gotta try that jazz
