Progress Update: 21 Jan 2023
Last night we completed SR 210 with some different builds, tactics and some perseverance! More details including videos and build links will be coming soon.
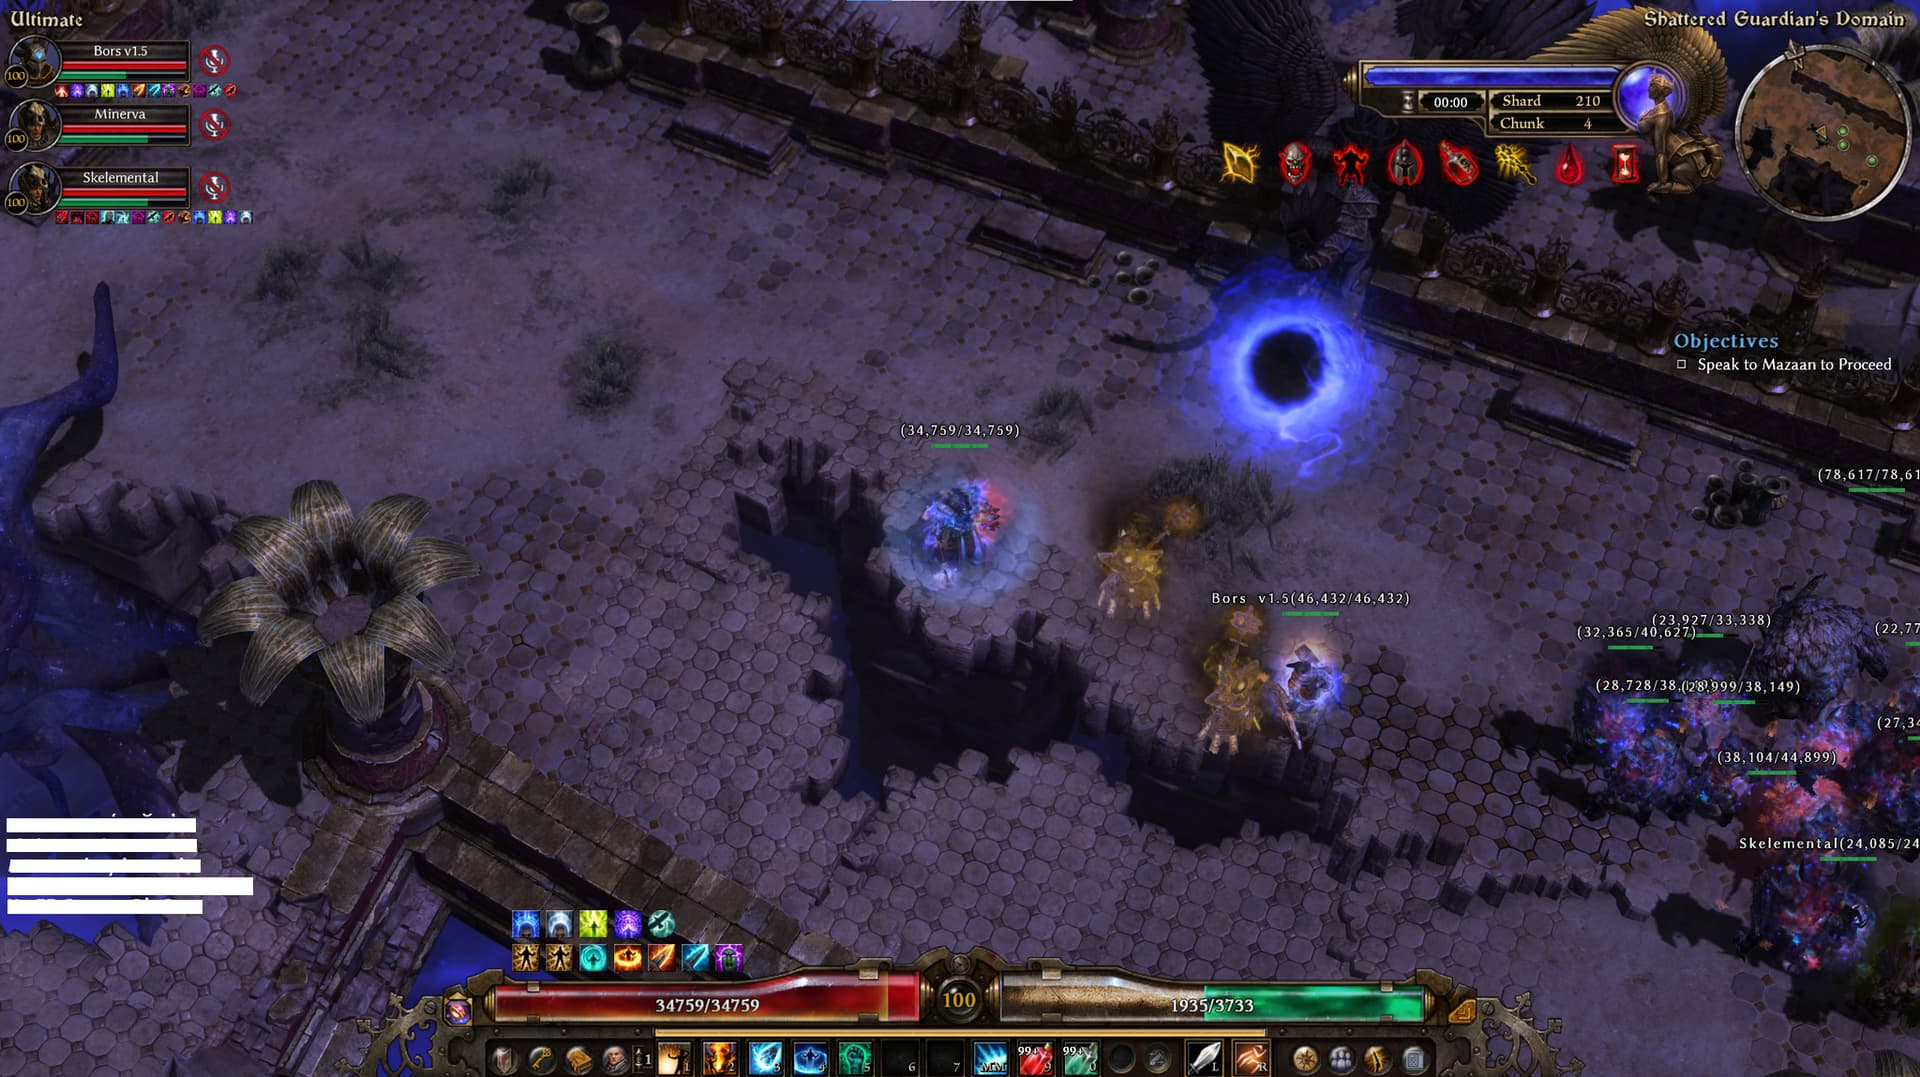
Pilots and builders: @Skelemental @WeaponZero @desioner
Progress Update: 15 Sept 2021
The other night, Knights of the Eternal Realm were able to smash through SR 185-186 in a four man team, so it’s time to update this post!

SR 186 Cleared: Video by @WeaponZero
With tolerable mutators, we found ourselves able to cruise through SR 185 without too much trouble. After a few careless deaths from landmines or a casual approach to fighting some bosses in the boss room, we figured we could likely have actually done 185 within the time limit. 186 was a different story, however, as we found ourselves deliberating over a few different strategies.
After 186, we did try our luck in 187. We fought our way to the boss room. By that time we’d spent a few hours in the session (we ran some warmups before jumping into 185, to introduce our fourth teammember and guest pilot of Kurumi to deep SR), so when we stepped into the room and saw Moosilauke and Aleks waiting for us (our two most hated bosses in deep SR), we called it a night before even trying. 
Our guest pilot was also using a controller, so they were auto-targetting whichever monster was closest while using Albrecht’s Aether Ray, so if you see the beam flying every which way, this is why 
It’s exciting to have made it to 186!! The game stops registering progress after 185 though, so if we want to try for 190, 200 or higher, we’ll need to either climb our way up from 185 through every shard, or find a mod that allows us to jump in at 190 or 200. Watch this space over coming months, we’ll continue to post about progress as it is made.
-| Click here for the original SR 175 Post |-
Original Post–
Over the weekend friends @WeaponZero, @Desioner and I managed to clock SR 175 in our three-man team. 
Grim Dawn 1.1.9.1 Shattered Realm 175 - 2021.07.26 - YouTube
Video by @WeaponZero - Check out 21:49 to see what happens when you miss an inquisitor seal
We were trialling some new healtank builds which I can share and talk about here, alongside Desioner’s phys damage pet conjurer which I can’t say too much about.
At some point I’ll create a post of all of the tank and healer variants that I’ve made in preparation for this deep SR team. Ideally we would like a fourth member to join us, but have had some troubles aligning our schedules to get the full four-man experience. The heal-tank builds below (Taryk and Bors) have been designed to accommodate for the idea that we might not have a fourth player. This is important to note when deciding which classes (and their team buffs) are crucial for the team’s success; which classes and skills to build around with the front line healtanks.
The 3-Man Team
These builds are built to depend on each other. Essentially we have a Tank who can heal, a tanky healer who can taunt, and a pet build who brings buffs and damage. The shortcomings of each individual build are covered by the buffs of the next build, which I’ll detail in the build description of each.
None of the healtanks use green items.
Click on the names below to see build details:
Builds: Updated Bors, Added Kurumi the Spellbinder (15-9-2021)
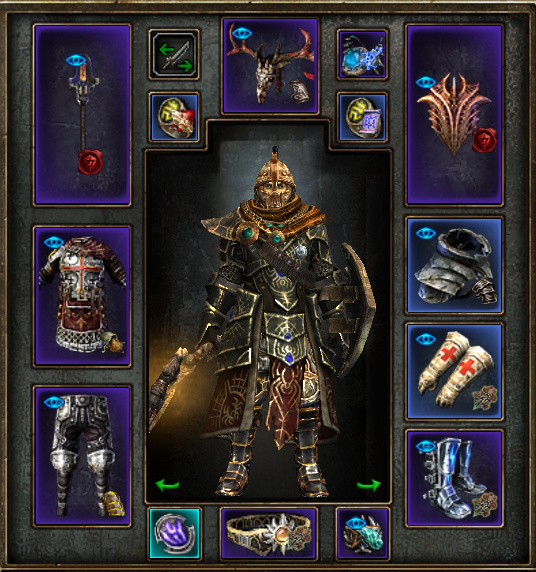
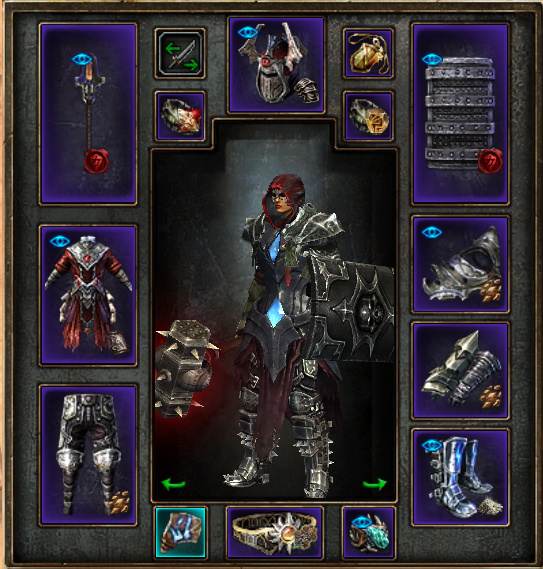
:: TARYK THE MIGHTY :: HealTank Commando
GrimTools: Commando, Level 100 (GD 1.1.9.1) - Grim Dawn Build Calculator
This build could be described as a ‘Tank that can Heal’.
Taunting and Aggro:
This build is built for two things. Tankiness and aggro. What we found through testing different tank+dps combos, is that attacks that provide fragments tend to get enemy attention quite a lot. These sorts of attacks could be anything like Rune of Hagarrad/Kalastor, to Fissure procs, to Ravenous Earth etc. In the past we had to seriously limit which sorts of DPS builds we brought into the team because of this. But, after brief discussions with @XandeRoot, I thought I’d trial pairing the “Generate Additional Threat” shield Mythical Untouchable with skills that generate fragments (in this case, Fissure). The shield, the Fissure fragments, War Cry and Blade Arc with it’s taunt skill addon and Ulzuin’s Wrath constantly hitting groups of enemies allow this build to compete against Briarthorns and Bors (the other healtank) for aggro very comfortably.
Crowd Control
The constant stuns from Fissure and Vindictive Flame, knockdown from Ulzuin’s Wrath and confuse from Searing Light all help to significantly reduce incoming damage from groups of trash mobs, which helps A LOT at SR 175 (where a trash mob can crit for 30k+ damage). Searing Light’s 30% fumble/impaired aim is also incredibly helpful to the survival of Taryk.
Tankiness
This build on it’s own actually lacks significant HP for deep SR. Usually around 40-50k minimum is stable. This build only has 42k when both Fortress and Touch of Purity are active (which is nowhere near close to 100% uptime) . Otherwise it sits at around 33k HP, which is potentially 15k too low. However, when paired with Haven (Oathkeeper), Vigor (Inquisitor), Heart of the Wild (Shaman), Divine Guard (Divinesteel Hauberk), this build’s peak HP is around 62k HP, allowing it to sit very comfortably at the frontline.
The physical resistance of this build is very low as a solo tank (at around 30% without Fortress active). However, with Aura of Conviction (Inquisitor), Divine Guard (Divinesteele Hauberk), Emboldening Presence (Shaman) and Aspect of the Guardian (Occultist), this build’s HP sits comfortably over 80%. With Blast Shield activated and team buffs, this build can achieve 90% physical resistance.
Blast Shield, Overguard and Stone Form work in tandem to create massive amounts of damage absorption, totalling at 1754 damage absorption if all buffs are up at once. This is boosted by an additional 364 damage absorption if standing in Bors’ inquisitor seal, totalling at 2118 damage absorption.
With all buffs up, this build has 8.2k regen which is SIGNIFICANTLY BOLSTERED by the team. I haven’t checked this stat specifically in the middle of a fight, but I think it would be up around 12-14k hp. This build has 46% healing increase, which is boosted to 63% in Bors’ presence. 4.4k armor and 3900 DA also contribute to the tankiness of this build. *Edit: In a team Taryk’s DA gets up to 4,500+.
Blast Shield, Divine Light and Menhir’s Will all serve as circuitbreakers for this build.
Benefits to the Team:
Healing Light, Apothecary’s Touch, Touch of Purity, Field Command and Stone Form all contribute to the survival of the team. Together this all adds additional max health, a chunk of regen, semi-regular healing spikes, damage absorption and armor. Between Squad Tactics, Flame Touched and Temper, this build also provides a significant boost to the team’s OA and DA.
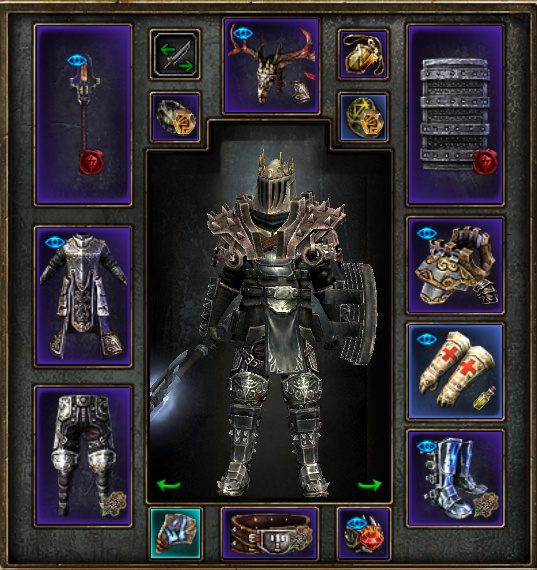
:: BORS THE UNYIELDING :: HealTank Paladin
GrimTools: Paladin, Level 100 (GD 1.1.9.1) - Grim Dawn Build Calculator
Updated: Removed Horn of Gandarr, added Summon Guardians of Empyrion for more physical resistance reduction. This helps to boost Minerva and Kurumi
This build could be described as a ‘Healer who can Tank’.
This build is loaded up with active heals and taunts, in a very ‘piano build’ skillbar:
This build’s primary directive is to provide Inquisitor Seals and buffs for the team, and then to catch the attention of any enemies that Taryk was unable to taunt - Especially in very large grouped pulls of monsters. As this build relies on a lot of high cooldown skills for healing, Time Dilation has been included into this build to allow for more consistent uptime of team buffs, and more rapid active healing. 
Tankiness
While this build is incredibly tanky, it lacks certain properties that a truly dedicated tank would consider ‘must haves’. These skills help to significantly bolster the build’s sturdiness - Menhir’s Bastion, Inquisitor Seal, Stone Form and Ascension (for a combined 20% + 874 temporary Damage Absorption). 51k HP while soloing, and around 60k HP while in a team helps this build to take hits. Circuitbreakers include Meat Wall and Divine Light if Bors takes spike damage.
As a solo build, Bors lacks a few things that would make it a dedicated tank.
- Permanent % Damage absorption
- Only 45% physical resistance without Resilience.
- Only 3170 DA
- Greater resistance to life reduction
- High armor
However, when teamed with the others Bors has a physical resistance of around 75%, and a DA of around 3700.
Taunting and Aggro
Aegis of Menhir (max 5 targets), Judgment and Vire’s Might all help Bors to take aggro. With these three skills, Bors is able to steal aggro from Briarthorns and sometimes from Taryk. Doing so helps to disperse the damage load across the group instead of having it all focused on a single character/pet for the duration of a fight.
Menhir’s Bastion and Ascension for damage absorption, and Touch of Purity for extra max HP are great buffs to stack when Bors takes a lot of aggro, or finds himself taking big damage. Of course, Menhir’s Bastion and Touch of Purity also help to bolster the team’s defenses while they are active.
Benefits to the Team
- Wide area DA shred with Crushing Verdict for team hits/crits.
- +20% physical resistance (Aura of Conviction, Divinesteel Hauberk)
- 1700 + 61% HP (Vigor, Haven, Divinesteel Hauberk, Touch of Purity)
- Inquisitor Seals for Damage Absorption, Regen, Elemental Resistance
- +313 OA (Presence of Virtue, Aura of Conviction)
- Healing Rain, Stone Form for healing, regen and damage absorption.
- 20% Damage Absorption (Menhir’s Bastion)
- -25% physical RR to Enemies (Summon Guardians of Empyrion)
Active Heals
- Word of Renewal
- Bysmiel’s Authority
- Touch of Purity
- Apothecary’s Touch
- Menhir’s Bastion
:: KURUMI :: Physical AAR Spellbinder < - - - - - - New Addition (15-9-2021)
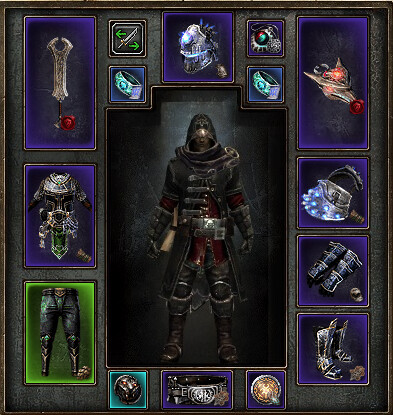
GrimTools: Spellbinder, Level 100 (GD 1.1.9.1) - Grim Dawn Build Calculator
Kurumi is a powerful physical damage spellbinder, with high HP and high damage. The concept for this build in the KotER team is the lovechild of @desioner and I. She uses a fully converted phys damage Albrecht’s Aether Ray and Devastation to do her bidding. As a solo build, her devotion assignment would be different. For example, having Blind Fury assigned to Albrecht’s Aether Ray ensures the shredding of all nearby enemies. But, in deep SR, she should not be too close to enemies, so the priorities became about debuffing enemies from a distance or proccing her own buffs from a distance where possible.
Benefits to the Team
- +243 OA (Overload, Inspiration)
- +110 DA (Inspiration)
- +18% Crit Daamge (Elemental Balance)
- -35% Armor to Enemies (Maul)
- -40% Physical Resistance Reduction (Spectral Wrath, Deathstalker)
:: MINERVA :: Pet Conjurer
Minerva
I can’t say too much about this phys damage conjurer pet build for now, but the blood of dreeg and emboldening presence that this build provides is central to the survival of the team. In our three person team, Minerva is the only build that brings damage. This is Desioner’s build, who wishes to share the build at their discretion.
An Additional Healtank :: Taro the Undying
GrimTools: Warder, Level 100 (GD 1.1.9.1) - Grim Dawn Build Calculator
This Warder healtank was on standby to be used in case the Paladin or Commando weren’t as potent as we’d hoped while testing. But, as our 175 run was highly successful, this build has not yet been heavily stresstested. As a solo build, it is the tankiest of the three healtanks due to it’s double Wendigo Totem healing power combined with it’s high HP.
Like the other healtanks, it does lack physical resistance because it was designed to be played in conjunction with certain other builds and abilities (Aura of Conviction, Divine Guard, Aspect of the Guardian, Emboldening Presence).
While I have taken this build for a bit of a spin, it has not been stresstested or playtested in the team environment that it was designed for.
The theory of it is simple: Have massive hp, provide wendigo totems for the frontline for incredible healing, and keep aggro using a combination of Mythical Untouchable (generate additional threat) and wide-reaching attacks (Wind Devil, Storm Totem) to catch aggro of mobs in a wide area.
Concepts discussed with @Duskdeep86 , @Ulvar1 , @XandeRoot and others from the community have ended up in these builds. Thank you all for the help in getting this far so far!!
Special thanks to @WeaponZero and @desioner for piloting builds and making this teamwork dream work!


 I will do better on minesweeping duty next time and hopefully dying less myself too.
