Not a Step Back!
Although the 1.2.1 physical resistance update crippled the build, causing it to lose its signature facetanking capability, the build has now been updated! With some adjustments it can still facetank like never before! Check out my new Bysmiel’s facetanking build for a facetanking build with more punch to it!
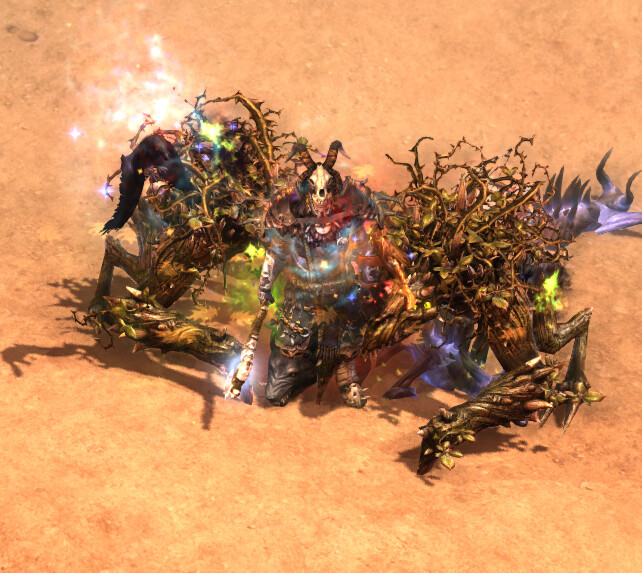
Salutations! For a long time I sought to craft a build that from my perspective is ideal for pet gameplay – that very same gameplay that allows you to face all enemies in battle like a man with your head raised high and your chest swollen with bravery. After some experimentation and trial and error I came up with this Beastcaller Conjurer who sports 30,000 health and +69% Heal Effects that is sustained by a Wendingo Totem, Dryad’s Blessing, and the Familiar’s Mend Flesh ability.

-
- [Pet] [1.2.1.2] (vid) Not a Step Back! – Bleeding/Vitality Pet Beastcaller Facetank
- Damage: Pets (Bleeding, Vitality)
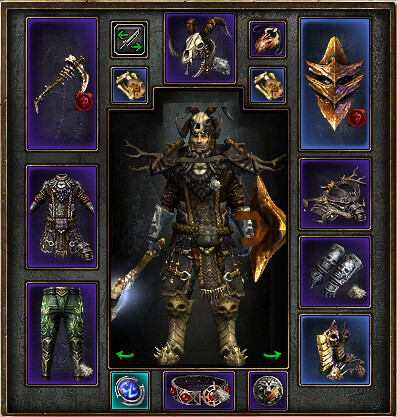
- Active Skills: Summon Briarthorn, Summon Familiar, Summon Hellhound, Conjure Primal Spirit, Curse of Frailty, Devouring Swarm, Wendigo Totem, Call of the Beast, Blood of Dreeg, Savagery, (Upon Rylok Wings)
- Passive Skills: Mogdrogen’s Pact, Primal Bond, Bonds of Bysmiel, Mogdrogen’s Ardor, Presence of Might (x2)
Celestials
Callagadra
Time - 5:30. Using the health regeneration potions and good timing with Blood of Dreeg and potions Callagadra collapses beneath the persistent onslaught of the Beastcaller... Though she kills your pets very quickly so their positioning is vital. The melee pets should be behind her or to her side to avoid death while the Familiar should be further away from her so it can heal you consistently. It can be annoying to attempt moving your pets as they are prone to ignore orders if they are in a middle of casting a spell so half your movement orders are ignored.Avatar of Mogdrogen
Time - 4:30. This so called 'god' is no match for the sheer brutality of the Beastcaller and falters beneath him. Nevertheless he can be very deadly and you need that lightning resistance potion to improve your chances of survival. Later on in the fight you may need to stop facetanking for a few seconds and run around the boss until either your potion of Blood of Dreeg are ready to be cast. He can kill your pets too but he doesn't do it consistently.Ravager of Flesh
Time - 4:20. Since you have an abundance of vitality resistance facing the Ravager of Flesh may be the best option out of the Ravager variants. At least this was my reasoning until I saw his energy leeching spell... Ravager of Minds may be easier after all. The Ravager of Flesh offers no threat to the Beastcaller or his pets. The only pesky thing about him is that energy leech which causes you to fall back a bit so you can recast your abilities.Manifestation of Korvaak
Time - 1:15. There isn't much to say about Korvaak. Compared to the other bosses he's weak and offers no challenge to the Beastcaller.Ulgrim
Time - 0:20. I am not sure if he qualifies as a boss but in my ordinary playthroughs I often found him challenging. I couldn't resist unleashing the Beastcaller upon that insufferable, sniveling wretch. He was even weaker than Korvaak.Secret Bosses
Clone of John Bourbon
Time - 3:15. This imposter is easy to take out and offers no threat or challenge. Compared to the Cellestial bosses he's a joke.Lokarr
Time - 0:35. Lokarr may have an attitude and an aura of nauseating self-importance but it is not enough to deliver him from the title of the weakest enemy on this list. Indeed if Ulgrim the crybaby could be fully killed and didn't stop fighting you when he reached half health he would survive for longer than this Crucible clown.Crate of Entertainment
Time - 2:15. This is the hardest boss to face using this build and the only boss that humiliates you. Against this Crate-man-thing you cannot facetank for long and need to run around to survive. He kills your pets and leaves you guessing if you will survive the encounter. If you're fast enough and focus your pets on him consistently you can defeat him.Shattered Realm
Shard 75 Time - 6:00. Shard 75 was a breeze and offered no threat. When I was testing my capabilities I found that initially I could only go to Shard 80 using the best waystone. I did just that and won it too though it was a lot more dangerous than Shard 75 and I died a few times before winning it. Somewhere between Shard 75 and 80 you lose the ability to purely facetank and have to run around a little bit to avoid death.Crucible
Gladiator 150-170 Time - 8:20. For the Crucible run I used one fully buffed defensive banner and all of the blessings seeing as they are bestowed upon pets as well. With this set up the pets do not die and I felt no threat when facetanking next to the banner.Legacy Version
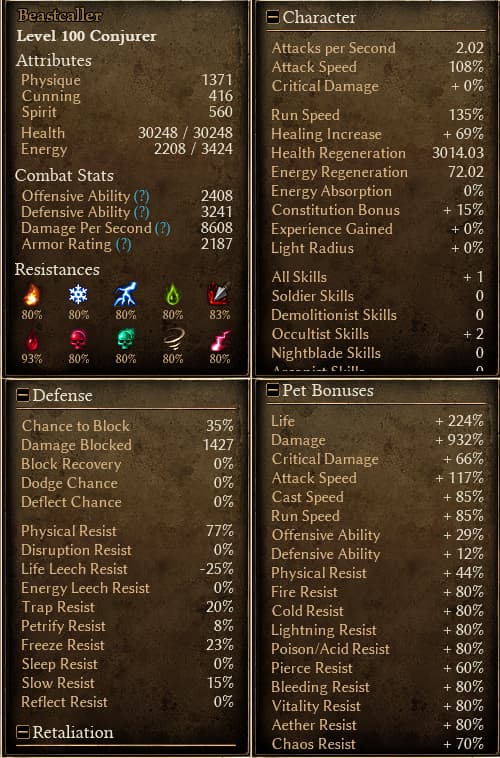
This build was developed, tweaked, and tested before the patch 1.2.0.0 went live. The legacy version used Primal Instinct instead as it was a lot stronger. Overall the patch made the build even better by making the summoned ghosts a lot more reliable. Mogdrogen's Ardor is a great selection now and boosts all your pets considerably. Though health regeneration is one of the less important defensive factors it was boosted significantly and pretty much countered the threat of the new Sundering mechanic. Before my health regeneration was at around 1400 without Giant's Blood and now it is over 3200 due to all the devotion buffs. The Healing Effects bonus also went up from +60% to +69%. The pre-patch version took around seven minutes to kill Callagadra which is a minute and a half longer than the post-patch version.Other Versions
Using the Beastcaller set was not my initial idea. I ended up trying a lot of different tactics and methods and found that using the Wendigo Totem is by far the best way to insure survival. Stacking health regeneration was not very effective and my attempts to use the Tree of Life of constellation only gutted my damage output while offering little survivability. My Necrolord Ritualist with 45,000 health and Wendigo Totem that restored over 9% of it per second was humiliated. My Conjurer using the Ghol's set proved too frail. The second best build to the Beastcaller was a build focused on elemental damage using all or most of the Trinkets of Bysmiel. This build succeeded facetanking Callagadra but I still felt it was overall weaker as it depended on Familiars which constantly died. When firing more than one missile the Familiar refuses to keep distance from Callagadra and always moves up close to its inevitable doom. Perhaps with some solid tweaking this other build could also work. I found that the key to success involves: a powerful Wendigo Totem, a large health pool, at least 75% Physical Resistance, at least 2900 defensive ability, and some damage absorption or a good amount of enemy damage reduction... It just so happens that most of the tools that grant you these necessary capabilities also grant you vitality and bleeding bonuses. After more experimenting it is possible to use the Ghol's set and facetank... Ghol's set facetanking!
For Newer Players
I have received several questions from newer players inquiring on how to advance in the game with this build in mind…
Classes and Skills
When you start you have no skills at all. This should change relatively quickly. After you bash some zombies to death you may want to first select the Occultist class as it can grant you pets faster than the Shaman class. You may want to put your points into the class itself until you unlock the Hellhound skill. You could also put a single point into the Familiar just to have it around. Once you have the Hellhound you can also put a point into Mend Flesh and turn the Familiar into a heal-bot. This will be quite helpful and will make you use potions rarely. Focus on the Hellhound and then go for Blood of Dreeg and try to put a point in Ember Claw. Later on you can put points into Shaman and put points into Mogdrogen’s Pact and then the Briarthorn. Once you unlock the Briarthorn you can refund the points in the Hellhound at the Spirit Guide who can be found in Devil’s Crossing or Coven’s Refuge. These points can then go to boosting the Briarthorn… Or you can just chill with your Hellhound.
Items
As you explore a lot of random items will drop from monsters and chests. Pick everything up and use the best things. Also check the shops from time to time to buy some items. You are looking for high armor values and high damage values for whatever melee weapons you find early on. Later on your standards can improve as your items become better and better. You can use the loot filter to see only weapons, jewelry, and medals that grant you pet bonuses. The Fleshwarped Bulwark monster infrequent shield is a uniquely good item that drops from Fleshwarped ethereals that can be met as early as in the Warden’s Cellar. If you find one you may want to use it over most other items until you find a better version. Once you find the necessary blueprints for relics, which happens randomly, make sure to craft a relic. It can be any relic at first but once you find those that give pet bonuses or entirely new pets you may want to go for those. The relics that really shine are Hysteria and Savage.
Components
The components you find can be useful. Just put them on your items and get stronger. You want any components that give you attributes (Polished Emerald) or defensive stats: resistances, health, and health regeneration. Chilled Steel and Searing Ember can be very good especially at the start of the game as they give you powerful spells that you can use to deal a lot more damage than just with your weapon. Abusing these spells can make the start of the game, the time before you have a lot of points in the Hellhound, a lot faster. There are also components for weapons and shields that boost your pets you can use once you find them such as Serrated Spike, Vicious Spike, Coldstone, Wrathstone, Riftstone, Vitriolic Gallstone, and Enchanted Flint.
Constellations
There are defensive and offensive constellations that you may want to take first. The Lizard is a solid starting one and will make you regenerate your health faster and buff your Familiar’s heals. You can then go for the Shepherd’s Crook as it greatly boosts your pets. You can activate it using a component skill like Ice Spike or Curse of Frailty. If you want to feel tougher go for the Behemoth after getting points for his requirement from the Toad and Nighttalon constellations. If you want to deal more damage sooner get Huntress after Toad and Nighttalon. Remember that you can put points into Crossroads and then later refund them if a Constellation gifts you the points that it also requires (this way the Constellation will give you the points that it needs and becomes self-sustainable in a sense).
I hope you like this Grim Dawn build and I hope you have fun playing the game!
Build Update
With the 1.2.1 update of Grim Dawn many things lost their physical resistance and undermined this build’s ability to facetank Callagandara. This isn’t such a big deal as the beast can be defeated by dodging its wing attack but I took it personally regardless. Using the Soulbearer scepter, instead of the original Ravager’s Bite, the Beastcaller was rebuilt and looking back it feels strange that I ever experimented with builds without have two trusty totems to rely on.
The original build using the Mogdrogen constellation and Ravager’s Bite
When I was first working on this build the Soulbearer did not this ability to give you a second totem. You needed an entire set to achieve that power. Instead I relied on a lot more healing increases to make my one single totem do more work. This old tactic no longer works, however, as it vital to pick up as much physical resistance and armor from constellations as possible making the Mogdrogen constellation a hard sell for a facetanking build.
Video showcasing a similar performance of the updated build against Celestials
Although the new updated build is as tanky as the old one it can easily sacrifice a lot of its defense for better times against bosses; it has plenty of offensive abilities left to max out including Ember Claw, Ground Slam, and Blood Pact.
Special Thanks
Special thanks to everyone who enjoys these builds! I enjoy trying to come with better performing builds and hope that my efforts can help other players as well.