It is just a DOS program, and you need to add the relevant arc file path later.
No problem.
It’s a command line program and will require a .bat or .cmd file. Here’s a thread about it:
1 Like
Thanks, with assistance I managed to get the files extracted! I believe I got all of the .arz resources put into my mod correctly. It was pretty simple to just import them in their .dbr form into the proper places in my mod. However, I’m having a bit more trouble with the .arc assets. Just putting the .arc directly in my resources folder doesn’t work, as when I build the mod it removes it. I can extract the needed .tex files from that as well (as you suggested) and import them as sources, BUT the Asset Manager says it can’t auto-create assets for them. Since they aren’t actual assets, the mod can’t use them. I also tried directly putting the .tex folders into my mod’s assets folder but my mod just gave me a slew of errors saying that they weren’t properly imported assets. I’m so close - do you have any more advice on how to proceed from here?
Content to be integrated: …\mods\Grim_UI_X-Mod_Hoarder
Great, I’m glad you got them extracted!
Yeah, I see your problem and that’s my fault, so I apologize. I didn’t take into account that everytime you build your mod, you’d have to replace the .arc file. My advice is, you should just extract the .tex files I mentioned and put them in your “settings” folder.
Here’s the deal with the Asset Manager and the .arc file:
It’s looking for source files to create the assets and then, ultimately, the .tex files from. These would be .psd (or .tga) files, which is what you would Auto-Create Asset ► Bitmap with. Then the AM would be able compile an .arc file correctly.
The TexViewer.exe allows you to save a .tex file as a .psd, as well as other formats, for editing.
Alright. Yeah I tried manually saving each file as a .psd and then turned each of them into an asset .tex, which when I built no longer gave me any errors. However, in-game, nothing still shows up, or I should say the character sheet is invisible with weird colored squares all over lol. Where is this “settings” folder you mention? The only settings folder I can find is directly in my GD Directory, and not related to any of my mods. So adding anything there wouldn’t allow anyone else using my mod to also have the assets available I assume?
I’m not quite sure what you’re trying to show me here, sorry. I can directly put the .arc into my mods sources but it doesn’t do anything for my mod in itself, and I can’t create an asset out of it.
The missing textures are most likely due to an incorrect path issue. If you’re creating the .arc file, it has to be named Grim UI X-Mod.arc, otherwise, you will have to change each .dbr file’s texture path to that of what you are naming your .arc file.
I assume that the Settings folder you’re referring to is in ...Documents\My Games\Grim Dawn, correct? If so, you can use that or you can create one in Grim Dawn’s installation directory. If one already exists in GD’s installation folder, you must’ve created it. Whatever the case may be, you can use either one.
And yes, if you use the Settings folder, there are no assets available to share. You can, however, simply share those .tex files.
I did notice the other day that the paths weren’t right, but unfortunately setting them to the proper directory didn’t seem to do anything. I’m pretty stumped as to what else I can do at this point. To break it down, here’s what I’ve done and what I’ve got:
- I extracted both the .arz and .arc files from your mod.
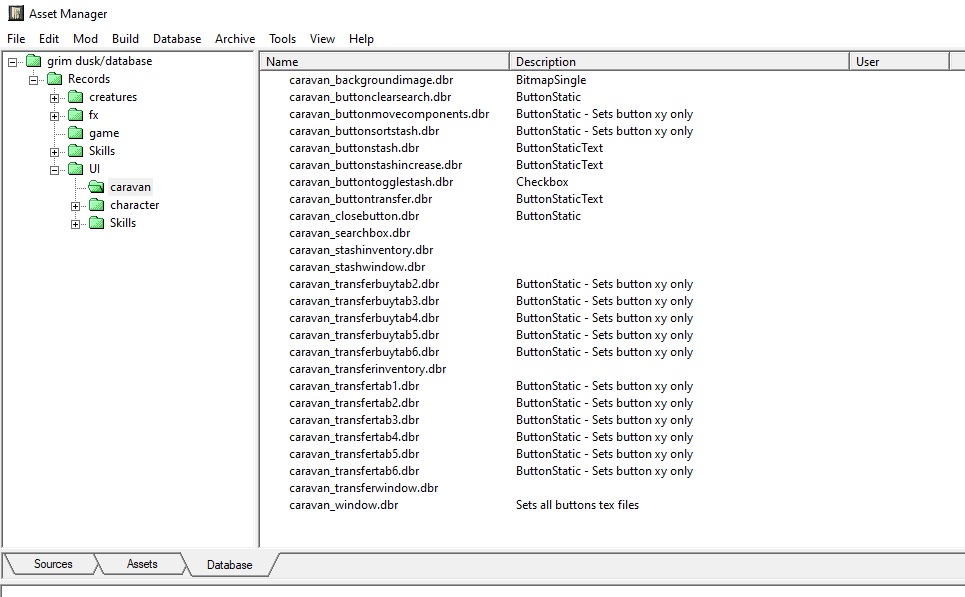
- I placed all of the .drb files from the .arz you mentioned with “caravan” or “character” in their name into my database via the Asset Manager and the import button. I made sure to create the proper folders and subfolders for them to be located in.
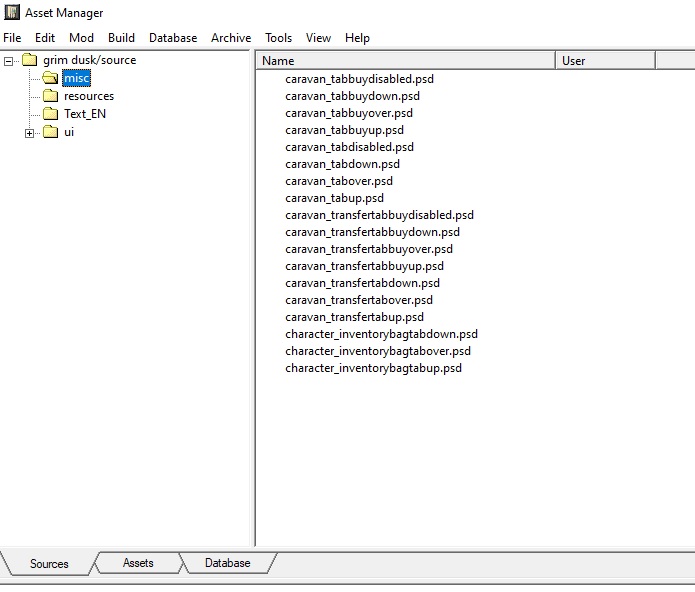
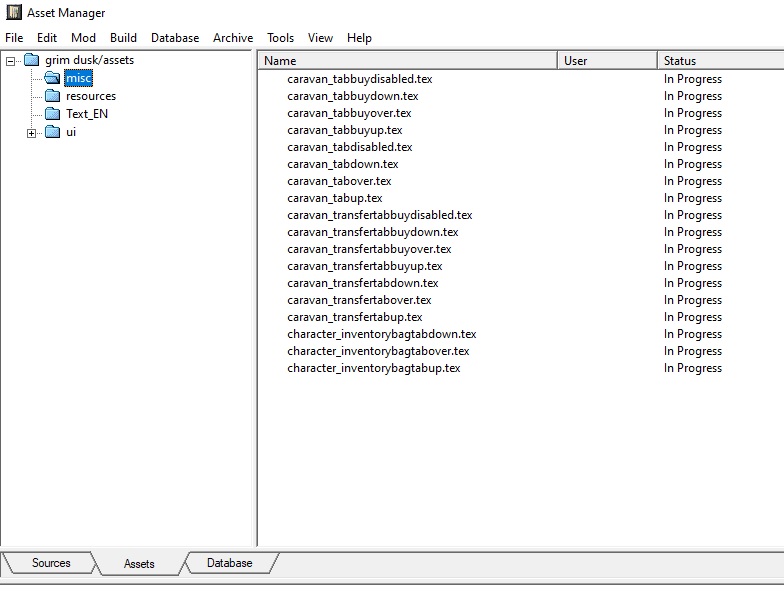
- I converted the .tex files from the .arc into .psd using the TexViewer and then imported them into my sources. I then auto-created assets out of them. Note that I tried both bitmap and textures of each format and all final results were the same.
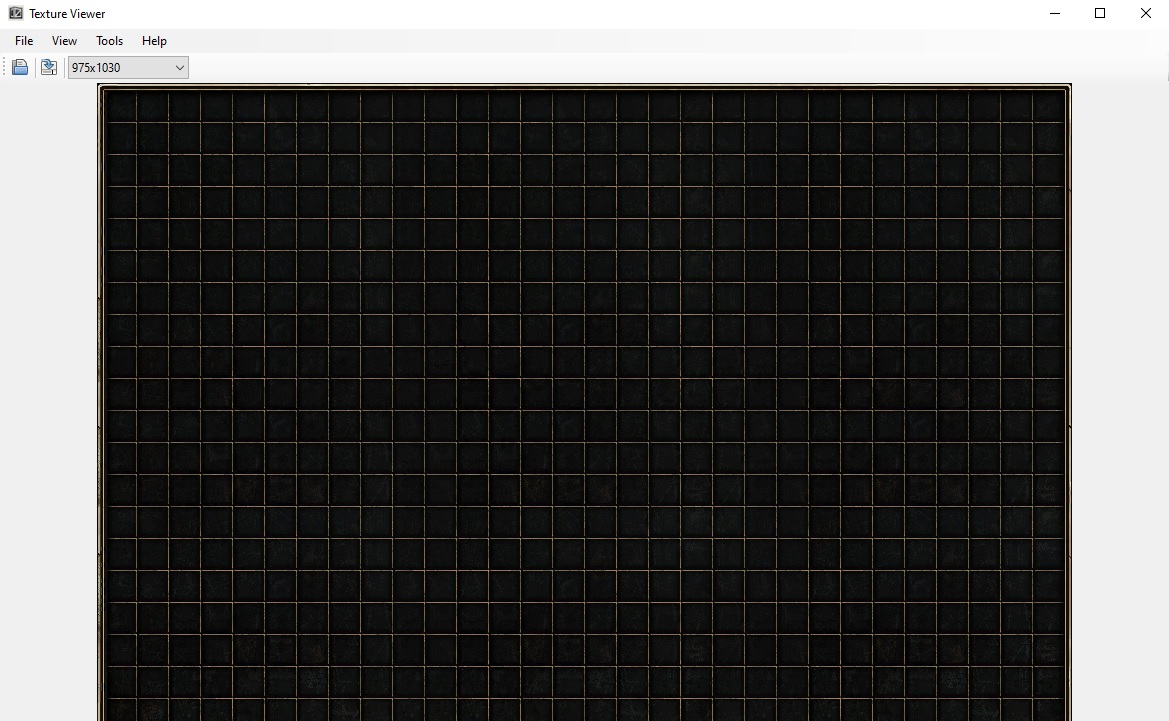
- I discovered that my new .tex files were in my Resources folder of my mod, and double-checked them in TexViewer to make sure they did indeed contain the images you created for your mod. They do indeed seem to be the proper images.
- I manually set the path of each .dbr file I imported to the proper .tex file from my resources. I used the little search button that lets you directly choose where to grab the image path from.
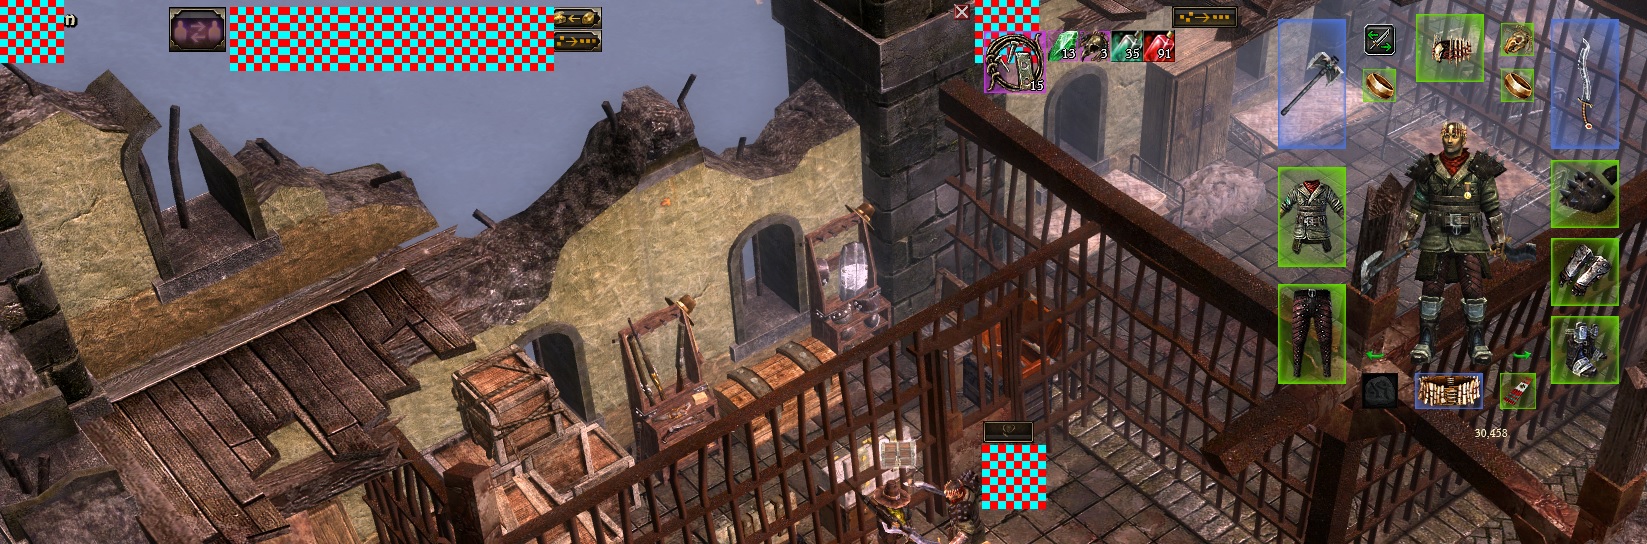
- That should be everything as far as I know, but when I build my mod (which at this point gives no errors) I still end up with this…
Sorry for the large slew of pictures but I’m hoping that maybe if I lay everything I’m doing out on the table you might be able to see if I missed a step or got a step wrong. (Sorry I’m bugging you so much with this).
1 Like
Do you mean extract the files? Because if I just slap the .arc into my mod then building it immediately deletes the .arc. I have to import the files manually or my mod won’t save them. At least that has been my experience thus far.
I’ve tried that, but whenever I build it deletes the Grim_UI .arc from my resources folder.
I’m sorry, I’m not quite getting what you’re trying to tell me. Don’t mess with my source tab at all? Also what is the difference between the standard build button and Archive>Build?
Oh, I think I see what you’re getting at. Essentially, leave the .arc alone and then when making changes to my mod, only build the parts I’m changing and not the part where my .arc is? Uh, that might work, if I could figure out in itself how just slapping the .arc in my resources would make my .dbrs usable, and how to link them to the right image sources.
Don’t worry about it at all, you’re not bothering me. And pictures help me immensely, so you’re all good on that front too.
-
Looks fine.
-
The
miscfolder you’re using makes amisc.arcfile, which is what you have to reference in your .dbr file. See number 5. -
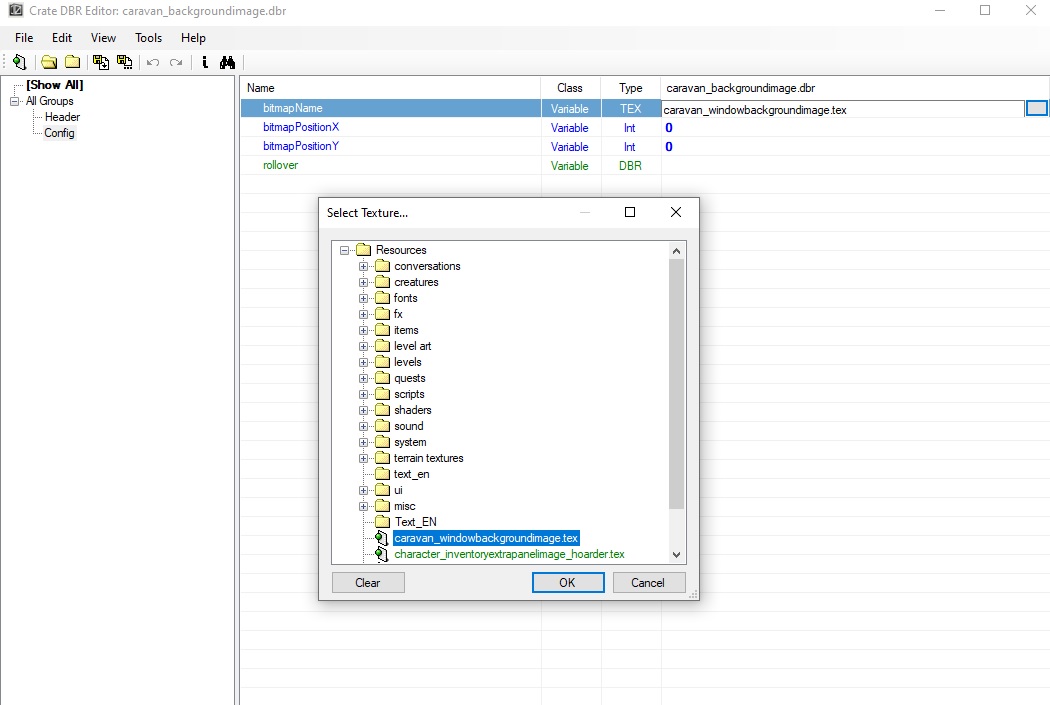
This is the
caravan_windowbackgoundimage.texand it’s inverted, so chances are, it’s gonna be upside down in game. You’ll have to flip the image with an editor before you use it.
- For whatever reason, the TexViewer.exe saves images inverted, which is a pain in my ass, let me assure you. Maybe I’m not holding my mouth right when I save .tex files or I’ve missed something over the years…yeah, probably both

- The path should read
misc/caravan_windowbackgoundimage.tex.
- You have to make sure this file is in the
miscfolder though. Based on your picture, it is not. You have it directly underResources, where you extracted the game files. This will give you number 6.
- Result of an incorrect path to your .tex files.
If you don’t edit any of the Hoarder .dbr file’s tex paths to begin with, then things will be fine with their textures as they are looking for the Grim UI X-Mod.arc file.
No. The texture path is being edited in the .dbr file as stated below:
1 Like
Blockquote If you don’t edit any of the Hoarder .dbr file’s tex paths to begin with, then things will be fine with their textures as they are looking for the
Grim UI X-Mod.arcfile.
In this case would it be simpler not to extract any files from the .arc at all? Should I do as @tt300 suggested and just put the .arc directly in my resources, and then just re-import the .dbrs with their original paths set? That way I wouldn’t have to worry about any image flipping right? With that my only issue is when building the mod, but apparently I can build selective parts instead of just the mod as a whole so perhaps it wouldn’t be quite as annoying as I would have thought after all?
Yes that is the mod I am working on. I’ll check out your model, thanks.
Well you got it to work lmao. You know my own mod better than me apparently 
 I will try to copy the file format you show and see if I can get it to work for myself using yours as a guide. Also how do you get the text “Grim Dusk v.1.81” to show up on the Quest Log in-game? That’s a nice touch.
@tt300 Holy crap that finally got it to work. Thank you SO much. Having a direct example to work from helped a ton! Also of course thank you a ton as well @JMD for your assistance and letting me integrate your mod with mine. Once I release my mod with it I will give you full credit for it of course. Btw, one last little thing  uh is there any way to remove the foreign text from the blank area of the inventory screen from before you get your first additional bag?

Not a huge deal if it’s not a simple fix, though in that case I would at least like to know what it means lol.
2 Likes
Awesome, thanks. I copied yours directly initially cause I really wanted to make sure I did everything exactly the same as you lol.
Here’s a lil gift for ya…
$path = "C:\Path\To\Images\Folder\That\Needs\To\Be\Flipped" #target directory

[System.Reflection.Assembly]::LoadWithPartialName("System.Drawing")
Get-ChildItem -recurse ($path) -include @("*.png", "*.jpg") |
ForEach-Object {
  $image = [System.Drawing.image]::FromFile( $_ )
  $image.rotateflip("Rotate180FlipNone")
  $image.save($_)
}
Modify the path on the first line to point at your target folder. On the 4th line is where you can add whatever file extensions you want flipped.
Now, paste the text into into a new .txt file and name it something witty and change the file extension to .ps1, like so…
flip180.ps1
Now you got yerself a lil Powershell script. Right-click it…
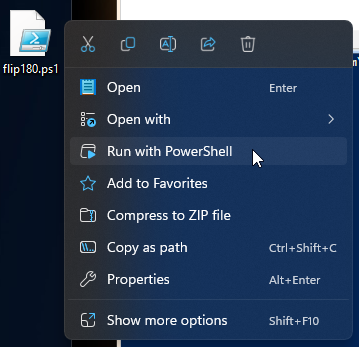
…to run it and watch it automagically flip everything 180 degrees at the destination.
–
I unashamedly searched and stole this script for ya from:
https://code.adonline.id.au/rotate-or-flip-images-powershell/
SIDE NOTE: This doesn’t appear to work with .psd file extensions. Quoted from the above linked article…
PowerShell can batch rotate and/or flip images in the BMP, GIF, JPEG, PNG, TIFF and WMF formats.
2 Likes