Introduction
The motivation behind this leveling journal/guide is mainly 1.) I haven’t used Stun Jacks until playing this character and 2.) I haven’t made a Purifier. I chose Purifier over Elementalist because of better survivability options (more on this in the Build Introduction) and this Monster Infrequent which benefits both Storm Box and Stun Jacks, possibly making it viable to level with both as main skills. Of course, the easier way to level is Blackwater Cocktail or ranged Fire Strike but there are already plenty of guides/builds that showcase it.
Before we continue…
This beginner guide will assume that you have both Ashes of Malmouth and Forgotten Gods expansions. The main items for leveling and for early farming (Monster Totems and Skeleton Key dungeons) are exclusive to the expansions. With that being said, let’s journey through Cairn with lightning!
Begin with the end in mind
There will be 2 phases for the end build: the easy-to-get version and the “farmable” version.
Easy-to-get
This version only has the base (affixless) and faction items, basic components, and weapon/accessory augments to serve as a rough guide. The armor augments will depend on what affixes you roll on the pants and belt. This setup is capable of farming Monster Totems easily, which will be the main focus until you get…
"Farmable": Stormrend + Stormserpent Set (with current stats screenshots)
This is the aim for the build which highlights Stormrend and the Stormserpent Set. Stormrend is a global Legendary item drop (can drop anywhere) but more frequently drops from Aetherwarped Monster Totems (hence the “farmable”) and the Stormserpent Set is an Epic/Blue item set that, although it has no blueprint for crafting, is still fairly easier to get than the Mythical Light’s Defender Set. The Grim Tools Link shows what I currently have on the character; affixes and augments can certainly vary. Also, GT shows 78% Pierce resistance but I have 80+4% in-game.
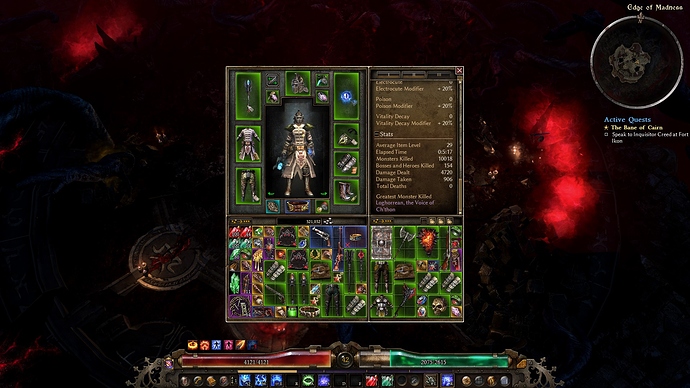
Current Stats
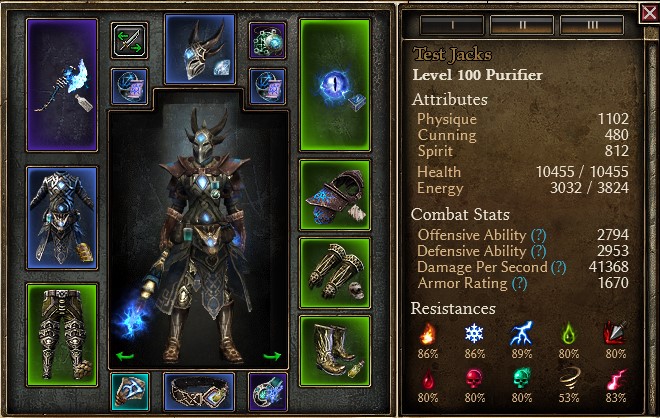
All toggle skills active + Word of Renewal and standing on Inquisitor’s Seal. Sheet DPS is for Storm Box
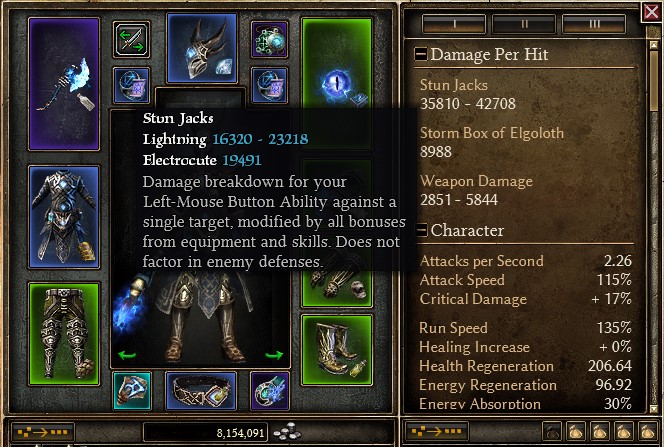
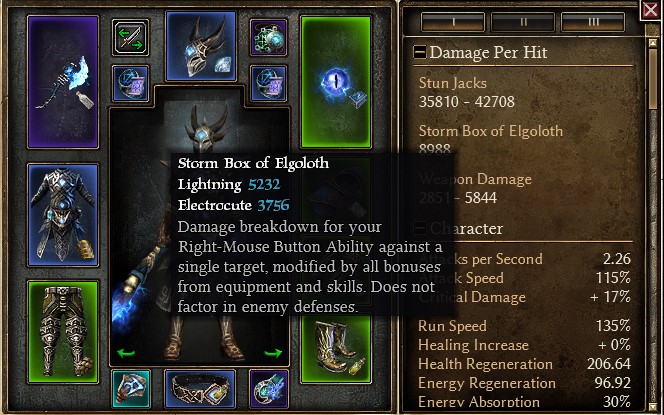
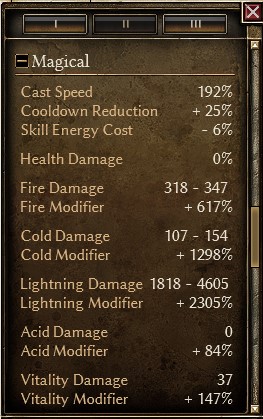
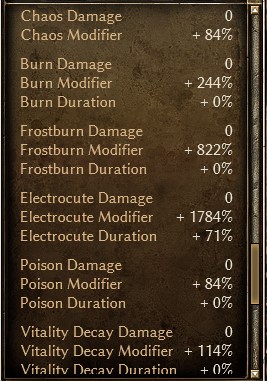
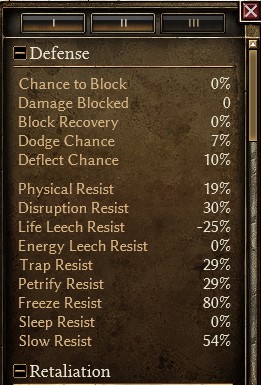
Build Introduction
Main Skills Info
The main skills for this build are Stun Jacks from Demolitionist and Storm Box of Elgoloth from Inquisitor.
Stun Jacks
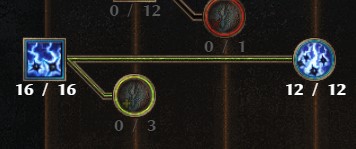
This Area of Effect (AoE) skill makes you throw projectiles (looks a lot like caltrops) in a cone area centered at you. This skill does not need a target to be cast. The “spread” or how wide the jacks will be thrown will depend on mouse distance from your character. This video will show you how it works.
This means that for maximum damage, you need to be in melee range of the enemy. The main downside of Stun Jacks is there is no way to lifesteal from it since it does not use Weapon Damage and there are no items that add Attack Damage converted to Health (ADctH) to it.
The base skill node Stun Jacks increases the flat Physical and Lightning damages and Stun Duration per point spent. The base number of Jacks that you can throw is 3, which can be increased by the second node Full Spread. Full Spread also adds Damage over Time (DoT) damage to each Stun Jack and increases the flat damage part. There is a Transmuter called Quick Jacks, which removes the Cooldown at the cost of less damage and removing the Stun effect. We will not use Quick Jacks for this beginner build.
Storm Box of Elgoloth
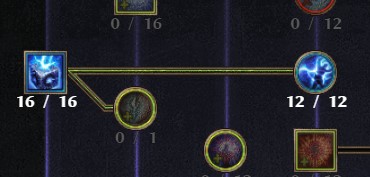
This is also an AoE skill with a small radius but it needs an enemy target to be cast. Storm Box of Elgoloth deals Lightning (flat) and Electrocute (DoT) damage and decreases enemy Defensive Ability (DA). Lower enemy DA means you have higher effective Offensive Ability (OA), which means you have increased Hit and Critical chances. The Lightning Tether adds a sort-of link to you and the target. This link also deals Lightning and Electrocute damages to the target and any enemies that passes through the tether, and it will break if you move too far after casting. The Transmuter Allagast’s Arcane Net converts the flat Lightning damage to Aether. We will not use the Transmuter in this build.
Class choice: Purifier (Demolitionist + Inquisitor)
As I mentioned in the introduction, I chose Inquisitor as the Support class. While Shaman is another option for Lightning-based builds, I decided to go for Inquisitor since it has Word of Renewal (healing + DA), Inquisitor’s Seal (Flat Damage Absorption) and Aura of Censure (% Damage Reduction and Elemental Resistance Reduction). These skills together with Demolitionist’s Blast Shield makes the build safer for beginners to use. Shaman’s Wind Devil and Storm Totem are great damage options but will require more skill point investment.
Leveling Guide
Items to look out for
The number one priority for leveling gear will always be Resistances. Make sure you cap/overcap resistances first before changing into additional damage/skills.
Affixes
Most of the loot that you will get along the way will have random affixes, so here’s some of the useful ones for our build:
-
Charged
This prefix gives Lightning and Electrocute damage, and also has some Physical to Lightning conversion -
Impervious
This prefix gives Pierce + another type of Resistance. Look out for Pierce + Poison combo. -
Thunderstruck
This prefix gives Lightning/Electrocute damage, Elemental and Aether resistances, and sometimes Physical/Stun Resistance depending on the item slot. The name kinda gives away it’s usefulness to our build. -
of Thunder
Straightforward suffix, gives Lightning and Electrocute damage. -
of Celerity
Gives Casting Speed, great for us since this is a Caster build. -
of Squalls
This affix gives Lightning and Electrocute damage, and +2 to Stun Jacks. Can also give a damage proc on Attack/when Hit.
Monster Infrequents
Grim Dawn has an item class called Monster Infrequents (MI), which are Rare/Green class items that drop from specific monsters in the game. These items mostly have skill bonuses (such as +2 to Stun Jacks, +1 to all Inquisitor Skills, etc) and some have unique Item Modifiers which have varying effects like additional damage, damage type conversion, etc.
The following items are not required but are highly recommended to help with the leveling process. These will be listed in order of Main Campaign progression. Click the item names to view in Grim Tools.
-
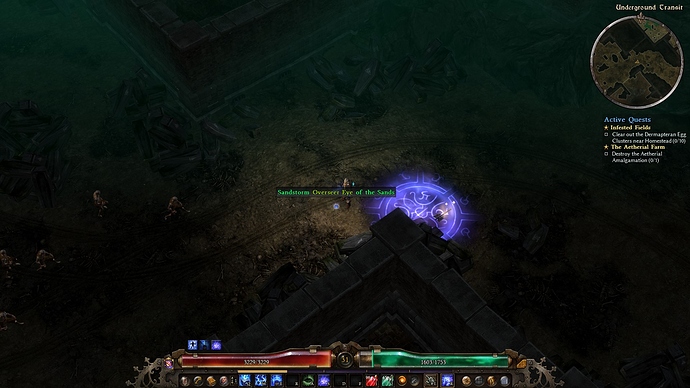
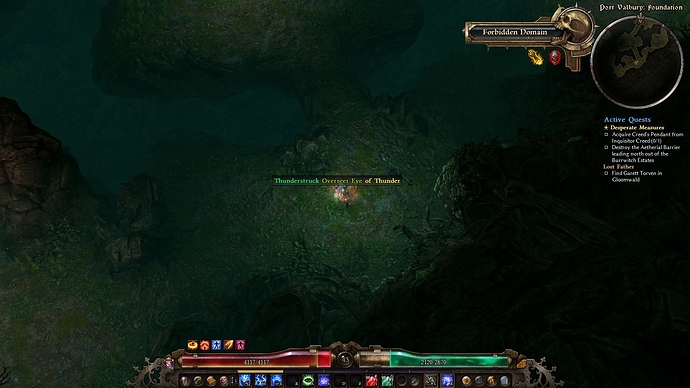
Overseer Eye

First available encounter: Burrwitch Village area
Drops from: Overseer/Overmind/Mindrager (Champion/Yellow monster rarity or higher, those large floating eyeballs)
This is actually one of the core items in the end build, but is not required for leveling. You can get away with just a caster offhand with Lightning/Electrocute damage, Energy Regeneration, and Cooldown Reduction. This item has a base of Lightning and Electrocute damage, +2 to Stun Jacks and Lightning Tether (which are both used in the build) and +1 projectile and more Electrocute damage to Stun Jacks.
This item can also be bought from a special vendor inside the Port Valbury dungeon, in case you want to powershop this for better affixes.
-
Ulraprax’s Sting

First encounter: Swarming Hive (left side from Twin Falls rift)
Drops from: Ulraprax (bee Boss monster, only found inside the Swarming Hive)
This item feels like it’s made specifically for our build. Base Lightning damage, +2 to Full Spread, +1 to all Inquisitor skills, and adds Electrocute damage to both Stun Jacks and Storm Box. What more can you ask for?
-
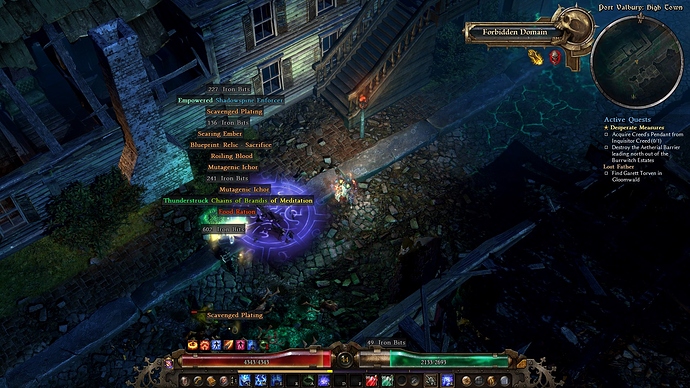
Chains of Brandis

First encounter: Port Valbury (Skeleton Key dungeon, right side of Homestead)
Drops from: Watcher Brandis (Commander Lucius clone)
Another item from Port Valbury. The reason why I mentioned this is the Vitality to Lightning damage conversion, which allows for the Bat Devotion proc to have more sustaining power. You can skip this if you don’t like to trade a Skeleton Key for it (70% chance to drop at monster level 50).
-
Wendigo Eye

First encounter: Ugdenbog area
Drops from: Wendigo (Champion/Yellow mob or higher)
This medal is great for the early levels since we are mostly using Word of Pain. Additional Elemental Damage and DA reduction is really good for clearing out trash mobs.
-
Enslaved Wraith

First encounter: Ugdenbog area
Drops from: Wraiths (those ghosts, Champion/Yellow rarity or higher)
This is another offhand option if you were not lucky enough to get an Overseer Eye from the world map or if you didn’t drop by Port Valbury to buy one. Base Lightning/Electrocute damage, +2 to Storm Box and gives it -10% Lightning Resistance Reduction.
-
Korvaak’s Storm-Blade

First encounter: after Vanguard of the Three (Forgotten Gods area)
Drops from: Korvaak’s Ascended (those big thicc bois with swords as hands)
This is the reason why we put at least 5 points into Cunning. Base Lightning/Electrocute damage, Casting Speed, +2 to Stun Jacks and adds +24% Crit Damage to it. Pretty sweet, provided that you crit.
-
Chosen Mask

First encounter: after Vanguard of the Three (Forgotten Gods area)
Drops from: Korvaak’s Chosen (a.k.a. "Korvaak saaaaveeee meeeee~), Sister Crimson/Brother Segarius/Astros the Sunherald (target-farm options)
The good thing about this item is you can see that the enemy wears it, and therefore has a higher chance of dropping it. Base Lightning damage, +3 to Lightning Tether, +2 to Thermite Mine, -0.5 second cooldown and more Electrocute damage to Storm Box.
Skill Allocation
The main skill nodes that you want to max ASAP for leveling are:
-
Storm Box of Elgoloth
Main skill, enough said. Only 1 point in Lightning Tether since are a lot of MIs that add damage to Storm Box. -
Word of Agony
Although Word of Pain is a really good AoE skill, we are only maxing out Word of Agony since it has the Lightning damage part. Death Sentence is good as 1 point for leveling. -
Aura of Censure
This is our exclusive skill. We want to hardcap this for the Damage Reduction and Elemental Resistance Reduction. -
Inquisitor’s Seal
Your safe space while in the chaotic world of Cairn. Damage absorption is really good since we tend to have low armor. Be strategic in placing Seal so you won’t get caught outside of it. Put 1 point to Arcane Empowerment. -
Full Spread
Yes, Stun Jacks is the main ability. But since we are using the cooldown version (not taking Quick Jacks), Full Spread makes more sense to max out for the DoT damages while leveling. 1 point Stun Jacks, hardcap Full Spread. -
Ulzuin’s Chosen
Adds more damage to Stun Jacks and has a chance to reset its cooldown. Stun Jacks spam is very satisfying to see. -
Word of Renewal line
You might want to max Steel Resolve first for the Aether and Chaos Resistances, then max out Word of Renewal. Put 1 point to Vigor at the start and leave it at 9/10 when you can put points; the increase in resists from 9 to 10 points is only 1%. -
Flame Touched
Gives more Lightning/Electrocute damage and Offensive Ability. 1 point only for Temper.
The next skills listed are not required to be maxed but has some breakpoints/“sweet spots” to consider because of diminishing returns:
-
Blast Shield
This proc + Inquisitor’s Seal makes you a bit of a facetanker, but not really. Don’t be afraid to stand in place when it procs, but get ready to disengage before it ends. Sweet spots are 5/12 and 10/12; we can’t reach 15/10 in this build, unfortunately. -
Thermite Mine
Your on-demand Elemental Resistance Reduction skill. Sweet spot is at 13/16. -
Vindictive Flame
We get this skill mainly for the Health Regeneration and Total Speed. Sweet spot is at 11/16, put 1 point in Ulzuin’s Wrath.
Optional skill: Flashbang
I initially thought of using this in the skill rotation but the build is point-starved and we have enough skills to proc our devotions. I used 1 point to Flashbang and Searing Light while leveling and removed it in the end build.
Devotions
If you checked both the Easy-to-get and “Farmable” versions, you will notice that there are some Devotion changes. We are going to focus on the Easy-to-get since this will be the leveling spec until you get the required items. My thought process on making this Devotion setup is to prioritize survivability since we lack ADctH/lifesteal and get the relevant Resistance Reduction Procs. Feel free to explore other options.
TL;DR version
(+ means add, - means refund)
+Green Crossroad
+Bat (bind to Word of Pain)
-Green Crossroad
+Blue Crossroad
+Tsunami (bind to Storm Box)
-Blue Crossroad
+Quill
+Widow (bind to Stun Jacks)
+Wraith
+Chariot of the Dead (bind to Aura of Censure)
+Solemn Watcher
+Rhowan’s Crown (bind to Thermite Mine, rebind to Flashbang/Inquisitor’s Seal after getting Ultos)
+Yellow Crossroad
+Harvestman’s Scythe
-Tsunami
+Oklaine’s Lantern
-Yellow Crossroad
-Quill
+Behemoth (bind to Blast Shield)
+Ultos, Shepherd of Storms (bind to Thermite Mine)
Tier 1
Bat
We take this for the affinity and because this will be our main sustain proc. We improve this via the Chains of Branding belt (Vitality to Lightning conversion) or the Stormseeker Set (up to 85% Pierce to Lightning conversion)
Tsunami
This is just for the early Blue affinity and additional damage. We will remove this once we have enough affinity later.
Quill
Just for early affinity and some minor boosts; will be refunded like Tsunami.
Wraith
Lightning damage and affinity. We will not remove this since both colors are needed to unlock other Tier 2 Devotions.
Tier 2
Widow
Mandatory for Lightning builds since it has -XX% Resistance Reduction, which stacks with other similarly worded RR types.
Chariot of the Dead
I chose this for the heal + Armor and Defensive Ability proc when hit. The heal is instant while the Armor and DA lasts for the duration.
Solemn Watcher
Great defensive devotion, also need for the affinity.
Rhowan’s Crown
Flat Elemental Resistance Reduction. We are not using Blackwater Cocktail (which has Flat RR on it’s Agonizing Flames node) so we take this Devotion. The stats are also useful to us.
Oklaine’s Lantern
This is more for the affinity, and the bonuses are not bad for casters like this build.
Behemoth
Another choice for survivability. You want to bind this to Blast Shield; that way, it will only proc when you actually need the emergency heal. Chariot proc makes more sense to be up all the time since it also gives Armor and DA, while Behemoth proc only heals.
Harvestman’s Scythe
Mainly for affinity and boosting stats and Health Regeneration.
Tier 3
Ultos, Shepherd of Storms
The only Tier 3 Devotion in this setup. The nodes are really nice to our build and the proc adds another layer of Resistance Reduction.
Leveling Journal
This will be divided into character levels and areas so you know what to look out for and what to do next. The early levels are not set in stone; it’s just what I ended up when clearing the area of interest. If the section does not indicate an area, it means that it’s a key level (usually major item changes).
Level 1 to 18 (Devil's Crossing up to Krieg, Normal Difficulty)
We are going through Normal and not on Veteran; the additional difficulty is not worth the time spent in my opinion. But if you really want to start at Veteran, more power to you.
Start with Inquisitor. When you get to Level 2, put 1 point to Word of Pain, 1 point to Storm Box of Elgoloth, and 1 point to the Mastery Bar. Repeat this until you reach 10 points into the Mastery Bar, then put 1 point to Word of Renewal and 1 point to Word of Agony.
Afterwards, do not put additional points to Word of Pain, and put points to Word of Agony, Storm Box, and Mastery Bar per level up. The reason for this is we are focusing on Lightning Damage; Word of Pain only gives Fire and Cold. Put only 1 point to Lightning Tether when available, and continue until you max out Storm Box and Word of Agony.
For stat points, put 1 each to Physique, Cunning, and Spirit until you reach 5 on all stats, then stop putting points to Cunning and alternate between Physique and Spirit. You need Spirit to be able to equip the core offhand.
As you progress, look out for floating eyeball monsters, mostly in the Burrwitch Village area. They have a chance to drop one of the core items in the build, the Overseer Eye. Once you have the offhand (you should be past Level 10 now), choose Demolitionist as the secondary mastery, put 1 point to the Mastery Bar and 1 point to Stun Jacks. You might be tempted to max Stun Jacks right away, but we are going to max out the Inquisitor tree first.
For Devotions, get Bat first. This will be one of the main health sustain procs since all of the main skills do not have any Attack Damage converted to Health (ADctH, or simply lifesteal) since they are not using Weapon Damage. Bind Bat to Word of Pain for consistent proc rate.
Level 18 to 23 (Devil's Crossing up to Twin Falls Rift)
Before you go to the west side towards Old Arkovia, make sure all your items have Components. Silk Swatch in both Pants and Shoulders are great options for Pierce Resistance; a lot of enemies are ranged and use hitscanning Pierce shots.
You have the option of getting a free Relic called the Bone Talisman if you lie about it during the Missing Elder quest in the Arkovian Foothills. If you missed it, you can just craft a Relic at the Blacksmith. You can get an upgraded version of the Bone Talisman in Elite and Ultimate.
Level 23 to 35 (Twin Falls Rift to Amalgamation)
This is the part where you might want to kill Ulraprax a few times to get the Monster Infrequent amulet. The affixes doesn’t matter too much since we are still in the early stages of the game.
Once you have it, don’t forget to pass by Balvoruuk near the Old Arkovia shrine to get the quest line that leads to the entrance of The Steps of Torment. Just finish the quest to get the Skeleton Key and blueprint but do not enter SoT; there’s nothing of interest for our build there.
You might also want to farm some Dynamite in the Cronley mines. There is the optional area to the right of Prospector’s Trail rift that needs 3 Dynamite to enter. I recommend you clear that area for levels, reputation, and a couple of Devotion Shrines. Proceed with the Main Campaign afterwards. Do not go to the right towards The Conflagration yet; we will return later.
You might reach level 35 at this point, in which case you can check out Faction Gear in Devil’s Crossing and the Rovers camp (you should be at least Respected with both Factions before you can buy the level 35 gear). There will also be some blueprints unlocked; get the Runestone from Rovers first for your Helm component. The rest of the blueprints can wait until Honored/Revered so you can buy them at a much larger discount.
I heard you like Darude Sandstorm
Level 35 to 39 (Homestead to Asterkarn Mountains Rift)
It’s time to face the Chthonians. If your Chaos Resistance is low, try using an Imbued Silver in your weapon slots so you won’t take too much damage. Don’t hesitate to use one Chthonian Seal of Binding in the Blood Grove Devotion Shrine; you want to get your Devotion points as fast as possible so you can level the proc nodes quicker.
For faction choice, it really doesn’t matter, but Kymon’s Chosen provides gear with Lightning damage so we choose their side. Make sure to complete all the faction quests to get to Respected/Honored faster and unlock the gear.
Level 39 to 42 (Asterkarn Mountains Rift to Loghorrean kill)
You can just ignore most of the trash mobs on the way to Fort Ikon and just kill whatever’s in your way. Be sure to clear the Tomb of the Archon for some Kymon reputation to hopefully get at least Respected by the time you reach the Necropolis Interior Rift. After killing Loghorrean, we don’t need to enter Bastion of Chaos since there’s no relevant items there for us.
At this point we have some things to clear before going to Ugdenbog. First, do the Hidden Path questline for the bonus stat and skill points; don’t forget the shrines in East Marsh and inside the Temple of the Three. An optional thing that you can do is to visit Port Valbury for an Overseer Eye upgrade and the chance to get a Chains of Brandis belt for the Vitality to Lightning conversion, which benefits the Bat Proc. Afterwards, proceed to the Coven.
Lucksack #1
Lucksack #2
Level 39 to 49 (Devil's Crossing to Lone Watch Rift)
While in Ugdenbog, don’t forget the shrine in the Ancient Grove and talk to Mogdrogen for another free Skeleton Key. Don’t enter the dungeon yet; wait until you are at least level 50 so you can equip better gear before going inside.
We are going to be friendly with Barrowholm since they have the endgame weapon augment for this build, the Ravager’s Eye. You might want to use the Ugdenbog Waistguard for the +1 Inquisitor skills in case you didn’t get the Chains of Brandis belt.
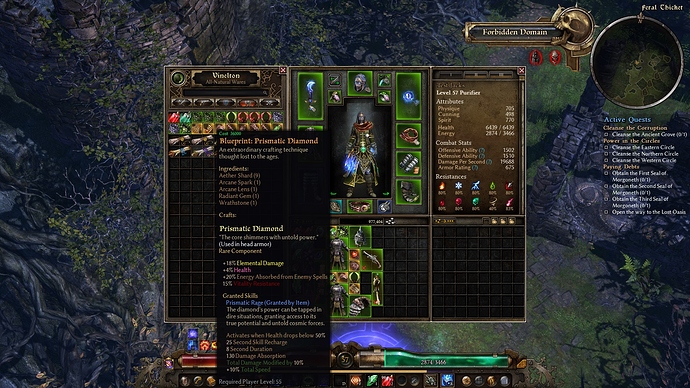
We want to go inside the Ancient Grove for one particular reason, and no, it’s not Ugdenbloom farming at this point in the game. We only want to go inside to buy the blueprint for Prismatic Diamond. You can also get it as a random world drop (particularly in Treasure Troves or Monster Totems) but the vendor in the Ancient Grove has a high chance of selling it.
If you don’t see the blueprint during your first visit, do not go out of the dungeon. Go to the next area (Tainted Wood), wait for around 15 to 20 seconds, then go back to the previous area where the vendor is (Feral Thicket). Repeat until you bought the Prismatic Diamond blueprint, then reset the game to exit or you can kill Gargabol for fun.
Level 49 to 54 (Lone Watch Rift to Theodin kill)
The only things to watch out for in Malmouth are the Aetherial Colossi, since they can smack you hard with Physical Damage, and Theodin himself, which can do the same. The big Aetherial monsters are susceptible to Stun, so place your Stun Jacks well to avoid getting Blitzed to the face.
This area is completely optional after unlocking the Malmouth reputation (the wagons quest), but I cleared everything for reputation and some levels. We are not in a rush to be Revered and get the Experience potions since everything is self-found; more on that later.
Level 54 to 57 (Conclave of the Three to Korvaak kill)
Yep, I only gained 3 levels from clearing all the FG Main Storyline; the quests do not give much experience compared to the Malmouth ones in Normal. We want to finish everything for the reputation farm.
For cult choice, I sided with Dreeg first for the Rift augment. Once you reach the Vanguard of the Three, you might want try to get two Monster Infrequents, the Korvaak Storm-Blade and the Chosen Mask before reaching Dravis.
Korvaak is a bit dangerous to us since we don’t have much sustain at this point and low-ish armor, so be careful in Inquisitor Seal placement and try to keep your distance. I did not craft a Prismatic Diamond yet since I lack the materials.
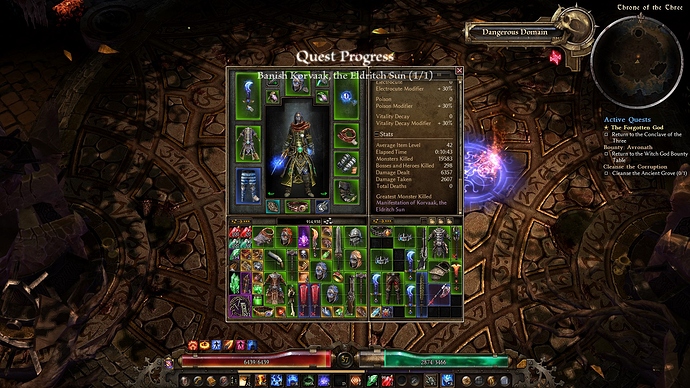
Congratulations, you cleared Normal difficulty! Hopefully, you didn’t die during the process (especially in Hardcore), but if you did, try to follow rule # 1 next time: “Just don’t get hit. 4Head” 
Level 57 to 62 (Devil's Crossing up to Krieg, Elite Difficulty)
There’s really nothing much to say in Elite Act 1 but to zoom through Devotion Shrines, even the ones needing Aether Shards (you can easily farm those back), and kill Krieg ASAP. You should have Behemoth proc now, remember to bind it to Blast Shield.
Level 65
This is one of the milestones for any GD character because you can equip the level 65 Faction gear from the expansion factions (Coven, Malmouth, FG Cults). Once you hit 65, unlock the next riftgate and go back to Normal. The key item to get is the Coven Warder Spaulders which gives +2 to Stun Jacks and relevant bonuses. Fill the other item slots as you see fit, taking into consideration the Resistance penalty in Elite. You can also check if you are Honored with any of the factions for some Augment upgrades (I got Honored with Coven at this point).
Once you’re done with the shopping spree, go back to Elite and continue the Main Campaign as per usual.
Level 72 (Elite Loghorrean kill)
Before going to Loghorrean, check your Faction reputations to see if you can upgrade anything. At this point, I wasn’t Revered with anything yet. You also have the option of revisiting Port Valbury for the offhand and belt. Make sure you are capped with Acid, Vitality, and Chaos Resistances, and you are good to go.
After killing Loghorrean in Elite, you have several options for progression. You can go straight to Ultimate, provided that your Resistances are taken care of. Or you can follow along with me and venture to Elite Ugdenbog. I only intend to clear the Ashes of Malmouth area until Elite Barrowholm and unlock the Lone Watch rift; the Malmouth area can wait until later since it scales up to level 90 (and Elite Theodin is no joke).
After getting to the Lone Watch rift, I went to the Elite Forgotten Gods area and sided with the Cult of Bysmiel this time. We need to reach Revered with Bysmiel ASAP because of the Mark of the Shadow Queen, one of the core items of the end build. Also, we only need to reach the Korvan Sands rift for the meantime; I’ll explain in the next part.
Level 75
Level 75 is another milestone because of a special item: the level 75 Fettan Mask, which gives +1 All Skills . The level 50 Fettan Mask used to have the +1 All Skills too (F for that version) but it was probably too good for its item level. At this point, +1 All Skills is better than the bonuses that the Chosen Helm gives since both Masteries are maxed and all relevant skills have points.
I transitioned to Ultimate once I got the Fettan Mask and crafted the Prismatic Diamond for it. Don’t forget to do the Hidden Path questline in Elite for stat and skill points.
Level 78 (Ultimate Krieg kill)
Same as Elite, just beeline to Krieg as fast as possible. All 55 Devotion points should have already been unlocked, so you can skip everything and save those for later (hint: leveling new Devotion procs). Once you finish all reputation quests in Devil’s Crossing, you should be Revered with them now, and use the Survivor’s Ingenuity augment. The next best accessory augments are available at level 90, so this will carry you until then.
Just continue with the Main Campaign until you reach Level 84.
Level 84
Level 84 unlocks the next tier of AoM/FG Faction items and base items, as well, so it’s time for another gear check. I dropped the sweet offhand while I was going to Krieg and I can finally use it. I decided to clear Elite Malmouth to reach Revered and clear most of Elite FG, right before Korvaak, then continue with Ultimate Main Campaign.
Level 90
Now it gets even more interesting: all Augments and Level 90 Faction gear/blueprints are available to you (provided you are Revered with the Factions). Remember to still prioritize Resistances over damage. You now have all the available gear to do the next step: Monster Totem farming.
Your next goal is to reach the Necropolis Interior rift, but don’t kill Loghorrean yet, unless you are confident you can take it on. Once you’ve reached it, it’s time for Totem hopping until you get your desired items. The Skeleton Key dungeons are a bit dangerous for us at this point, but you are welcome to try.
Level 94
Congratulations! You can now equip any item that you want (as long as you have the stats/requirements, of course). At this point, I’ve only gotten the Stormserpent Armor and Helm, but I want to wait until I get the Belt before replacing anything. So, Totems are my best friend until then.
Just get it
Level 100 and beyond
All Monster Infrequent + Faction items Goal
The GT Link shows the base item build without any affixes or armor augments, since affixes are random and augments are used to patch holes in the resistances. This is the Easy-to-get version intended to be accessible to everyone to start farming Totems for the “Farmable” version, which includes Stormrend axe and Stormserpent set. There are also some unused stat and skill points; this assumes that you finished all related quests and only need to clear Shattered Realms to get the remaining points.
You will notice that I did not include components such as Seal of Annihilation, Ugdenbog Leather, etc. nor did I use higher level Relics such as Bane or Serenity. Feel free to use these as you get the blueprints; my intention is to show that the budget build is still playable with basic gear that everyone can access.
Build Performance
Here are some videos showing what the Farmable Stormrend + Stormserpent build can do so far:
Ancient Aetherwarped Totem clear
Ultimate Krieg kill
Benn’Jahr kill
Shattered Realms Shard 20 Boss Room
Conclusion and Final Thoughts
I am quite surprised at how the build performs since I never played both Stun Jacks and Purifier before (my experience with Demolitionist was with an Ulzuin Canister Bomb Shieldbreaker and for Inquisitor was with a Blind Assassin Pierce Infiltrator).
There are optimizations for the leveling and endgame Devotion paths for sure, but I’ve chosen the ones that made sense to me at the time.
The next steps for the build will be:
- clearing Ultimate Korvaak
- clearing all Ultimate Skeleton Key dungeons
- clearing Shattered Realms 35-36
I might try Crucible as well, but the build needs to be itemized with fully-endgame gear and components, but still keeping Stormrend + Stormserpent Set. We’ll see how it goes.
Here are endgame options past the items that I have:
Thanks to @Ulvar1, @Stupid_Dragon, @Nery, @Monceaux for their Beginner Guides. These helped me to figure out things when I was starting out in Grim Dawn. Thanks also to @RektbyProtoss and his many different SSF Beginner Build series for some ideas on how to build characters from scratch. And special thanks to you for reading, I hope you’ve learned something from my first attempt at a Beginner Guide. 

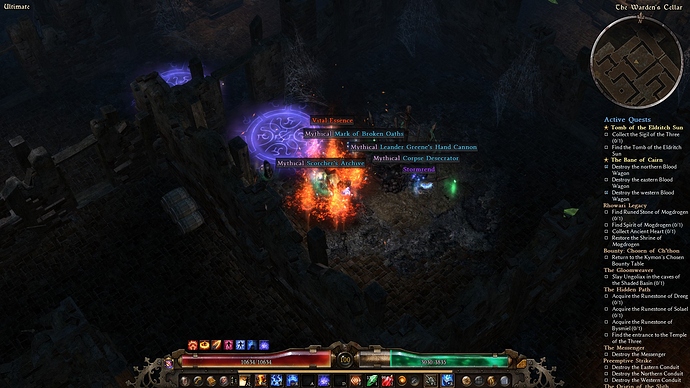
 But aether totems are the ones you wanna farm for that particular item. I have seen some people drop if from general heroes and bosses but the chances are very very small
