[How To] Make Custom Font

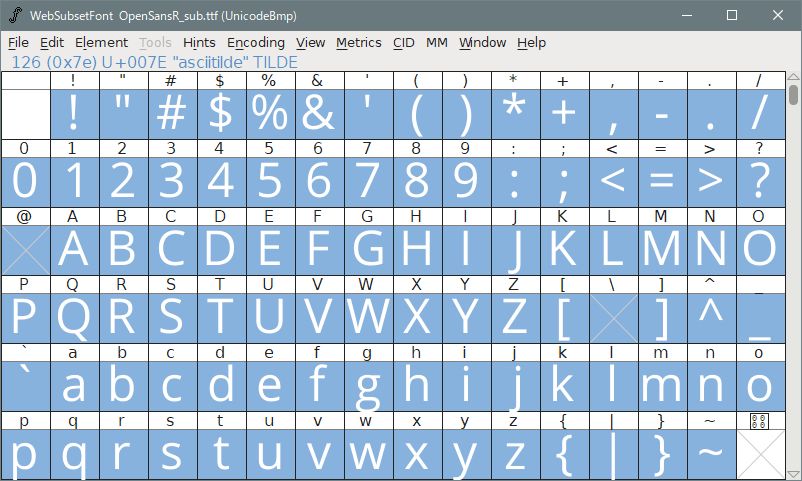
The font used in this game are not the general outline fonts, but the bitmap fonts, so you can not simply change the display by changing the fonts such as ttf or otf. But bitmap fonts can be easily created by AssetManage. So if you find it difficult to read fonts in the current game, or if you want to change your mood, it is a good idea to try different fonts according to this guide.

It would be interesting to download and make your favorite fonts from 10001 Free Fonts, DaFont etc.

JOURNAL

CHARACTER STATS

  • In this game, two types of font are prepared depending on the language used. One is the language of western countries such as Czech, Germany, Greece, Spain, France etc, and their font sets are each composed of 19 kinds of bitmap fonts. On the other hand, the languages of Japan, China, Korea, Vietnam and Thailand are all displayed in one outline font. The latter has special properties and will be explained separately.

Western countries Font

In western countries languages, 19 types of bitmap fonts constitute one font set (fonts.arc), and specifications such as the font size and the presence or absence of shadows are specified in detail by DBR for each location used (records\ui\styles ext). According to it, each font is used as follows (roughly summarized).

[spoiler]

[ol]
[li]briosopro.fnt: Item name, constellation name, etc.[/li]
[li] cinematic.fnt: Loading screen tips, achievements cancellation and messages during hero defeat[/li]
[li]combattext.fnt: Combat related messages[/li]
[li]credits.fnt: Credit (Staff Roll)[/li]
[li]criticalhit.fnt: Combat related message[/li]
[li]jura.fnt: GUI parts application[/li]
[li]juranooutline.fnt: Party player level (unconfirmed)[/li]
[li]jurashadow.fnt: Hot key slot[/li]
[li]linbiolinum_sansserif.fnt Status screen, item description, title screen character name, ESC menu button, etc[/li]
[li]linlibertine_r.fnt: Quest column on the right of the screen[/li]
[li]linlibertine_r_nooutline.fnt: Status screen class name etc[/li]
[li]misc.fnt[/li]
[li]nevis.fnt: Title screen left button[/li]
[li]nevisnooutline.fnt: Name of person in conversation window, title of journal etc[/li]
[li]nevisnooutlinespaced.fnt Mastery window tabs etc[/li]
[li]nevisshadow.fnt Game screen upper left difficulty level, upper right place name[/li]
[li]questtext.fnt: Quest, Journal, Optional Tooltips[/li]
[li]savapromedium.fnt: World map location name, quest complete dialog[/li]
[li]titlescreen.fnt: Startup message[/li]
[/ol][/spoiler]

  • Note that one bitmap font can contain many fonts, but it is not necessary to include all DBR settings (see attached file: Fonts_dbr.zip). In many cases, it is sufficient to put in only a few core sizes. Since this project file is set by such core size, it will be easy to create the target font by using this.

Usually, it will be sufficient to change the font of frequently used journals, items and character sheets. They consist of two fonts: questtext.fnt and linbiolinum_sanserif.fnt.

Using this project file (FontsProject.zip), you will be able to create the font immediately by following the steps below. This Project file contains all kinds of fonts, so if you want, you can change them all to make a whole new font set.

  • Although this project file is set as a German font folder (fonts/de) as an example, change Germany to another language if necessary.

procedure

  1. First, import the fonts to use in the Sources tab.
    After clicking “DeFonts/database” on the left, right-click in the right column, and select the font you like by “Import”.
  1. Go to the Assets tab and click questtext.fnt.
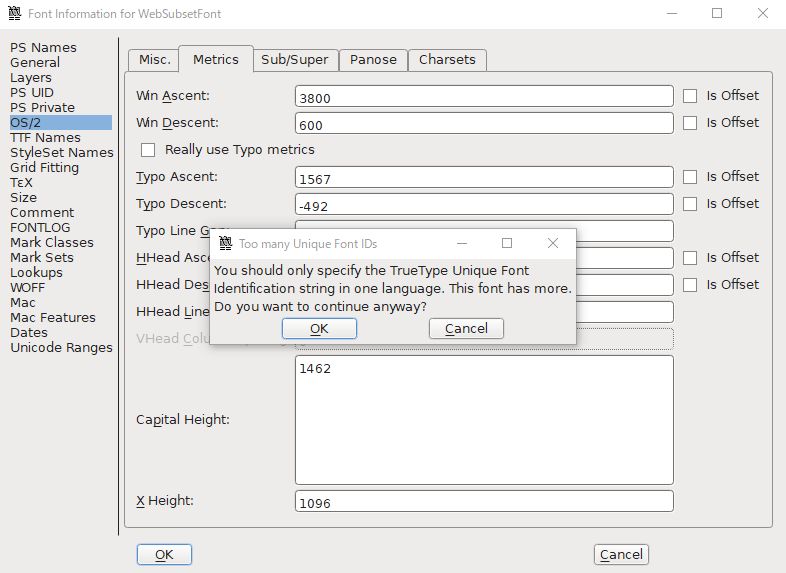
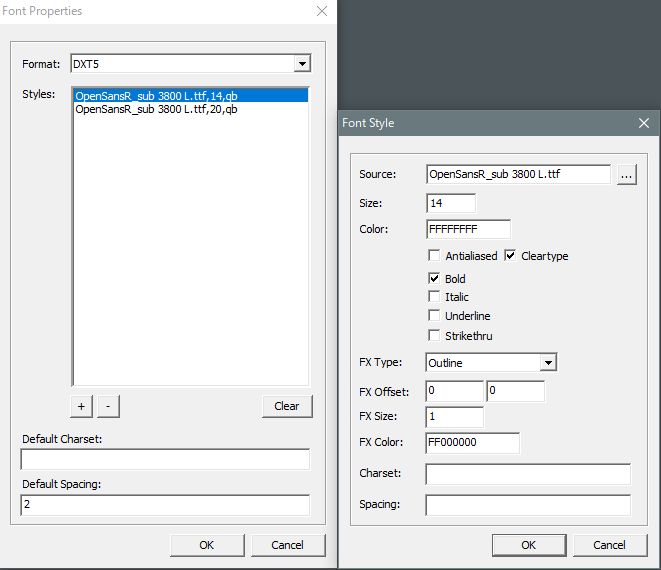
  1. The font properties include settings obtained from DBR, so click on each one to replace it with the imported font.


4. Finally, if you do Build, the font (*.fnt) is created in Grim Dawn\mods\defonts\resources\fonts\de.


5. Copy it to settings\fonts\de and launch the game.

[spoiler]\Documents\My Games\Grim Dawn\settings\fonts\de
or
\Grim Dawn installation folder\settings\fonts\de

[ul]
[li]If there is no settings folder, create it. [/li]
[li]You only need to create folders that you can easily access, not both.[/li]
[li]Change the folder name according to the required language. (de -> bg, cs, el…)[/li]
[li]In English, put the created font in the “fonts” folder. There is no need to create an En folder.[/li]
[/ul][/spoiler]

Application example
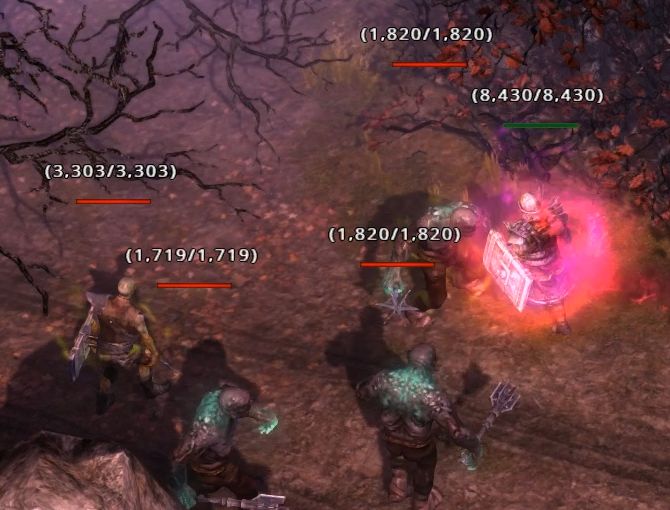
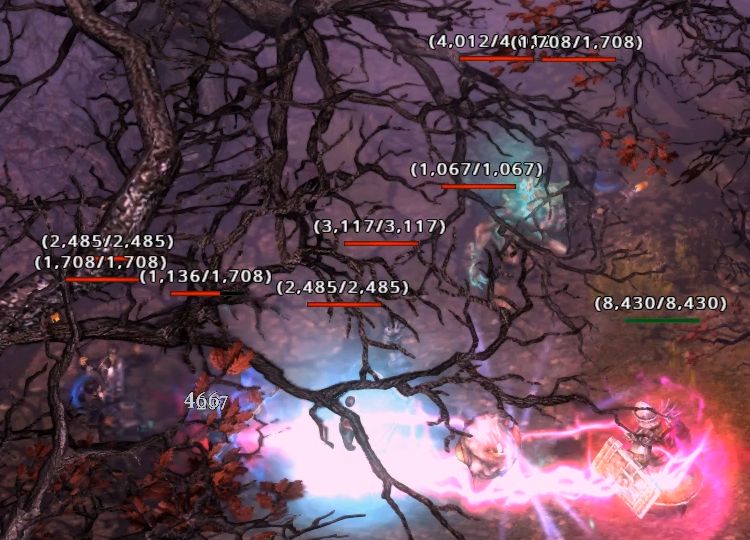
Since it is used in various places in linbiolinum_sansserif.fnt, you can also mix fonts tailored to specific places if necessary. (In this example, not only the resistance value but also the font of the option window’s keyboard settings will change.)

Attachment: 00 journal.jpg
Attachment: 00 stats.jpg
Attachment: makefont_01.jpg
Attachment: makefont_02.jpg
Attachment: makefont_03.jpg
Attachment: makefont_04.jpg
Attachment: makefont_05.jpg
Attachment: makefont_06.jpg
Attachment: FontsProject.zip
Attachment: 00 resists.jpg
Attachment: Fonts_dbr.zip
Attachment: am 01.jpg
Attachment: am 02.jpg
Attachment: am 03.jpg
Attachment: am 04.jpg
Attachment: am 05.jpg
Attachment: am 06_1.jpg
Attachment: am 07.jpg
Attachment: am noshadow.jpg
Attachment: am shadow.jpg

1 Like

Font database

The font database is set very closely in “database\records\ui\styles ext”.
This file is an extraction of those data. When you are creating a custom font, look at this if you want to know which font is used in which scene.

Asian font 1

Asian fonts seem to use system fonts instead of bitmaps. However, rendering does not go well, often causing garbled characters. So, here I will explain how to make Asian bitmap fonts. Since China and Korea already seem to be familiar with the method, the targets are Vietnam and Thailand.

Asian fonts.arc contains only one font in addition to the credit font. And the font is an outline font instead of a bitmap. However, what is actually displayed is not the font but it looks like a system font.

So, there are two ways to create Asian bitmap fonts. One is to show everything in one bitmap font, and the other is to borrow European settings.

Almighty single font

  1. First, import the font to use in the Sources tab.

  1. Right-click one of those fonts and select Auto-Create Asset.

  1. Select Bitmap Font for Select Asset Type.

  1. Add the font to be used with the ‘+’ button of Font Properties.

  1. Decide the font modification with Font Style. Normally, you should check Clear Type. You may want to add a shadow of size 1 (FX Size 1) to the font (sizes 12 and 14) used for world map labels.

Nomal/Add shadow

[spoiler]

[/spoiler]
6. Include some sizes, using 2-3 different fonts. However, if you register too many sizes, you will have to moderate as the font breaks down.

[spoiler]

Font size: application point

[ul]
[li]12,13,14,15: World map label, Component number, Character Seat[/li]
[li]16,18,20: Journal/Quest text, Item description, Constellation[/li]
[li]23: Journal/Quest title, Item name, Class name, Button[/li]
[li]32: Floating text, Cinematic text, Title Screen[/li]
[/ul][/spoiler]
7. The font you designed appears in the Assets tab, right-click and build it.

Asian Font 2

Other language borrowing

Including various fonts and sizes in one font is an easy way, but it can not be displayed as set. So, if you want more correct display, you can borrow a European language. The font creation method in that case is the same as the western countries language font. However, in that case, it is necessary to create all 19 types of fonts. Because the original font may not have the font of your language.

Finally, to use the resulting font, you have to change the language.def in the translation file to the country you created.

Asian Font 2

Other language borrowing

Including various fonts and sizes in one font is an easy way, but it can not be displayed as set. So, if you want more correct display, you can borrow a European language. The font creation method in that case is the same as the European language font. However, in that case, it is necessary to create all 19 types of fonts.

Finally, to use the resulting font, you have to change the language.def in the translation file to the country you created.

Good, that someone made tutorial for fonts changing.
But I want to say some notes based on my experience.

  1. Font sizes. Still game don’t need all default sizes, some text use different sizes depend on UI scaling and that text will rescale font too that will looks weird.

  2. Default charset and spacing. This option allow create .fnt file that include only necessary glyphs. Good choise If You use fonts with lot of supported languages. For example default linux libertine have specific glyph - font logo that place artefacts on other letters after compile .fnt
    Spacing allow set spacing between letters - it’s logical
    To set charsets write decimal values of it’s unicode number; use "-"and “;” for ranges.
    I use 32-127;169 for english (with © sign).

that example of my RuFont

charsets and spacing also can be specified for certain font sizes

  1. antialiased and cleartype option. I still don’t understand how it used. Different fonts looks better withone of this this mark or without all. Just try and see.

In addition, as practice shows, not all fonts can be converted, some give an empty file.

I can also share my notes later.

1 Like

Hello Matougi,

Many thanks for this guide! :slight_smile:

Thanks for the additional information. If there are any missing parts, welcome to add them.

So, I can not explain the charset specification because I do not know the decimal value of the charset of all countries.

1 Like

No problem, but you seem to know enough already. :wink:

I hope this helps the people who are having trouble with fonts.

I think , who want find it here (and use calc :))

Only through your guide! :wink:

I think so.

She helped me. :smiley:

Thank you, that site is very helpful!

Glad to hear that. :smiley:

Thanks for the guide :smiley:

Link is broken, can’t open forum attachment.

Huh? Both links work for me. Which don’t seem to work for you?

Nvm, im dumb. I figured it all out, now im testing dozens of fonts to find the perfect combination.

Thanks for providing this guide! I’ve modded my game to use the Open Sans font as a test. I have modified all of the given .fnt files in the project from OP to use Open Sans but I still see the Monster Health font using the original font. Here’s what I’m seeing:

And here’s what my UI looks like for the rest of my fonts:

Notice that my hotbar keybind font is also the original font. Any ideas on what I’m missing or if there’s anything I can do to use my font everywhere? Thanks in advance!

There are 21 fonts used in Font.arc used for Grim Dawn, but credit.fnt and misc.fnt do not need to be changed, so if you want to change all fonts, you need to change 19 fonts Become.

Of these, the monster health bar appeared in v1.0.4.0, so I did not write it in this old article.That is, long after I wrote this article, linbiolinum_shadow-lg_spaced.fnt for health bar numbers and nevisshadow-lg_spaced.fnt for monster names and races appeared.

So, if you want to change the font of monster health numbers, you need to change linbiolinum_shadow-lg_spaced.fnt. However, it is troublesome that these fonts need to be repositioned unlike other fonts. If you just change it like other fonts, the numbers will be displayed far away from the health bar as shown. The font will shift up and to the left.

You will have to adjust it using FontForge to get it in the right place.

To lower the font position, select Font Info from the Element tab, select OS/2 in the left column, and display the Metrics tab in the right column. Increasing the value of the top item “Win Ascent” lowers the font position. This must be determined by trial and error. After trying various things, I decided 3,800 was appropriate. If you press OK, you will be warned, but no problem.


To move the font to the right, use the Set LBering setting in the Metrics tab.
First select the character you want to move, then click “Set LBearing” on the Metrics tab. When the value of “Increment LBearing By” on the setting screen is increased, the selected character moves to the right. This too must be determined by trial and error, and I set it to 400.


06%20Lbearing%20plus

Now that you have adjusted the font position, save the font edited in “Generate Fonts” with an appropriate name. Copy this to Source in Asset Manager and build linbiolinum_shadow-lg_spaced.fnt.

According to the database, the settings for this font are as follows:
For reference, here is the font I created.
linbiolinum_shadow-lg_spaced.zip (13.5 KB)


The monster names, races and attributes displayed on the screen can be changed to your favorite font by the same operation. This thread will also help you.

1 Like